100
REPLACEMENT OF MAIN COMPONENTS
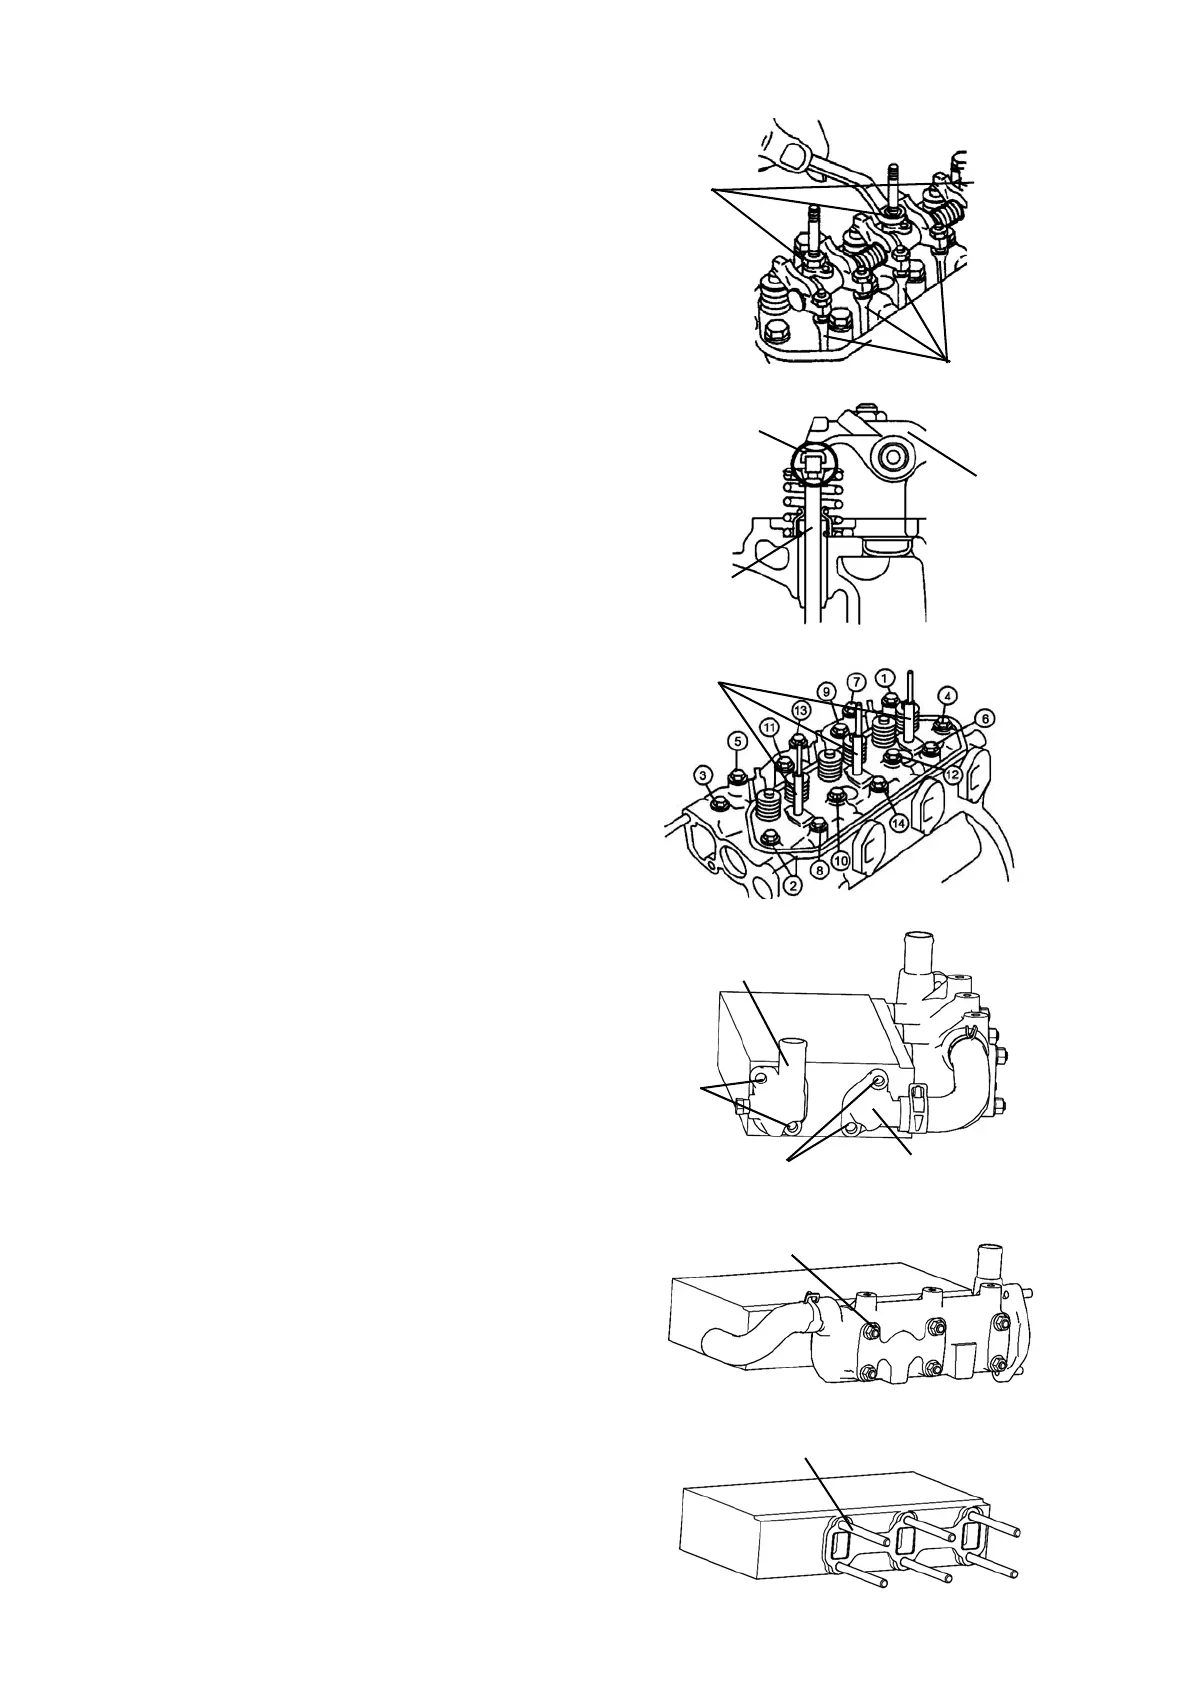
8. Remove the cylinder head.
1) Loosen 3 nuts to remove the rocker shaft ASSY
NOTE) The valve stem caps stick to the rocker shaft
ASSY with engine oil. Take care not to drop
the valve stem caps into the engine.
2) Remove 6 valve stem caps.
3) Remove 6 push rods.
NOTE) Place the push rods in the order they are
removed.
4) Remove 3 stud bolts.
5) Loosen 14 bolts evenly in the order shown right
in several rounds, and remove the cylinder head.
NOTE) Take care not to damage the mounting
surface of the cylinder head.
9. Remove the surrounding parts from the cylinder
head.
1) Unscrew 2 bolts to remove the water inlet bracket.
2) Unscrew 2 bolts to remove the water outlet bracket.
3) Unscrew 6 nuts to remove the exhaust manifold.
4) Remove 6 stud bolts.
Nuts
Push rods
Valve stem cap
Valve
Rocker shaft
Stud bolts
Water outlet bracket
Water inlet bracket
Bolts
Bolts
Nuts (6 pieces)
Stud bolts (6 pieces)
 Loading...