101
REPLACEMENT OF MAIN COMPONENTS
[Reassembling]
1. Remove completely the gasket or dirt sticking to the sealing surface such as the cylinder block upper surface,
water inlet bracketor water outlet bracket with a scraper or a gasket remover.
NOTE)
Make sure that dust does not enter the oil inlet, engine coolant inlet or bolt hole.
Never use a gasket remover on anything other than metallic portions.
If there is water or oil spill in a bolt hole, remove it with rag.
(If not, the spill may ooze when a bolt is tightened, which may cause a sealing failure.)
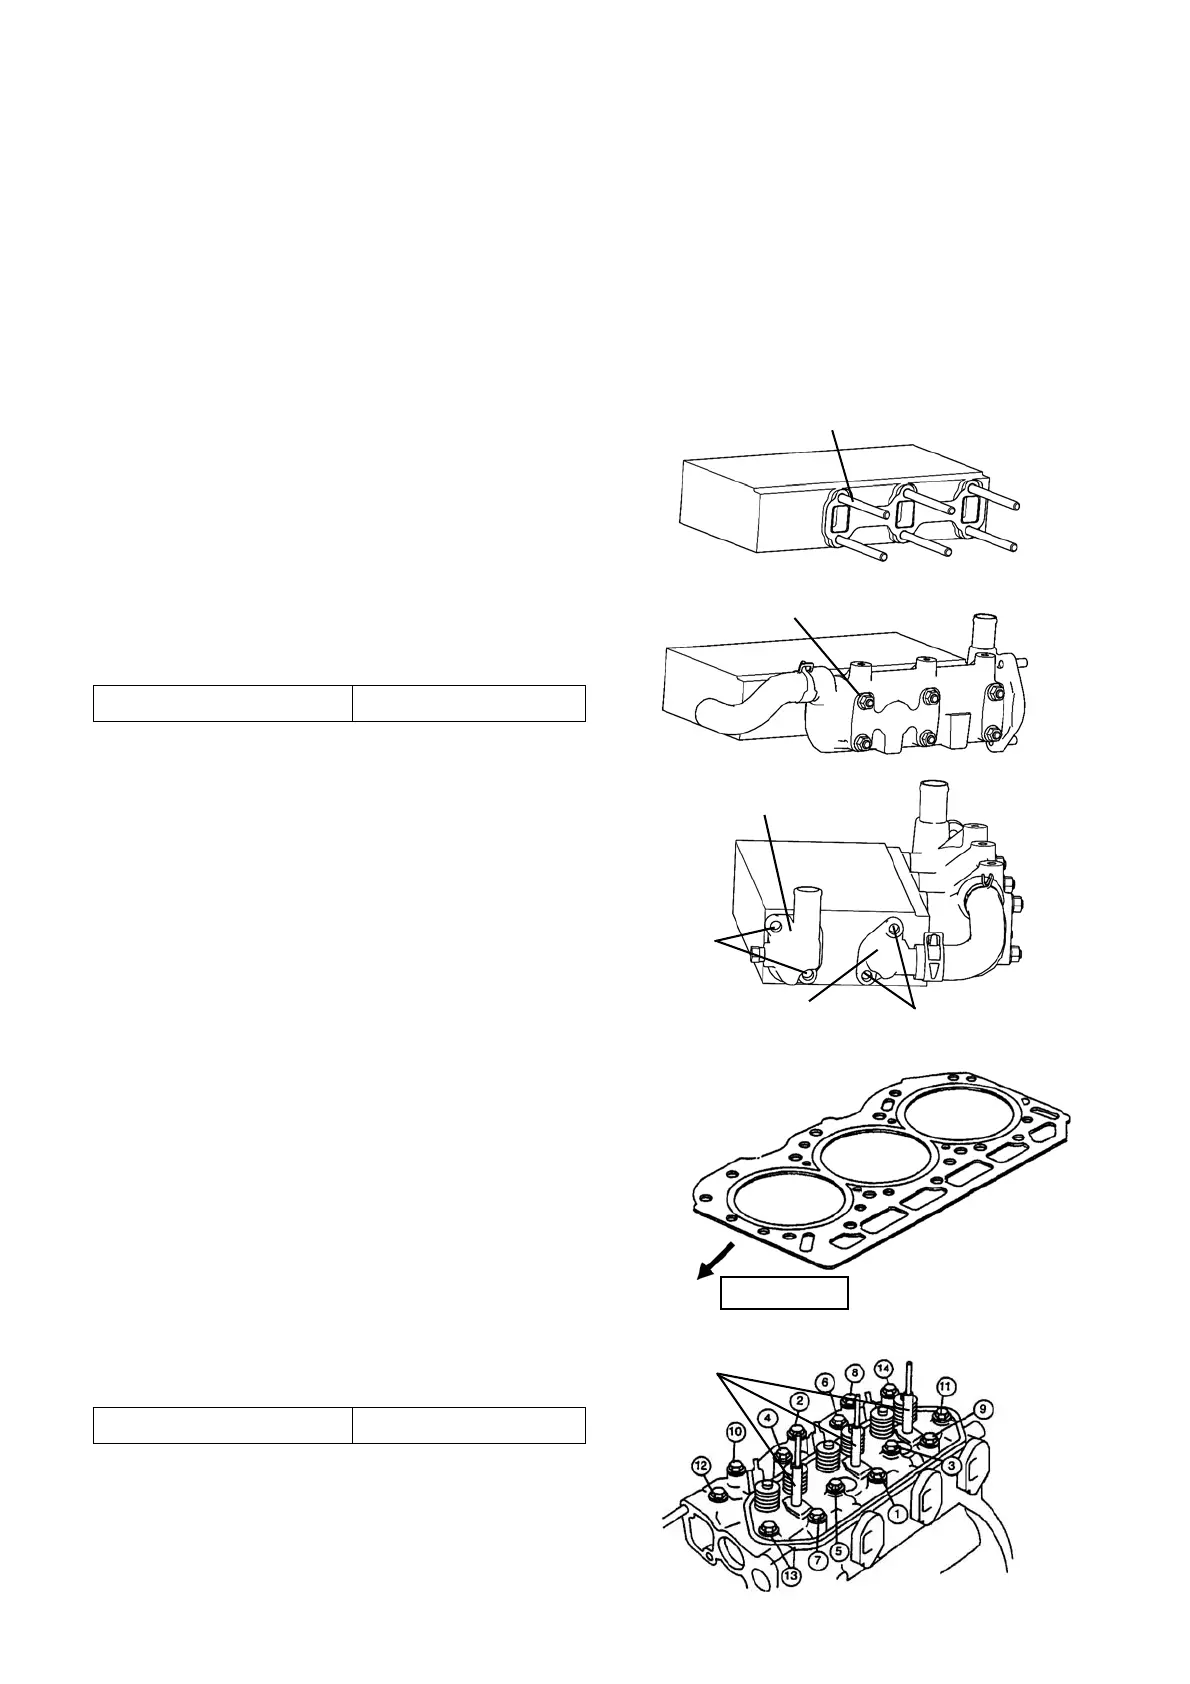
2. Install the surrounding parts to the new cylinder
head.
1) Mount 6 stud bolts.
2) Mount the exhaust manifold and tighten 6 nuts.
NOTE) Replace the gasket before mounting the
exhaust manifold.
3) Mount the water inlet bracket with 2 bolts.
4) Mount the water outlet bracket with 2 bolts.
NOTE) Replace the gasket before mounting the water
inlet bracket and water outlet bracket.
3. Reassemble the cylinder head.
1) Mount a new gasket on the cylinder block carefully
in the correct direction.
2) Apply engine oil to the 14 bolts to tighten the bolts
evenly in the order shown right in several rounds.
3) Mount 3 stud bolts.
Stud bolts (6 pieces)
Nuts (6 pieces)
Tightening torque 14.8 lb·ft (20.0 N·m)
Water outlet bracket
Water inlet bracket
Bolts
Bolts
FRONT side
Stud bolts
Tightening torque 25.1 lb·ft (34 N·m)
 Loading...