74
REPLACEMENT OF MAIN COMPONENTS
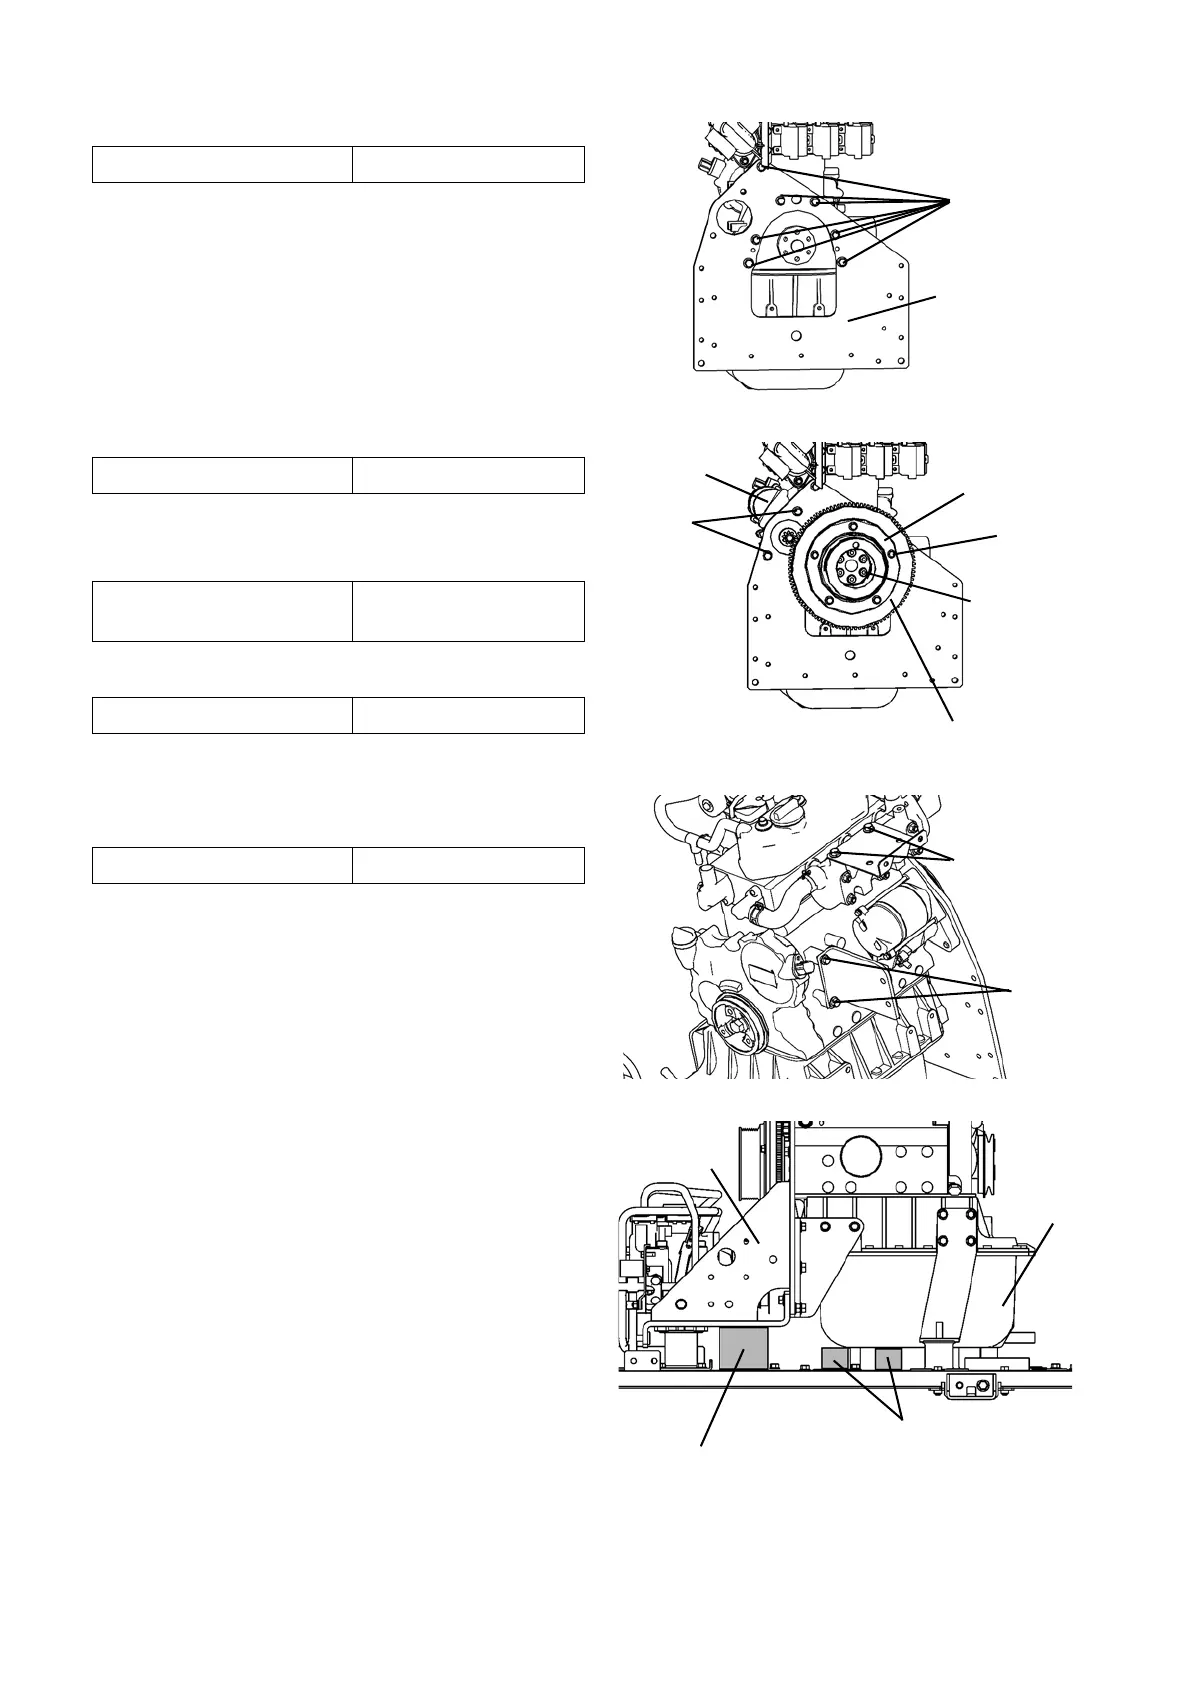
4) Mount the bracket and tighten 7 bolts.
5) Mount the starter and tighten 2 bolts.
6) Mount the flywheel and tighten new 6 bolts.
NOTE) Use new bolts.
7) Mount the crank pulley and tighten 5 bolts.
8) Mount the stays (2 places) and tighten 2 bolts
(2 places).
3. Reassemble the engine.
1) Place a wooden block (thickness: approximately
3 inch (80 mm), length: 24 inch (600 mm) or longer)
under the compressor bracket.
2) Place 2 wooden blocks (thickness: approximately
1-1/2 inch (40 mm), length: 24 inch (600 mm) or
longer) where the engine is placed.
3) Place the new engine on the wooden blocks.
Bolts
Bracket
Tightening torque 31.0 lb·ft (42.0 N·m)
Flywheel
Pulley
Starter
Bolts
Bolts
Bolts
(6 pieces)
(5 pieces)
Tightening torque 31.0 lb·ft (42.0 N·m)
Tightening torque
29.6 ~ 35.5 lb·ft
(40 ~ 48 N·m)
Tightening torque 23.7 lb·ft (32.0 N·m)
Bolts
Bolts
Tightening torque 14.8 lb·ft (20.0 N·m)
Bracket
Wooden block (Thickness : 3inch)
Oil pan
Wooden blocks (Thickness : 1-1/2inch)
 Loading...