Publication 1734-UM011A-EN-P - February 2004
Install the 1734-AENT Adapter 2-3
3. Set the network address thumbwheel switches to the desired value (see
Set the Network Address on page 3--6 in the next chapter).
4. Slide the safety end cap up to remove it. This exposes the backplane and
power interconnections.
Mount (or Replace)
EtherNet/IP Adapter to an
Existing System
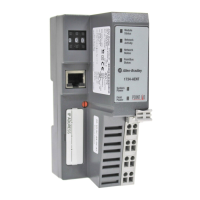
Follow the steps below to mount (or replace) an Ethernet adapter.
1. Remove the existing adapter (if there is one) from the DIN rail as
follows:
a. Pull up on the RTB removal handle to remove the terminal block.
b. Disconnect the Ethernet connector from the adapter.
c. Remove the adjacent module from its base.
d. Use a small bladed screwdriver to rotate the DIN rail locking screw
to a vertical position. This releases the locking mechanism.
e. Lift straight up to remove.
2. For the replacement adapter, slide the safety end cap up to remove. This
exposes the backplane and power connections.
3. Position the replacement adapter vertically above the DIN rail. (Make
certain the DIN rail lock is in the horizontal position.) Slide the adapter
down, allowing the interlocking side pieces to engage the adjacent
module.
4. Press firmly to seat the adapter on the DIN rail. The adapter locking
mechanism will snap into place.
5. Replace the adjacent module in its base.
6. Reconnect the Ethernet cable to the adapter.
WARNING
If you connect or disconnect the Ethernet cable with
power applied to this module or any device on the network,
an electrical arc can occur. This could cause an explosion in
hazardous location installations.
Be sure that power is removed or the area is nonhazardous
before proceeding.
ATTENTION
Do not discard the adapter’s end cap. Use this end cap to
cover the exposed interconnections on the last mounting
base on the DIN rail. Failure to do so could result in
equipment damage or injury from electric shock.

 Loading...