6-36 | Model 933S UV Analyzer
Auto-Setup Fault Message and Corrective Action
If during an Auto-Setup “w: Bench auto-setup problem” is displayed
under MC Scode on the Status tab, it may indicate a problem with the
PMT Level or PMT Balance signal. See “Microcontroller Board Alarm
Conditions and Corrective Action” in this chapter for corrective action to
take to reset this alarm. Restart the Auto-Setup after this alarm has been
corrected.
The Auto-Setup Sequence
To perform an Auto-Setup:
1. From the Gas Calibration dialog box, change the Flow Control set-
ting to ‘3’ (zero). Click Apply (next to Flow Control) to set the ana-
lyzer into zero Flow Control mode and then click OK. Do not save
the changes to EEPROM. Allow the Zero gas to flow for 2–3 minutes.
Check the rotameter to ensure Zero gas is flowing (approximately 4.5
L/min at 80 psi).
2. From the Status tab, click Conc. Alarm Soft Enable On/Off to tempo-
rarily Disable the Concentration Alarms. Allow the analyzer to stabi-
lize for approximately 10 minutes before continuing.
3. From the Optical Bench dialog box, record the PMT Level and PMT
Balance.
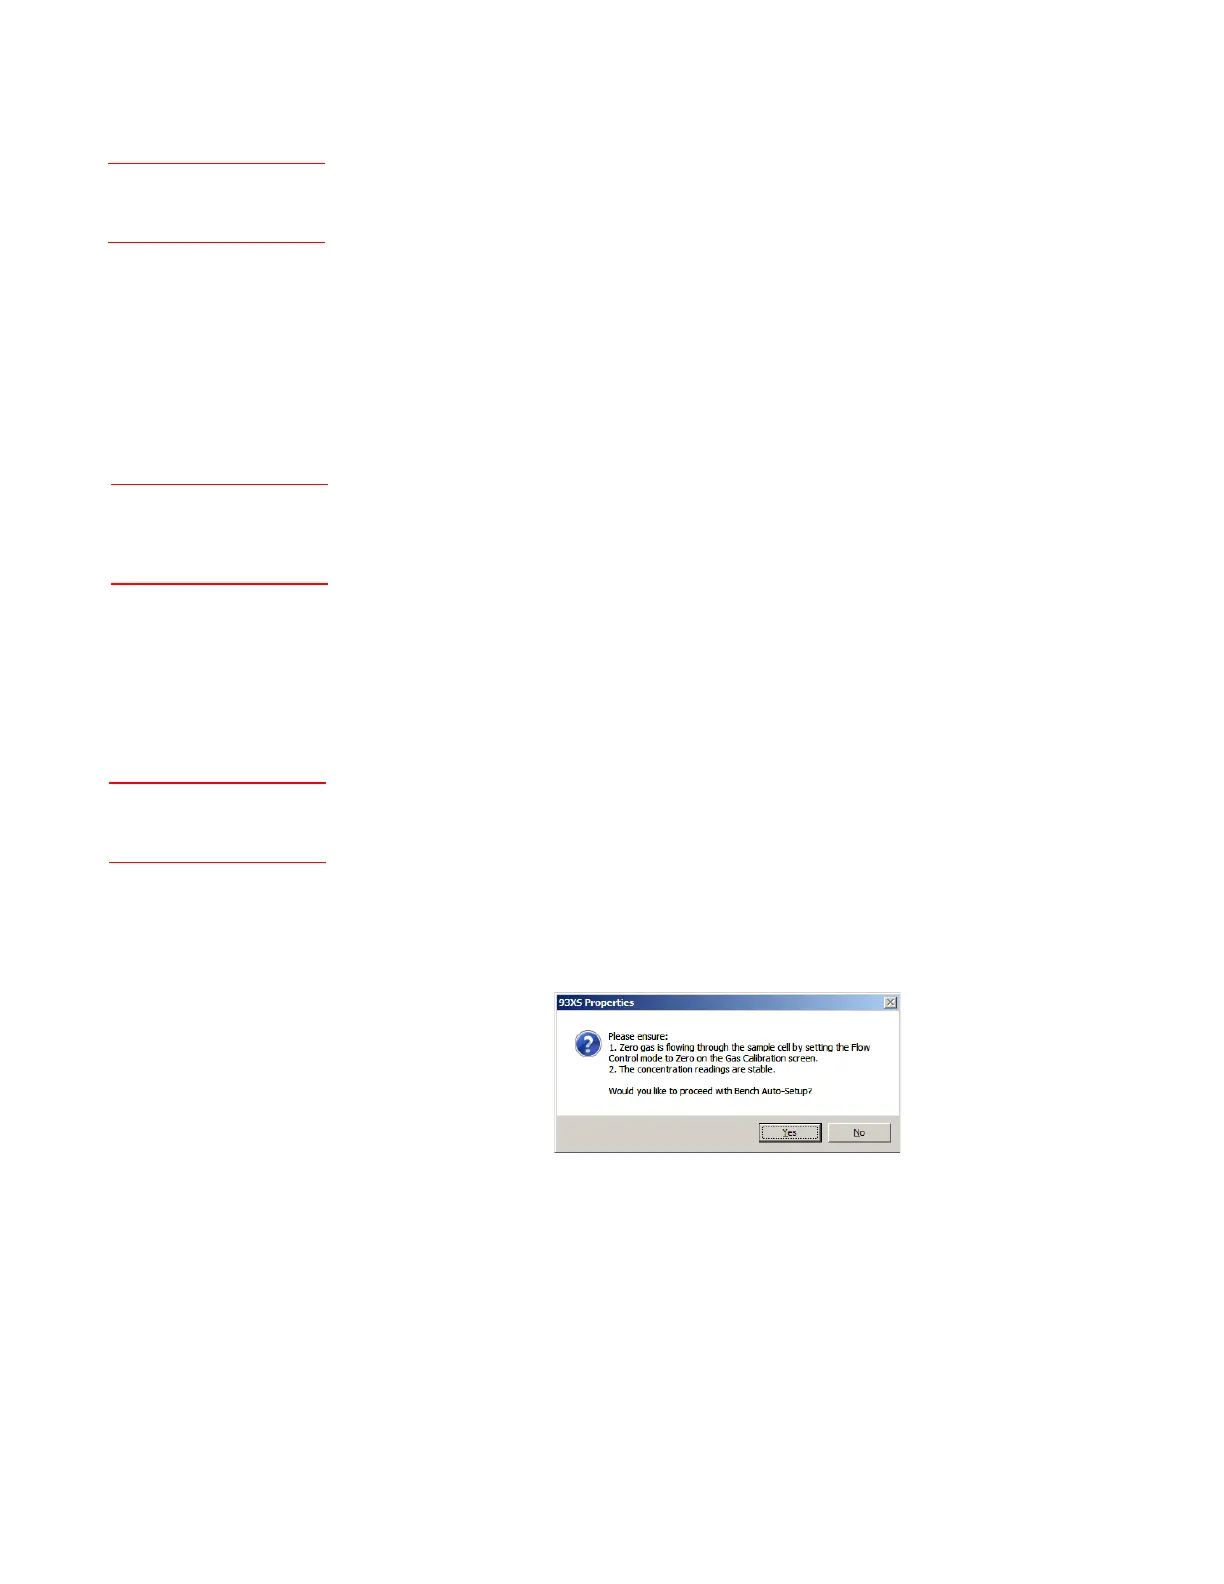
Click the Auto-Setup button. When this button is clicked, a pop-up
message is displayed asking “Would you like to proceed with the
Bench Auto Setup?”. This message also lists conditions that need to be
met before proceeding.
If the conditions have been met and you wish to proceed with the
Auto-Setup, click Ye s . If not, click No. The Auto-Setup takes about 3
minutes to complete.
Status (tab)
<<MC Scode>>
Setup (tab)
Gas Calibration<<Flow
Control>>
Setup (tab)Optical
Bench<<Auto-Setup>>
 Loading...


