R5906788-03 Thor series48
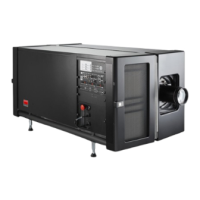
SCR EEN CEN TER SCR EEN CEN TER
O FF-CEN TER
A B
Image 6-4
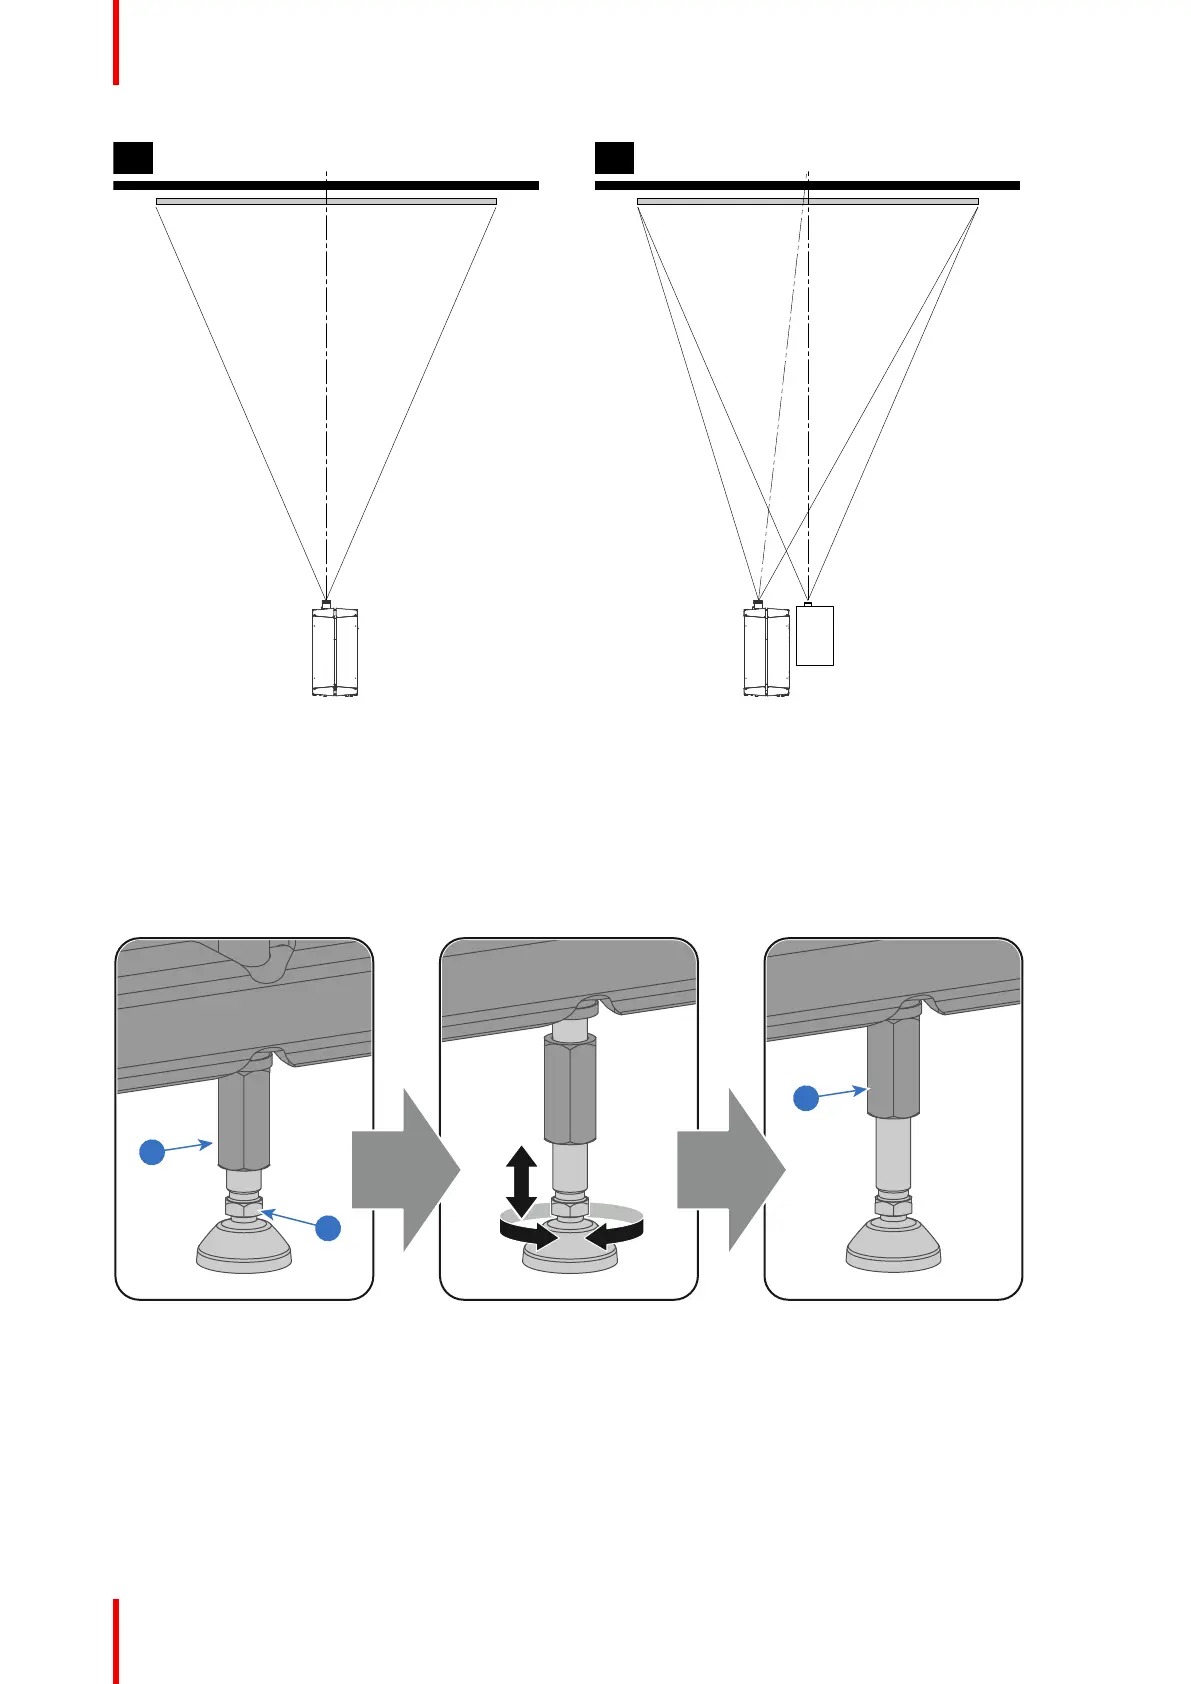
3. Proceed to level the projector by adjusting the feet of the projector as follows:
• Loosen the long nut (reference 1 Image 6-5) on the threaded rod of the four projector feet. Use a 24 mm
open end wrench.
• Adjust the height of the four legs to level the projector. Use a 17 mm open end wrench to adjust the height
as illustrated (reference 2 Image 6-5).
• Secure the leg height by tightening the long nuts (reference 1 Image 6-5) of each projector foot against the
projector chassis.
Image 6-5
4. Later, when the projector is up-and-running, adjust precise image geometry and placement.
Projector tilting
In an ideal installation, the Thor series projector lens surface is centered with and parallel to the screen. This
orientation helps to ensure optimized lens performance with minimal offset. If this position is not possible
(such as when the projector is significantly higher than the center of the screen), it is better to rely on offset
rather than extra tilt. In other words, use the SHIFT functionality of the Lens Holder prior to tilt the projector.
Physical installation
 Loading...


