3 Disassembly / Assembly
3 - 28 Infusomat® compact
plus
P 1.0
EN
For internal use, only
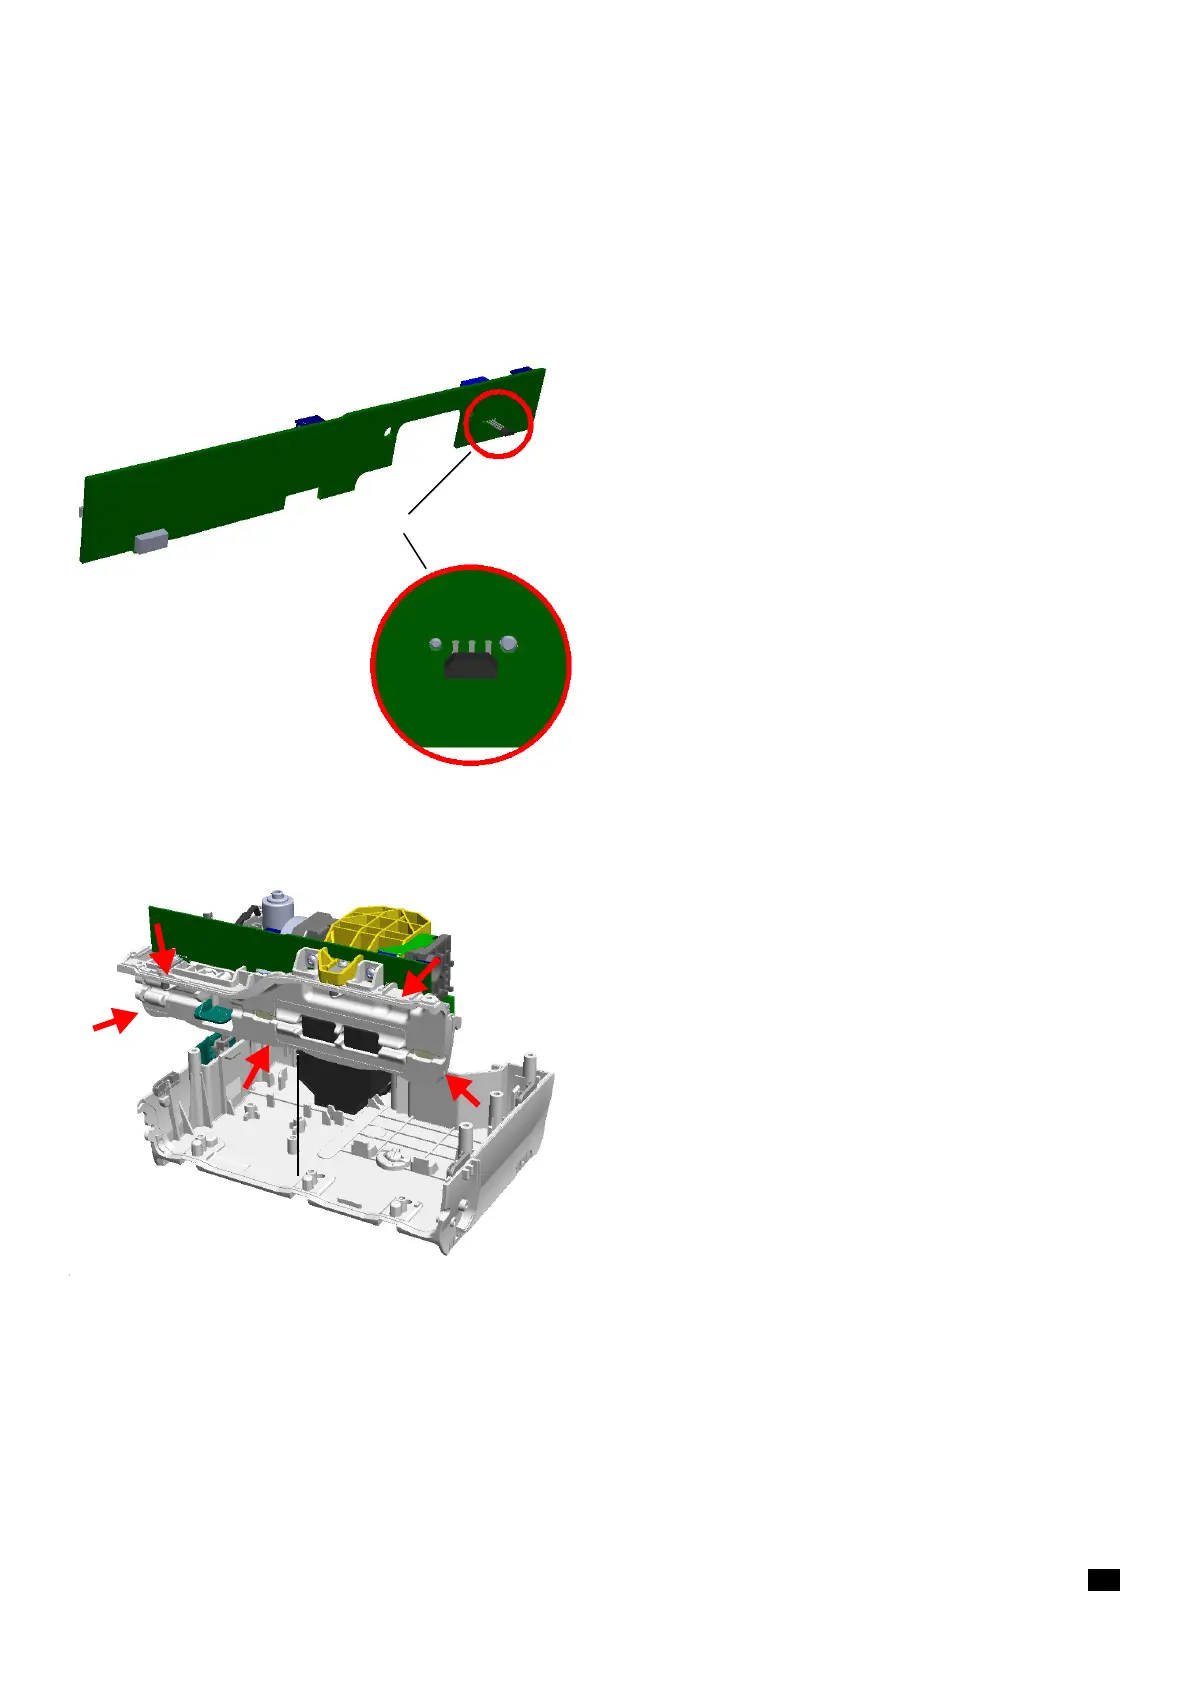
8. If the sensor board has to be replaced, first plug in the new Hall
sensor
(Fig. 3 - 39 / Item 1) in its correct orientation before
inserting the sensor board.
9. Screw the pump to the housing front with a torque of 0.6 Nm
±
0.06 Nm (first and second screwing).
10. Push the Hall sensor into the bracket (Fig. 3 - 32 / Item 3).
11. Establish all cable connections to the sensor board.
12. Before inserting the housing front, apply high-vacuum grease
to the groove all around (see
Fig. 3 - 40).
13. Mount the housing front flush with the front edges of the
housing, bottom part.
14. Screw the housing front to the housing, bottom part with a
torque of 0.6
Nm ± 0.06 Nm (first and second screwing).
1
Top of unit ▲
▼ Bottom of unit