92 ATICS-2-ISO_D00046_04_M_XXEN / 03.2021
Periodic verification and service
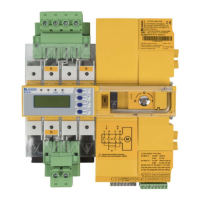
9.5.1 Removing the existing ATICS®
1. Record settings on the existing ATICS®. The settings should match the entries in the checklist
(see checklist, included in the scope of delivery).
2. Disconnect the device from the power supply or switch on the bypass switch. Switch existing
ATICS® to manual operation, switch to position "0" and secure against unintentional switch-
on (see chapter „Connecting the ATICS® safely“ on p. 31).
3. Remove connections
4. Remove the ATICS®
Undo the mounting screws on the top green plug connector
and remove the connector (A). Afterwards, loosen the fasten-
ing screws of the bottom green plug connector and remove
the connector (B).
Remove the three connector plugs (C).
For ATICS…400 and -ES: Remove connector from upper part
of the enclosure (opposite side of (C)).
C
I
note: extraneous voltage!