4910 Power Supply Unit
11-5
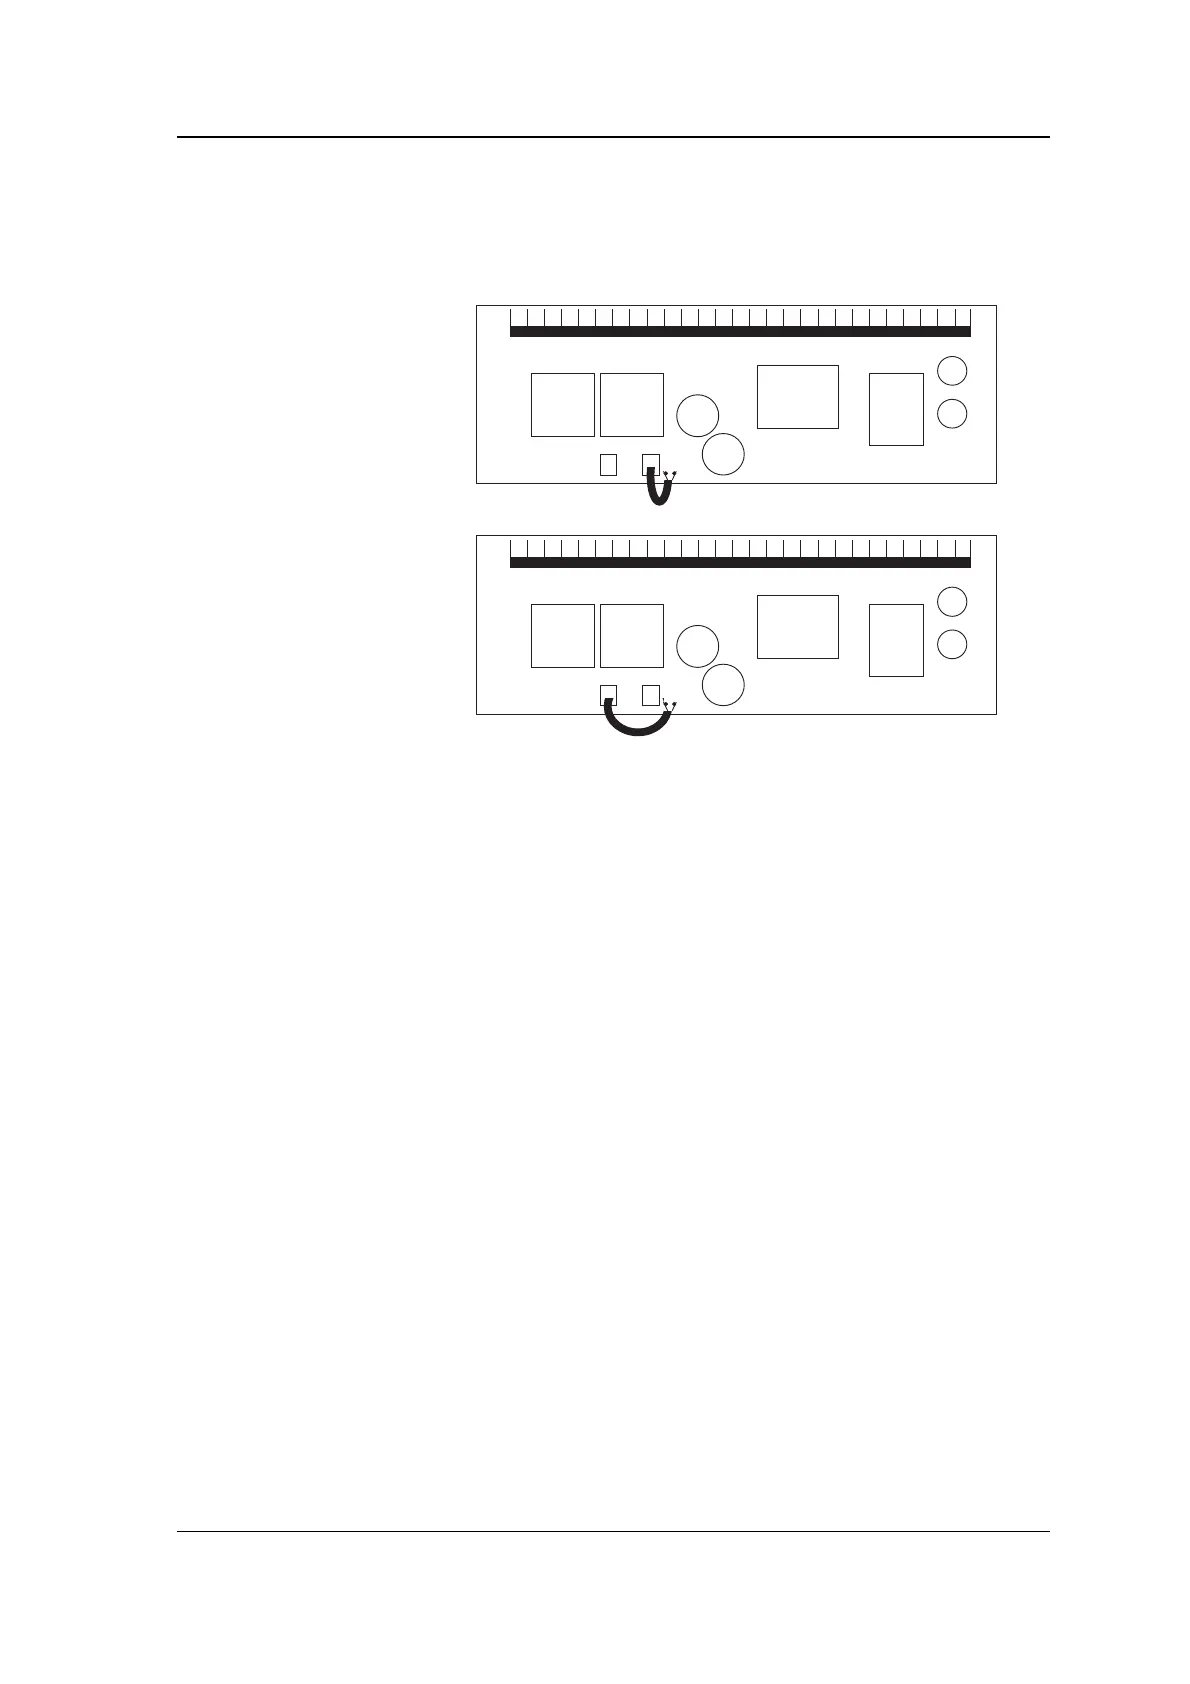
1. On the underside of the chassis is a PCB. Jumper J1 is a short
length of cable with a plug on the end. This plug can be
connected to one of two connectors, CN4 and CN5 which are
labelled 115V and 230V respectively.
120V
240V
(default)
2. Plug J1 into the required connector.
3. Replace the chassis and reconnect the earth cable.
Fitting the battery
The 4910 PSU is shipped in a different package from its battery. The
4911 PSU is shipped without a battery.
Warning
:
at all times take
care not to short circuit the battery contacts
. To fit the battery,
take the following steps:
1. Undo the two screws holding the battery housing. The screws
are held captive in the battery housing and so do not fall out.
2. Raise the battery housing at the end where the screws are and
slide the locating flange out of the slot at the other end until
the housing is removed.
3. Slide the battery into the housing (the piece you have just
removed) so that the positive (red) terminal is nearest the
flange containing the captive screws.
4. Replace the battery housing in its slot making sure the cables
are not trapped underneath it and tighten the two screws.
5. Connect the two battery cables to the terminals using the
spade connectors, the red wire to the red (+ve) terminal, the
black wire to the black (-ve) terminal.
Note
: if you fit the battery the wrong way round and operate the PSU,
the CHARGING LED never goes out. (Of course, the battery backup
will not work either!)