4101-2 Controller Installation Handbook
11-6
Connecting
To meet international PTT and EMC regulations and to meet the FCC regulations for a class B
digital device, this equipment must be fitted with the ferrite sleeve provided, see the section
entitled “Connecting the mains cable”.
External connections are made to the PSU via cables which can enter
through holes in any part of the case using the knockouts provided.
There are two clamps on the chassis for securing the cables.
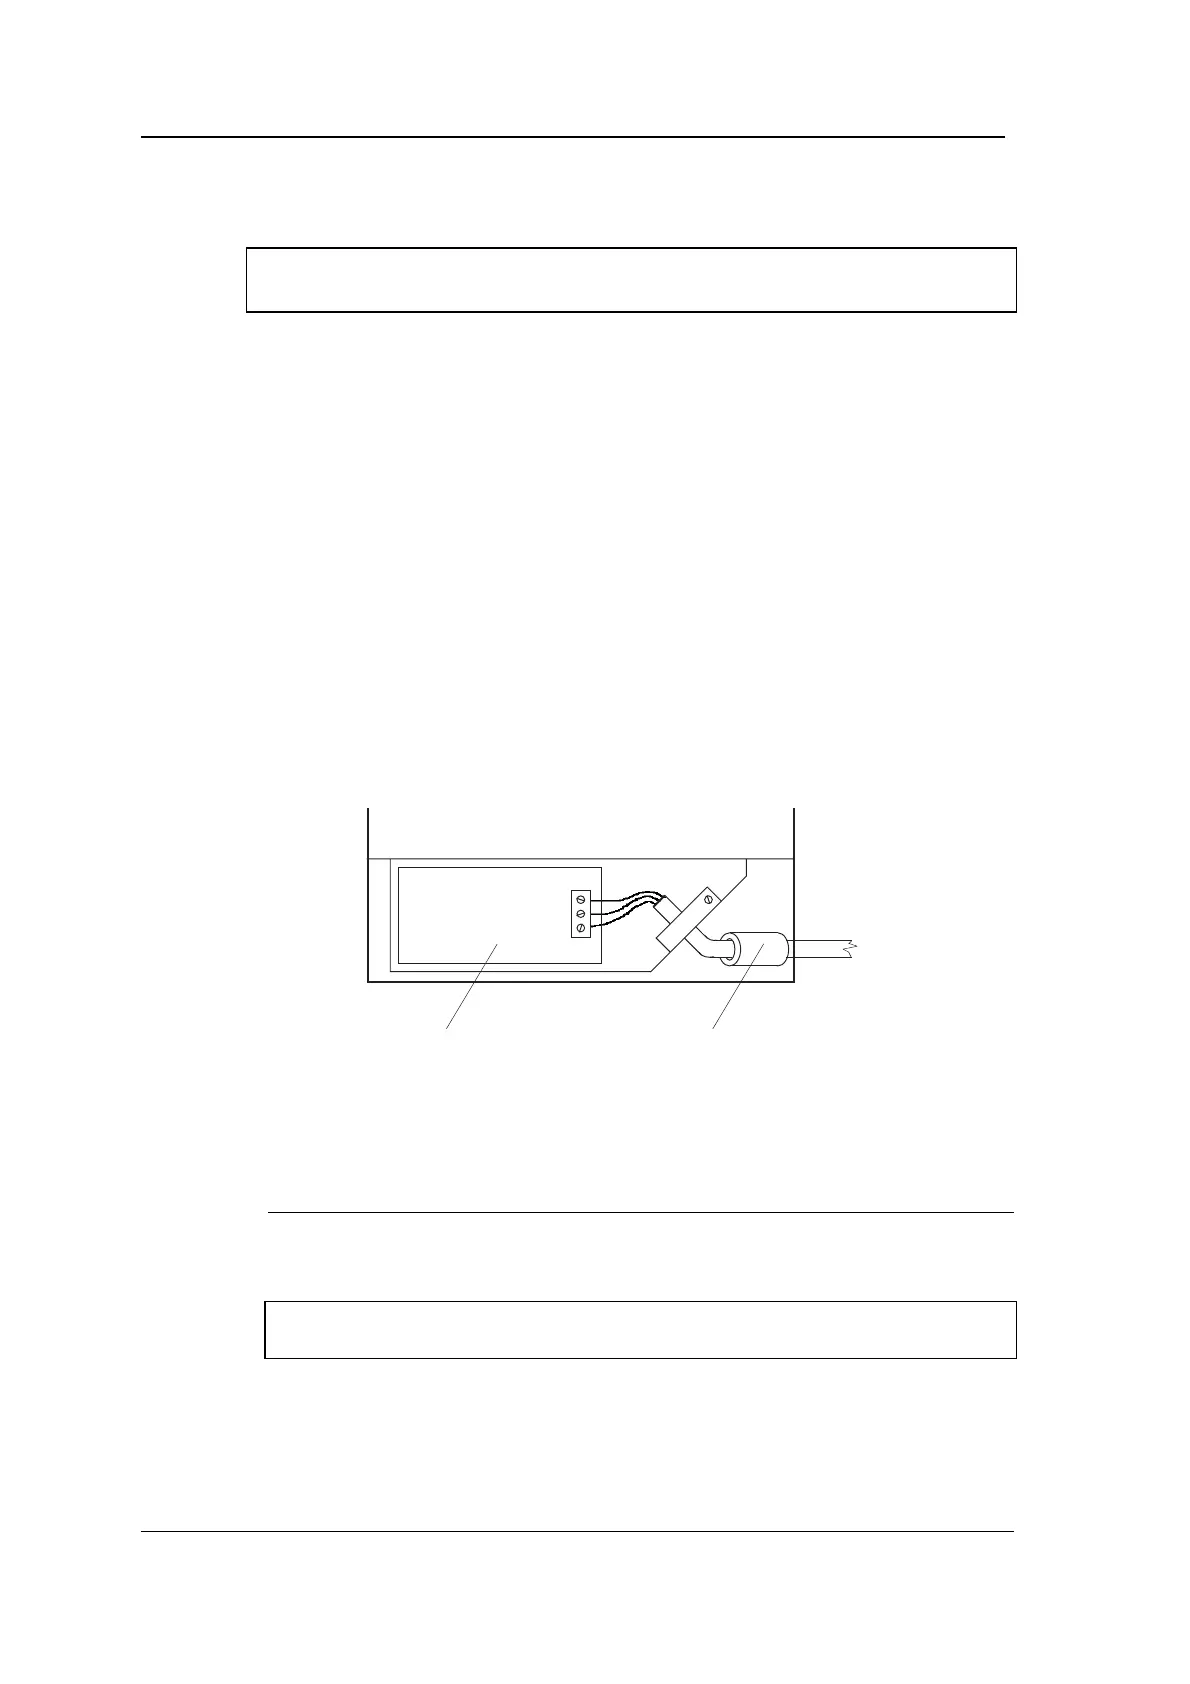
Connecting the mains cable
To pass emission regulations, the mains cable must pass through the
ferrite sleeve provided.
1. Insert the mains cable through the knockout at the bottom
right of the case.
2. Thread the ferrite sleeve
Q
123 over the mains cable as shown
in the diagram. (If you have the clip-on style of ferrite sleeve
Q
126, you can clip this over the mains cable between the case
and the cable clamp instead of using
Q
123.)
Mains input
printed circuit
assembly
Fit ferrite sleeve
(part number Q123)
over mains cable
Lower part of Power Supply Unit
(not to scale)
3. Connect the mains cable to the mains connector as follows:
Pin Function
L Live - brown cable
N Neutral - blue cable
E Earth - green/yellow cable
Important note: the power supply unit must be earthed using the E
pin of the mains connector.
4. Clamp the mains cable using the clamp provided. The ferrite
sleeve should be to the right of the cable clamp.