Task Procedures Illustrations
230
LEGACY
Installing
1” x 2” at
shank on
SCS 2100
at spring
cushion
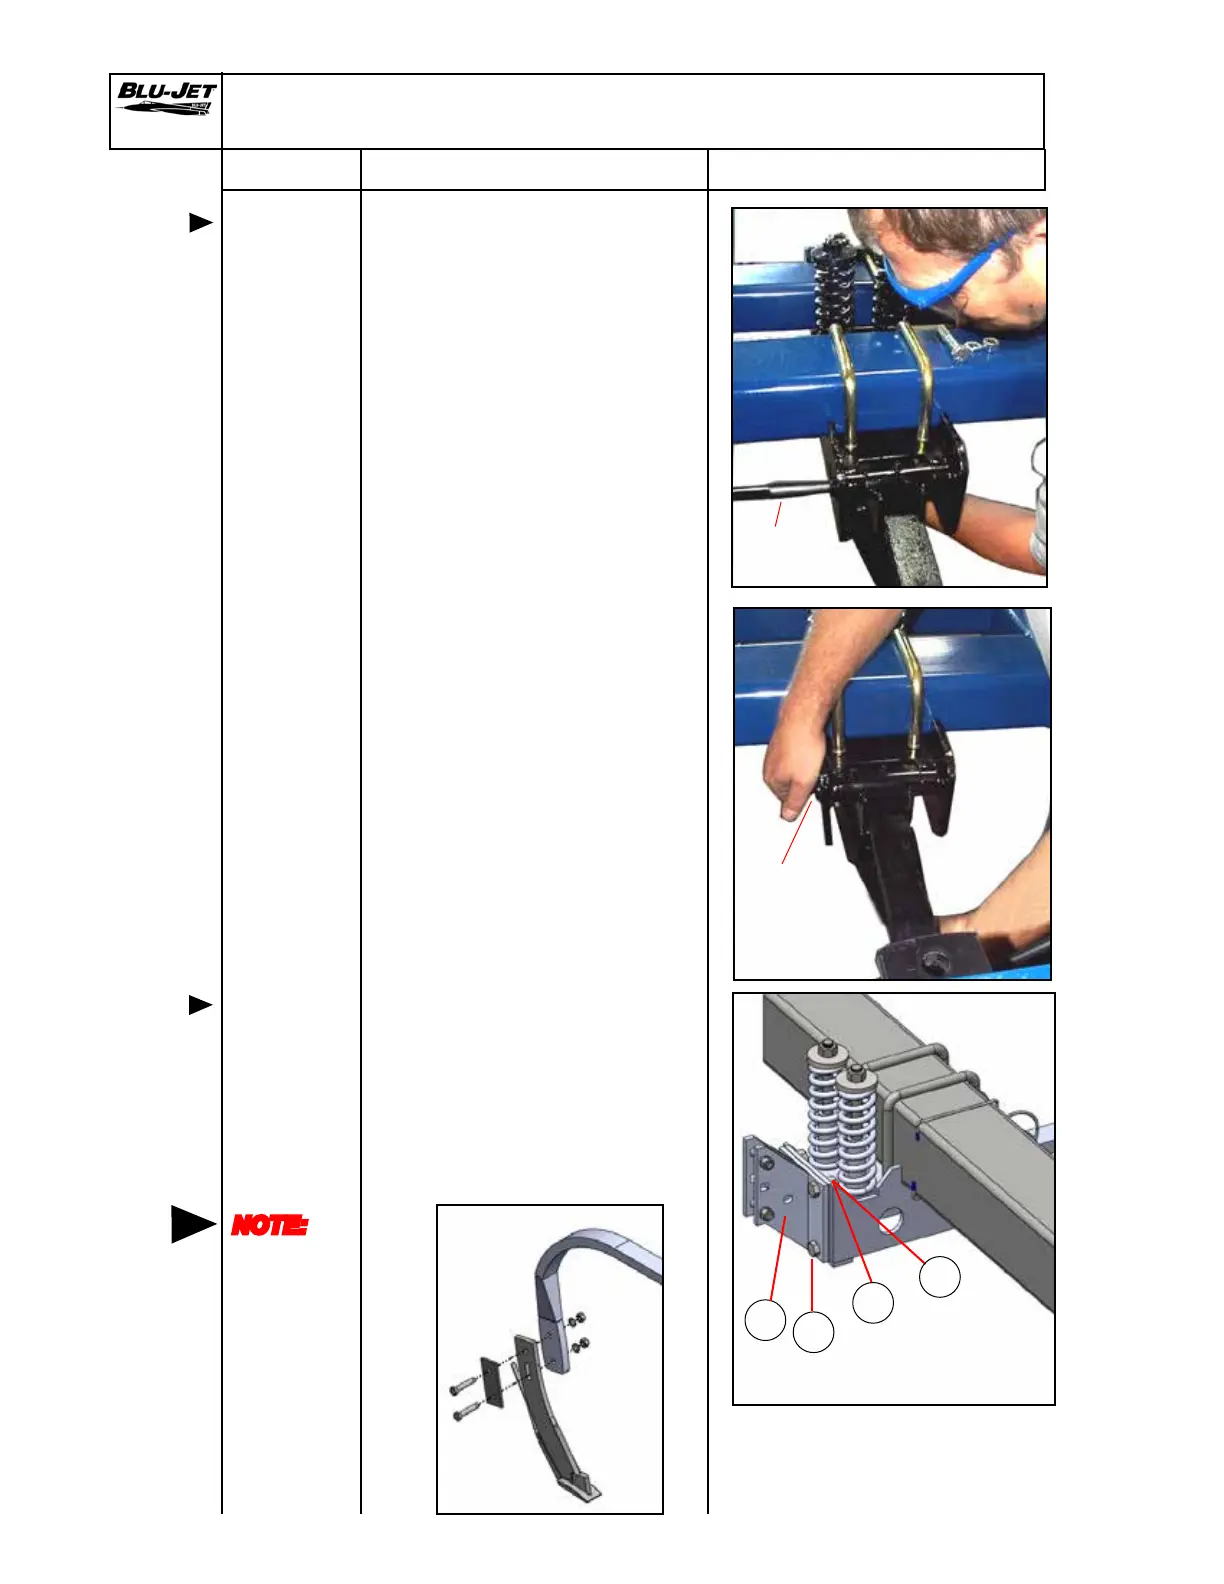
4. Raise 1” x 2” shank into
assembly over 3/4” bolt stub.
Replace 3/4” lock washer
and hex nut. Insert punch to
hold up the rear of shank
while the hex nut is installed.
Do not tighten until the rear
3/4” hex cap screw is installed.
5. Insert (BP3141) 3/4” x 3” hex
cap screw through opening
in side of assembly weldment
into shank weldment. Raise
shank and insert hex cap screw
under shank. Place (BP3035)
3/4” lock washer and (BP3034)
3/4” hex nut on hex cap screw.
6. Tighten front or rear 3/4” hex
nuts at this time.
7. Install (a) (AM2699) spring
bundle atback 4 x 6 on front
of spring cushion assembly
with four (b) (BP3097) 5/8” x
1-1/2”hex cap screws and
secure with four (c) (BP3039)
5/8” lock washers and (d)
(BP3039) 5/8” hex nuts.
Punch
Insertion
point for 3/4”
x 3” hex cap
screw.
Mounting
coulter
bracket
SCS 2100 Spring Cushion Assembly and Mounting
NOTE:
No threads
in shear
area when
attaching
knives
a
b
d
c