Task Procedures Illustrations
236
LEGACY
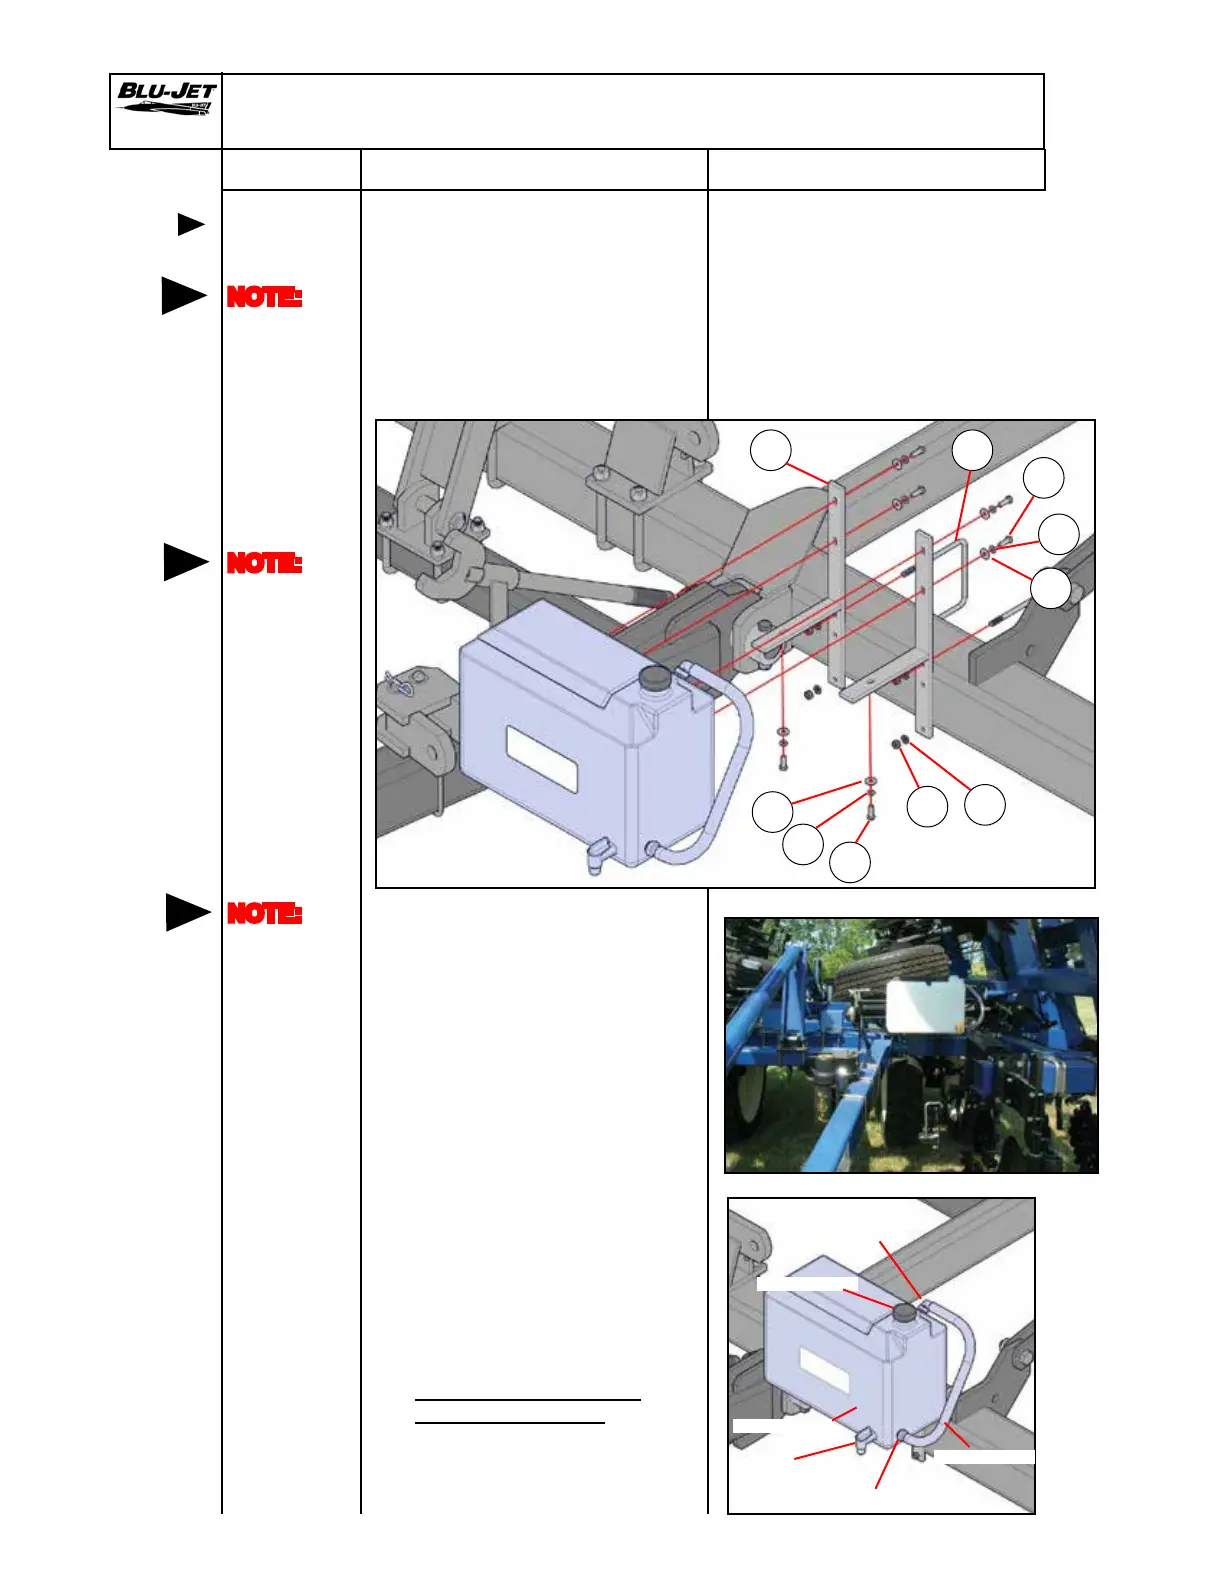
1. Attach two (a) (AM2136)
9 gallon tank mounting
brackets to (b) (AP2137)
9 gallon fresh water safety
tank with six (c) (BP3159)
5/16” at washers, (d) (BP3158)
5/16” lock washers and (e)
(BP3108) 5/16” x 1” hex cap
screws.
2. Attach tank on the left-hand
side with two (f) (BP3351)
3/8” x 6”W x 7”L u-bolts,
Secure with (g) (BP3002)
3/8” lock washers and (h)
(BP3001) 3/8” hex nuts.
3. Place sealant on tank
spigot and install in the
front of the tank.
Place sealant on hose barbs
and install top and bottom.
Place hose clamp on
clear hose and attach to
bottom tank hose barb.
The top hose barb does
not require a clamp..
a
h
g
e
f
d
c
Safety Tank Assembly
Mounting
safety tank
SHB075 Straight Hose Barb
CP2471 90 Degree
Hose Barb
NOTE:
Right-hand
and
left-hand
as viewed
from the
rear
e
d
c
NOTE:
Mount
Safety Tank
after
machine
has been
folded to
avoid
hitting and
collapsing
tank
AP2137Hose
AP2137Lid
AP2137Spigot
AP2137Tank
NOTE:
Safety Tank
placement
will depend
on row
spacing