Task Procedures Illustrations
240
LEGACY
Hydraulic System Charging
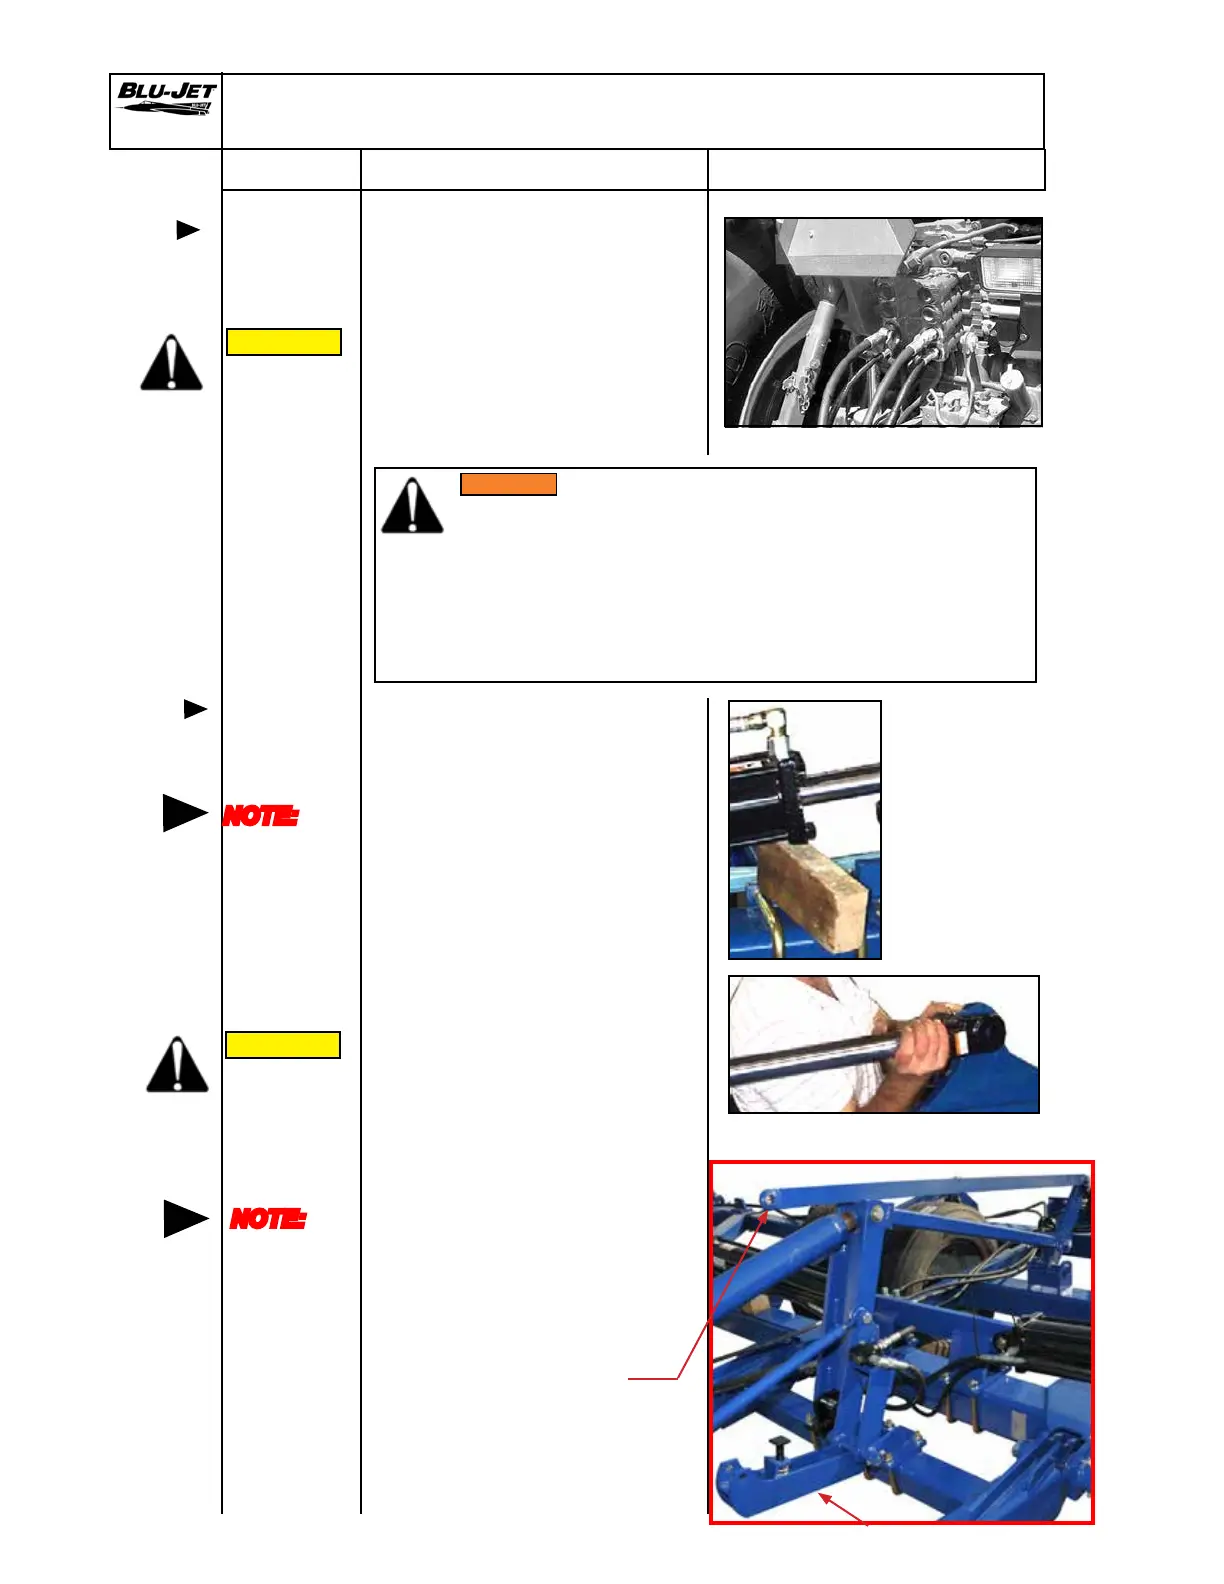
1. Connect the hydraulic hoses
to the tractor remote couplers.
The 1/2” hoses supply oil to
the wheel lift cylinders. The
3/8” hoses supply oil to the
wing cylinders. Mark hose
pairs with paint or tape.
Mark hoses so that
they are plugged in correctly
each time.
WARNING: Hydraulic uid escaping under pressure can have
enough force to penetrate the skin. Hydraulic uid may also
infect a minor cut or opening in the skin. If injured by escap-
ing uid, see doctor at once. Serious infection or reaction can
result if medical treatment is not given immediately. Make sure
all connections are tight and that hoses and lines are in good
condition before applying pressure to the system. Relieve all
pressure before disconnecting the lines or performing other work
on the hydraulic systems.
Generic example
Connecting
hydraulic
hoses to
tractor
CAUTION:
Always
hook tool
bar to
tractor
before
lling oil
lines
NOTE:
Cylinder
should be
blocked
high enough
to avoid
damage to
wings when
rods are
extend
hydraulically
Charging
and attaching
wing
cylinders
CAUTION:
Always
hook tool
bar to
tractor
before
lling oil
lines
NOTE:
Charging a
hydraulic
system will
remove oil
from a
tractors
hydraulic
reservoir.
Be sure to
check
tractor oil
level after
charging a
new system
2. Before charging the wing
cylinders block rod ends up.
3. Hook implement to tractor.
Connect the hydraulic lines
to tractor ports.
4. Begin by holding the tractor
remote lever in one direction
until the cylinders are fully
extended or retracted. Hold
1 minute to purge air from
lines. Reverse the direction of
the remote lever to charge the
other side of the system. Hold
1 minute to purge air from
lines. Continue process until
cylinders are extending and
retracting completely.
5. Extend cylinder rod slowly
until centered over linkages.
6. Insert clevis pin and secure
with cotter keys.
7. Repeat procedure on opposite
wing linkage.
8. Repeat steps to charge wheel
lift cylinder.
WARNING
CAUTION
CAUTION
NOTE: Do not attach
(41) (AM6266) depth control
stop linkage to button stop
bracket until the cylinders
have been fully charged.
Button stop bracket