EN
26
Installation
www.bora.com
6.6.2 Preparing the cooktop
Attaching the sealing tape
2
1
Fig. 6.16 Sealing tape in the case of surface mounting
1
2
Fig. 6.17 Sealing tape in the case of ush installation
[1] Black, heat-resistant silicone sealant
[2] Sealing tape
XX
In the case of surface mounting, attach the enclosed sealing
tape [2] around the outer edges of the underside of the
cooktop. Do not leave any gaps.
XX
In the case of flush installation, attach the enclosed sealing
tape [2] to the horizontal cutting edge in the worktop cut-out,
even if you are sealing the cooktop with a silicone sealing
compound[1] or similar.
Fitting the installation clamps
1
2
Fig. 6.18 Fitting the installation clamps
[1] Retaining brackets
[2] Installation clamps
i
2 installation clamps must be fitted to each side of the
cooktop.
XX
Push 2 installation clamps [2] onto each side of the cooktop
until they come to a stop in the retaining brackets [1]
provided.
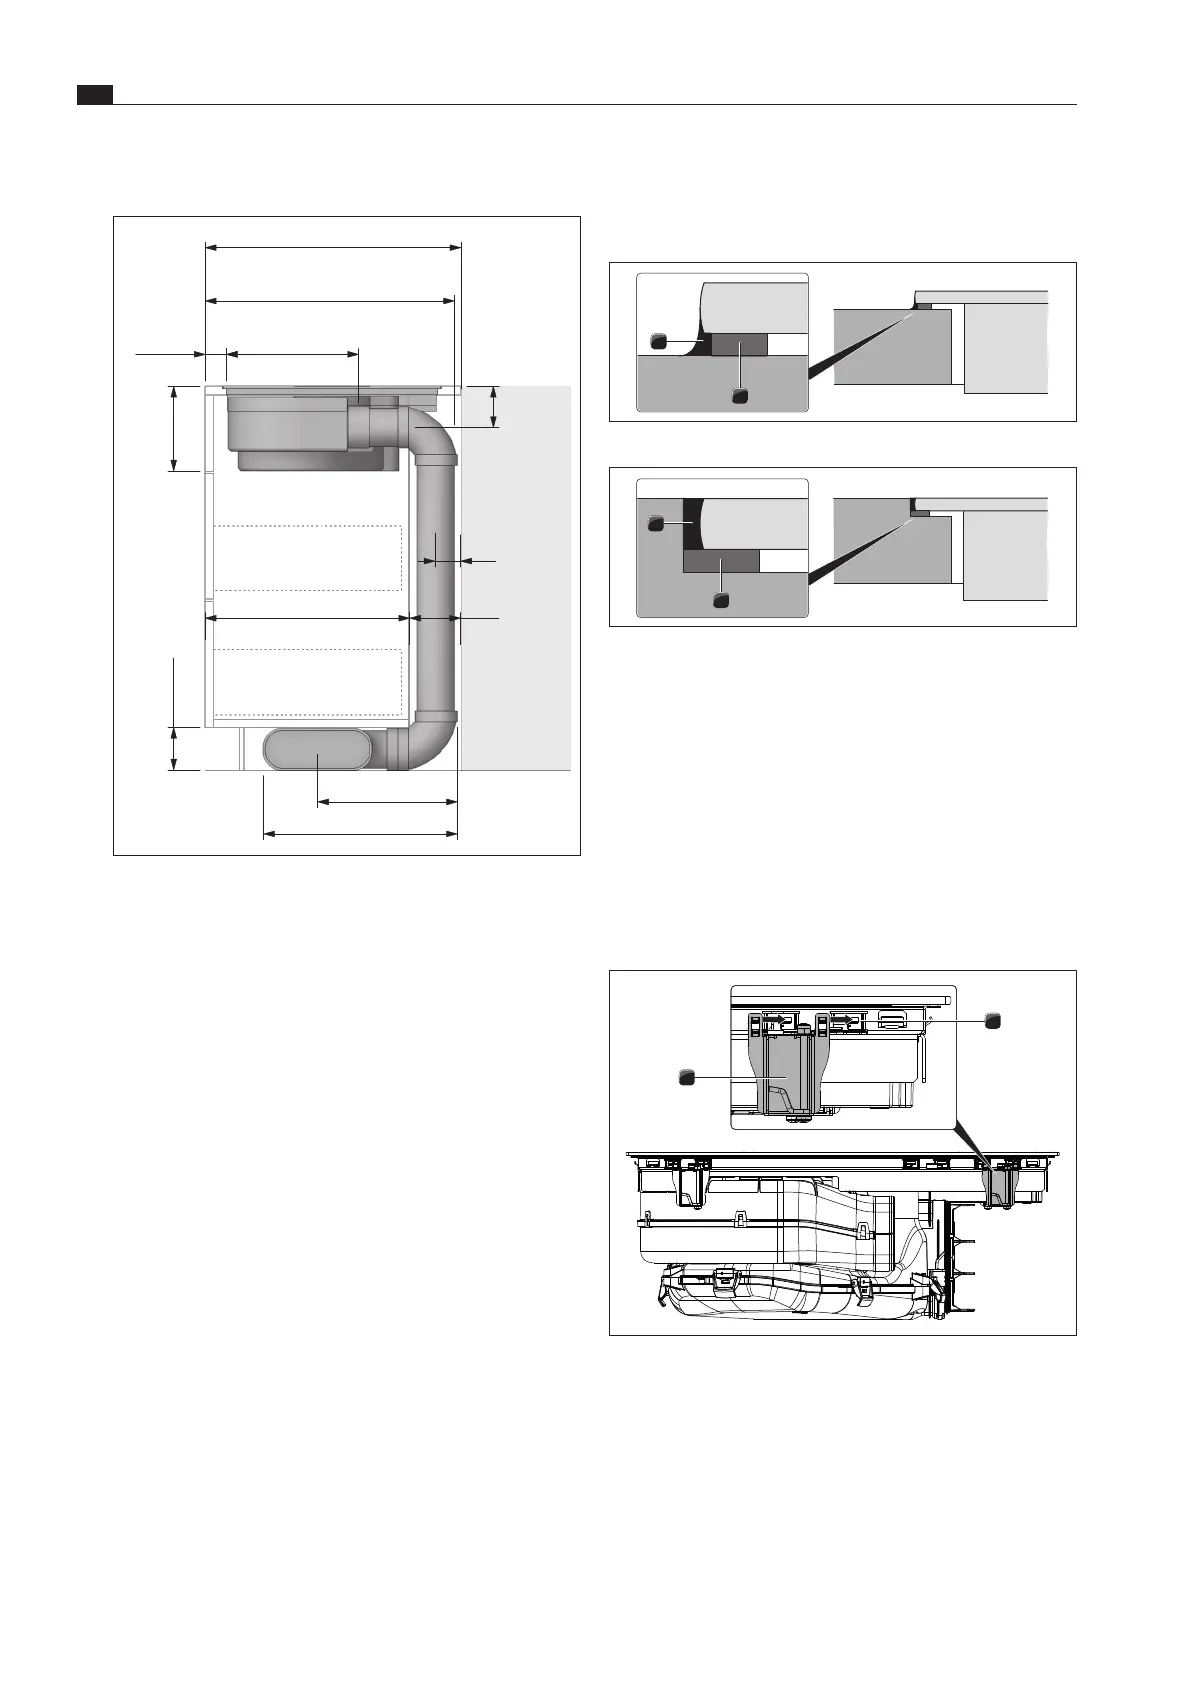
Installation dimensions
BORA LÜFTU N GSFIBELXX
min.
600
min.
50
199
495
-
575
0
-
80
min.
25
575
(min.
545)
125
min.
675
min.
50
199
600
-
680
105
-
185
min.
25
min.
650
125
Einbauschnitt
PUXA
Abluft
(Insel):
Einbauschnitt
PUXU
(Zeile
600):
Einbauschnitt
PUXA
Abluft
(Zeile
600):
BORA X
Pure
Einbauschnitt
PUXU
mit
zusätzlichem Teleskopauszug
PULBTA (Insel):
min.
600
min.
50
199
120
585
(min.
474)
max.
480
60
min.
455
min.
329
min.
100
97
310
700
(min.
600)
min.
50
199
120
685
max.
580
min.
455
50
min.
279
min.
100
97
60
310
Fig. 6.15 Installation dimensions for exhaust air, worktop depth
600 mm
Adjusting the back wall of the unit
XX
Before installation, check the suitability of the floor unit
with regard to the necessary installation dimensions for the
appliance and the planned duct system.
XX
If necessary, adjust the position of the back wall according to
the required installation dimensions.