EN
52
Cleaning and Maintenance
www.bora.com
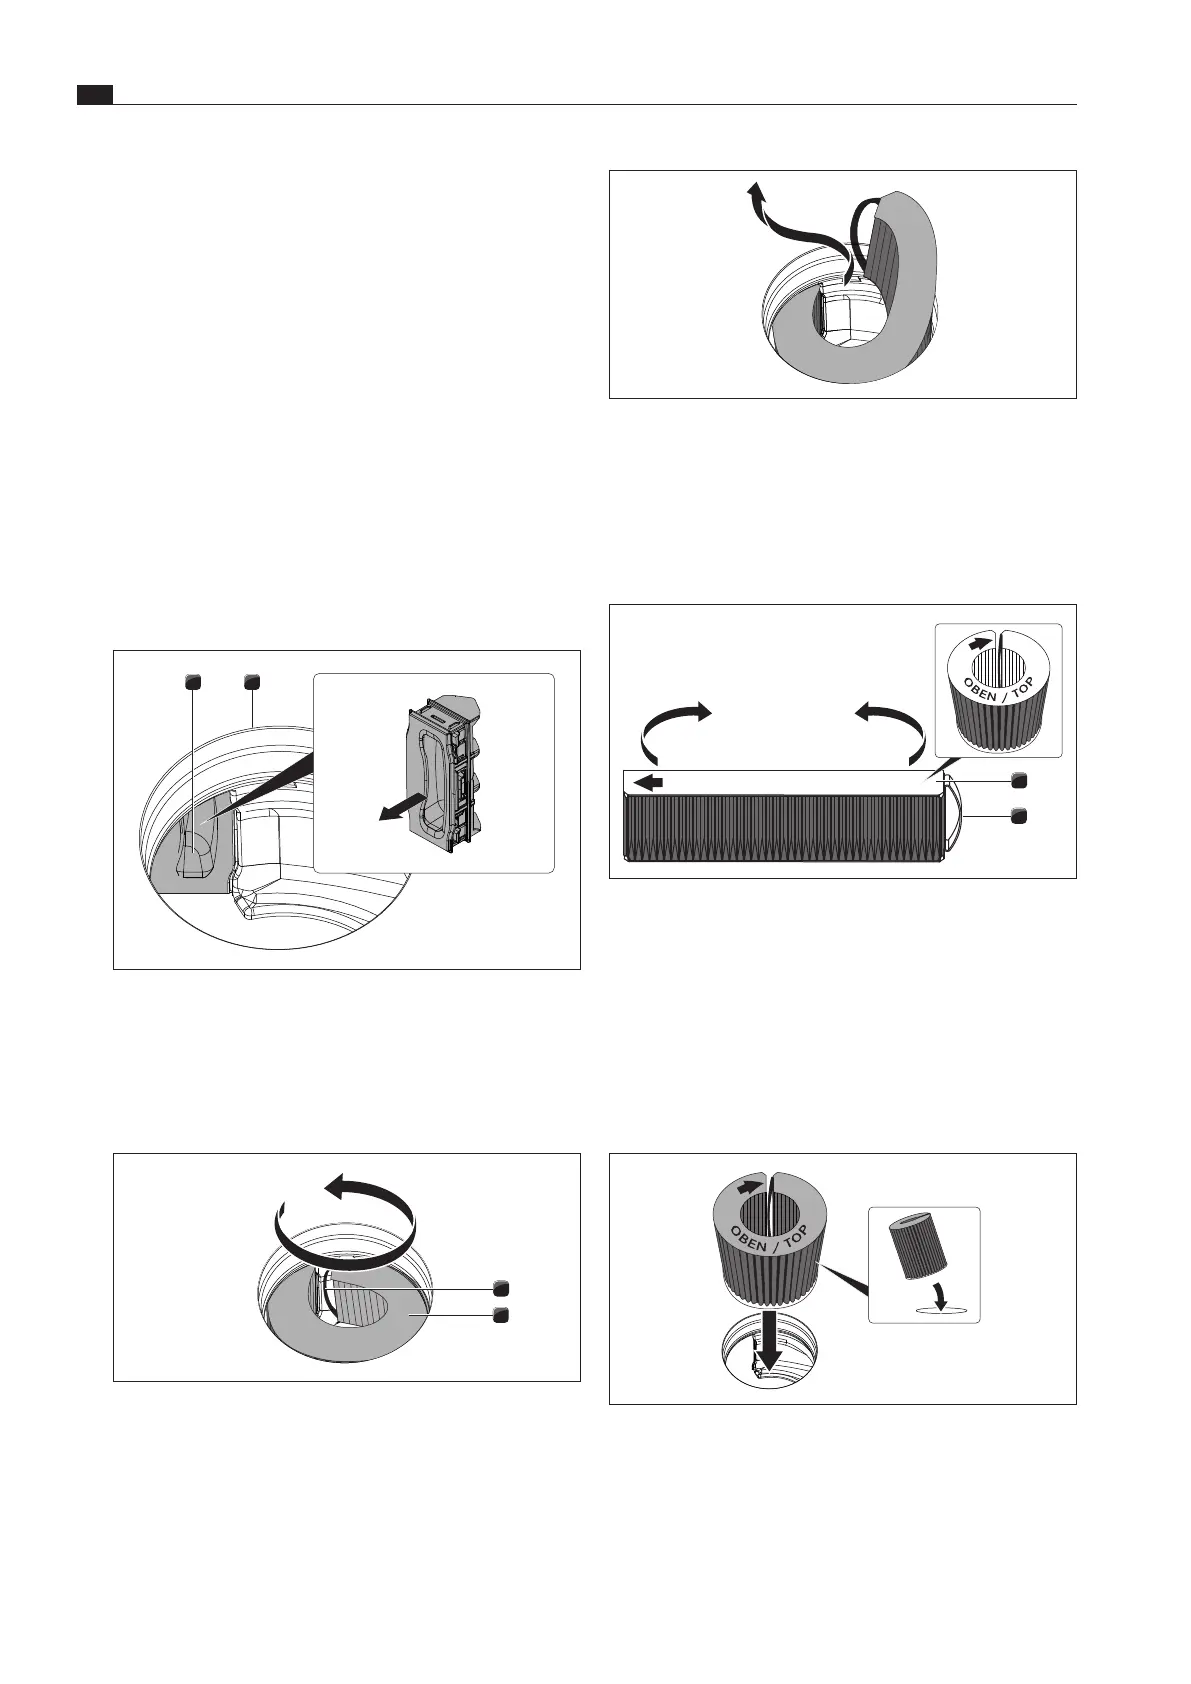
Fig. 8.7 Removing the activated charcoal lter through the
inlet opening
XX
Take hold of the end of the activated charcoal filter and pull
upwards and towards the left until it is completely out of the
inlet opening.
Inserting the activated charcoal filter
OBEN / TOP
2
1
Fig. 8.8 Activated charcoal lter
[1] Activated charcoal filter
[2] Grip strap
XX
Remove the packaging from the activated charcoal filter [1].
XX
Position the activated charcoal filter correctly with the help of
the printed symbols (arrow left, grip strap [2] right).
XX
Hold the activated charcoal filter at both ends.
XX
Bend the activated charcoal filter into a cylindrical shape so
that both ends of the filter are opposite each other.
Fig. 8.9 Inserting the activated charcoal lter through the vent
opening
XX
Tilt the activated charcoal filter towards you slightly and insert
it through the inlet opening.
XX
Guide the left end of the filter into the opening in the filter
housing.
8.6 Replacing the activated charcoal
filter
An activated charcoal filter will only be fitted with the stainless
steel grease filter if the cooktop extractor is used in recirculation
mode. The activated charcoal filter absorbs cooking odours that
arise during cooking.
i
The activated charcoal filter must be replaced when the
fan indicator shows
F
(Filter service indicator).
You can obtain the activated charcoal filter PUAKF from
your specialist supplier or by contacting BORA via the
website at www.bora.com/filter.
XX
Make sure that the cooktop and cooktop extractor are
switched off (see the Operation chapter).
XX
Wait until the fan power level indicator shows
0
.
Removing the activated charcoal filter
XX
Remove the air inlet nozzle and stainless steel grease filter.
2
1
Fig. 8.5 Remove the lter replacement cover
[1] Filter replacement cover
[2] Inlet opening
XX
Inside the inlet opening [2] pull the filter replacement cover [1]
out through the opening in the filter housing.
2
1
Fig. 8.6 Removing the activated charcoal lter from the lter
housing
[1] Grip strap
[2] Activated charcoal filter
XX
Take hold of the activated charcoal filter [2] by the grip strap
[1] and pull it out as far as possible through the filter housing
opening.