EN
50
Cleaning and Maintenance
www.bora.com
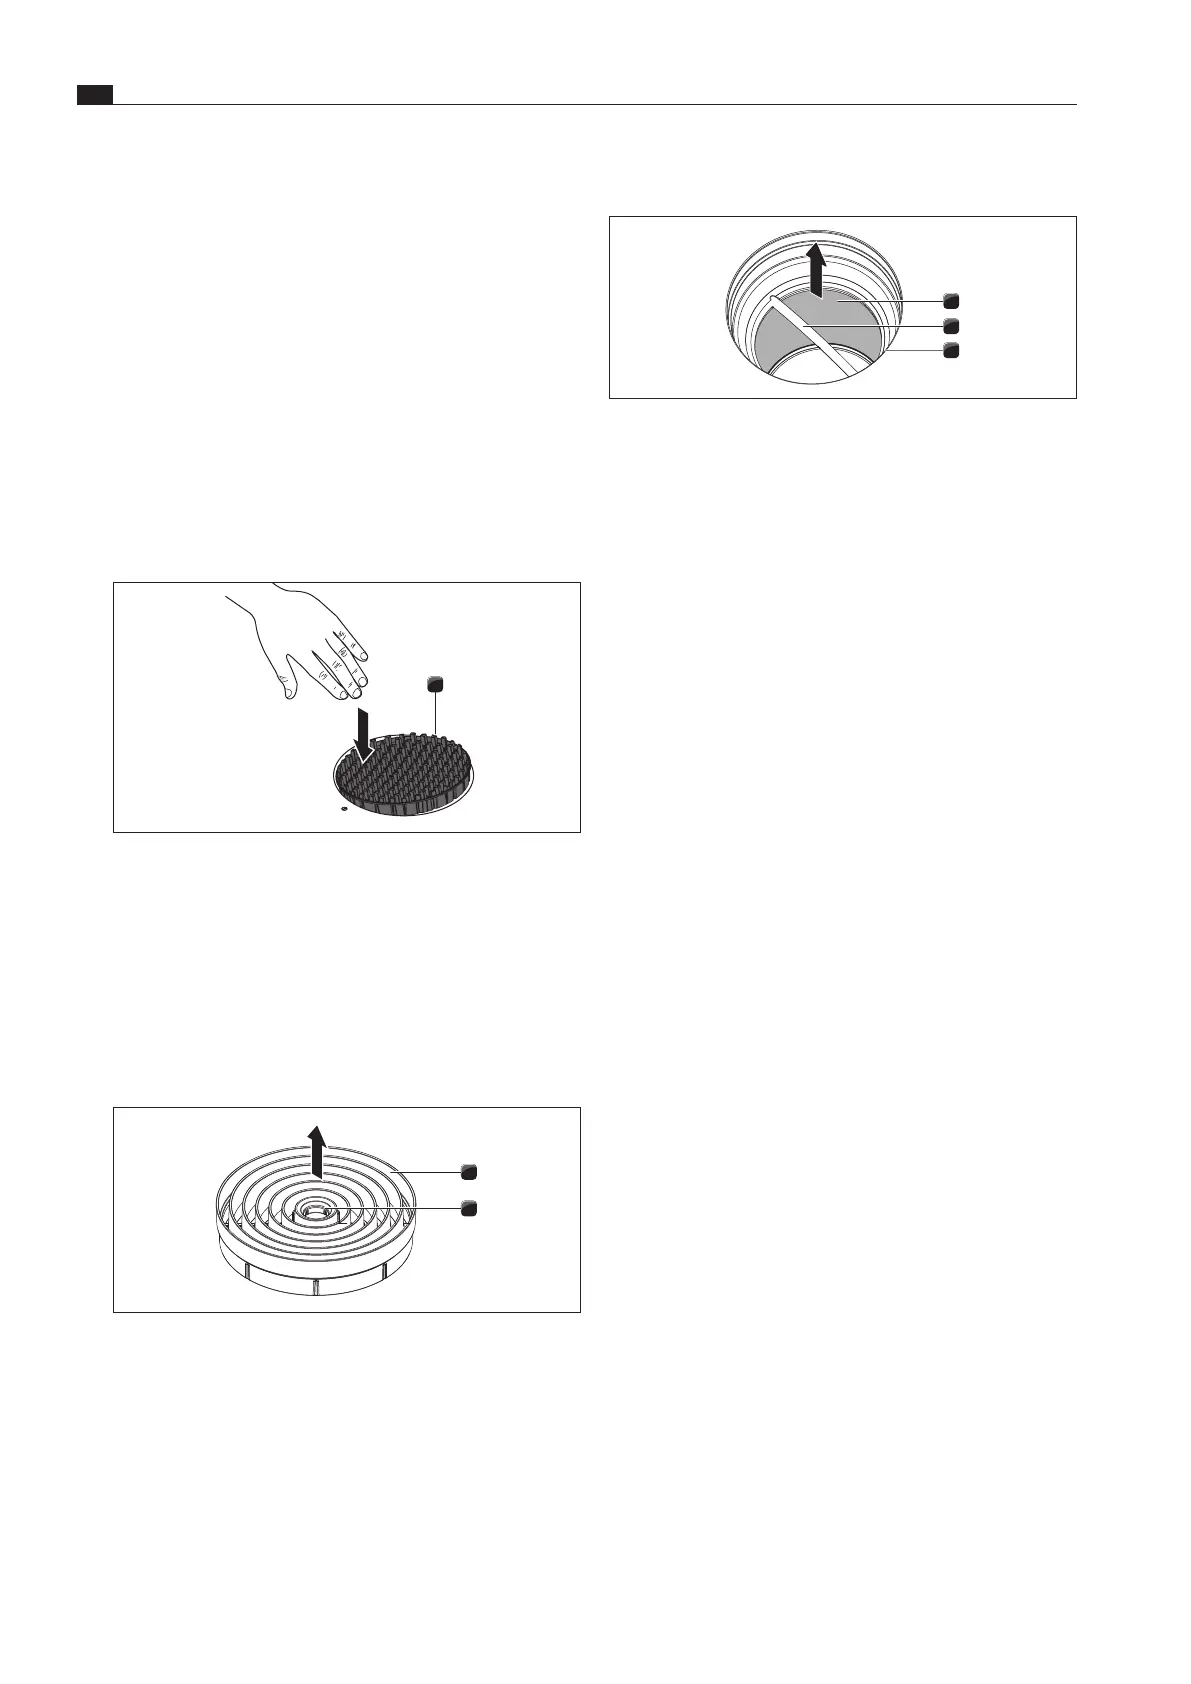
Removing the stainless steel grease filter
3
2
1
Fig. 8.3 Removing the stainless steel grease lter
[1] Stainless steel grease filter
[2] Handle
[3] Inlet opening
XX
Take hold of the stainless steel grease filter by the handle [2].
XX
Pull the stainless steel grease filter [1] up and out of the
suction opening [3].
8.4.2 Cleaning the air inlet nozzle and
stainless steel grease filter
i
If it is no longer possible to clean the stainless steel
grease filter completely, it must be replaced – see
Accessories chapter).
Manual cleaning
XX
Use a cleaner and degreaser in one.
XX
Rinse the air inlet nozzle and stainless steel grease filter with
hot water.
XX
Use a soft brush to clean the air inlet nozzle and stainless
steel grease filter.
XX
After cleaning, rinse the air inlet nozzle and stainless steel
grease filter well.
Cleaning in the dishwasher
XX
Remove coarse food residues from the stainless steel filter
XX
Rinse the air inlet nozzle and stainless steel grease filter with a
rinsing program at maximum 65 °C.
i
To prevent water from dripping into the appliance, it is
recommendable to shake the nozzle well upon removal
from the dishwater and, if necessary, to dry it with a tea
towel.
8.4.3 Fitting the components
Inserting the stainless steel grease filter
XX
Take hold of the stainless steel grease filter by the handle [2].
XX
Insert the stainless steel grease filter [1] in the inlet opening
[3]. A lock is not provided or necessary.
Inserting the air inlet nozzle
XX
Insert the air inlet nozzle in the inlet opening.
XX
Make sure it is positioned correctly.
8.4 Cleaning the cooktop extractor
The air inlet nozzle and stainless steel grease filter absorb the
greasy particles from cooking vapours.
XX
Make sure that the cooktop and cooktop extractor are
switched off (see the Operation chapter).
XX
Wait until the fan indicator shows
0
.
XX
Clean the cooktop extractor in accordance with the cleaning
cycles.
XX
Clean the surfaces of the extraction system using a soft,
damp cloth, detergent or a mild window cleaning agent.
XX
Soften dried on dirt using a damp cloth (do not scrape it off!).
8.4.1 Removing the components
Removing the X Pure air inlet nozzle
1
Fig. 8.1 Removing air inlet nozzle PUXA, PUXU
[1] Air inlet nozzle
Prerequisite:
The fan level indicator shows
0
.
XX
Tilt the air inlet nozzle [1] from its horizontal position.
XX
Remove the air inlet nozzle [1] with your other hand.
Removing the Pure air inlet nozzle
1
2
Fig. 8.2 Removing air inlet nozzle PURA, PURU
[1] Air inlet nozzle
[2] Access opening
Prerequisite:
The fan level indicator shows
0
.
XX
Reach into the access opening [2] of the air inlet nozzle [1]
with your finger.
XX
Pull the air inlet nozzle [1] up and out.