51
Electrical installation and Wiring
8.7 Wiring the 8025 Batch in panel version
Only move the selectors when the power supply is off.
→ Install the device as described in chap. 7.5.
→ Set the selectors "SENSOR TYPE", "SENSOR SUPPLY" and "LOAD": see chap. 8.9 Connecting the remote
flow sensor to a 8025 Batch in panel-mounted or in wall-mounted version.
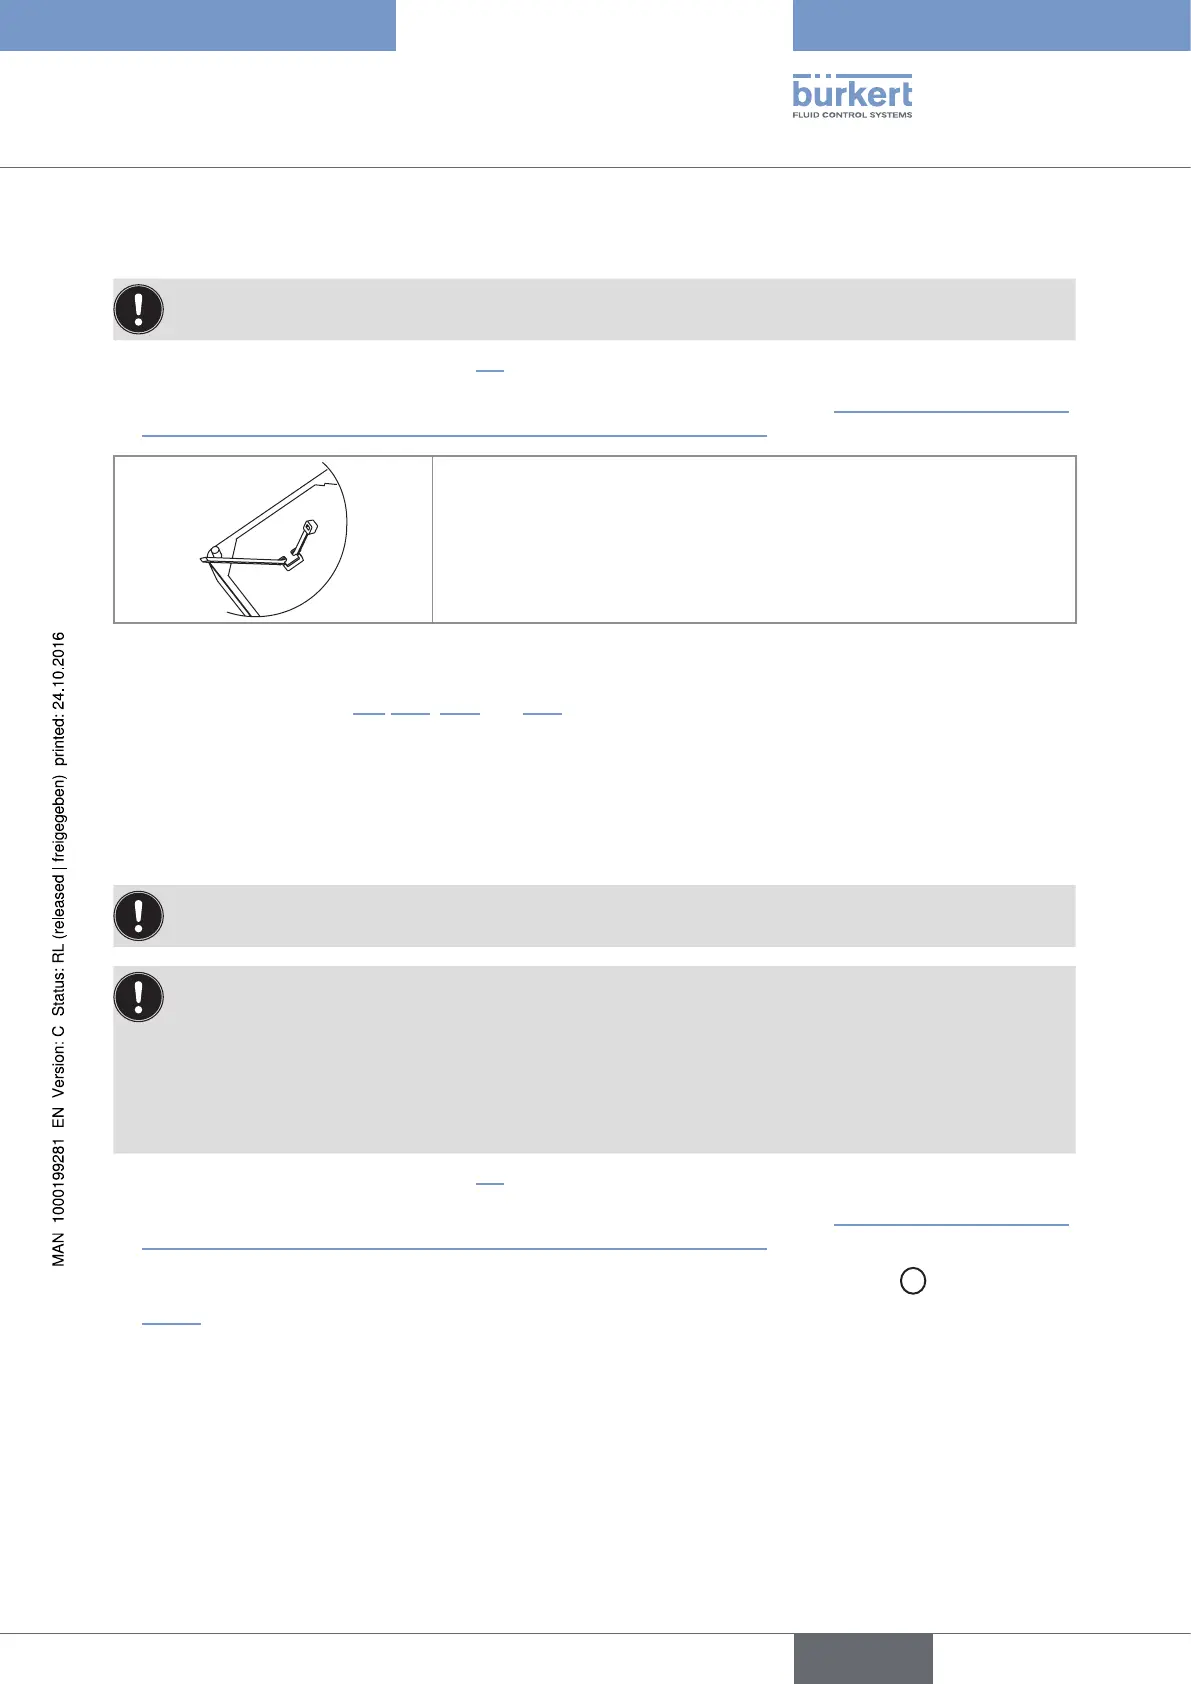
→ Before wiring the device insert the supplied cable clips into the slots of
the electronic board.
Fig. 29 : Inserting the cable clips
→ Wire according to chap. 8.9, 8.11, 8.14 and 10.6.
→ Secure the power supply cable, the flow sensor connection cable and the relay connection cables, with the
cable clips.
8.8 Wiring the 8025 Batch in wall-mounted version
Only move the selectors when the power supply is off.
Insert the supplied stopper gaskets into the unused cable glands to ensure the tightness of the device.
• Unscrew the unused cable gland.
• Remove the transparent disk.
• Insert the supplied stopper gasket.
• Screw the nut of the cable gland.
→ Install the device as described in chap. 7.6.
→ Set the selectors "SENSOR TYPE", "SENSOR SUPPLY" and "LOAD": see chap. 8.9 Connecting the remote
flow sensor to a 8025 Batch in panel-mounted or in wall-mounted version.
→ If the wall-mounted version is energized with a 115/230 V AC power supply, set selector
D
as shown in
Fig. 30.
English
Type 8025 - 8035 - SE35 BATCH