46
Advanced Guide
Basic Guide
1
Camera Basics
2
Auto Mode /
Hybrid Auto Mode
3
Other Shooting Modes
Tv, Av, and M Mode
6
Playback Mode
7
Wi-Fi Functions
8
Set-Up Menu
9
Accessories
10
Appendix
Index
4
P Mode
5
Tv, Av, M, and C Modes
Before Use
Using the Dual Axis Electronic
Level
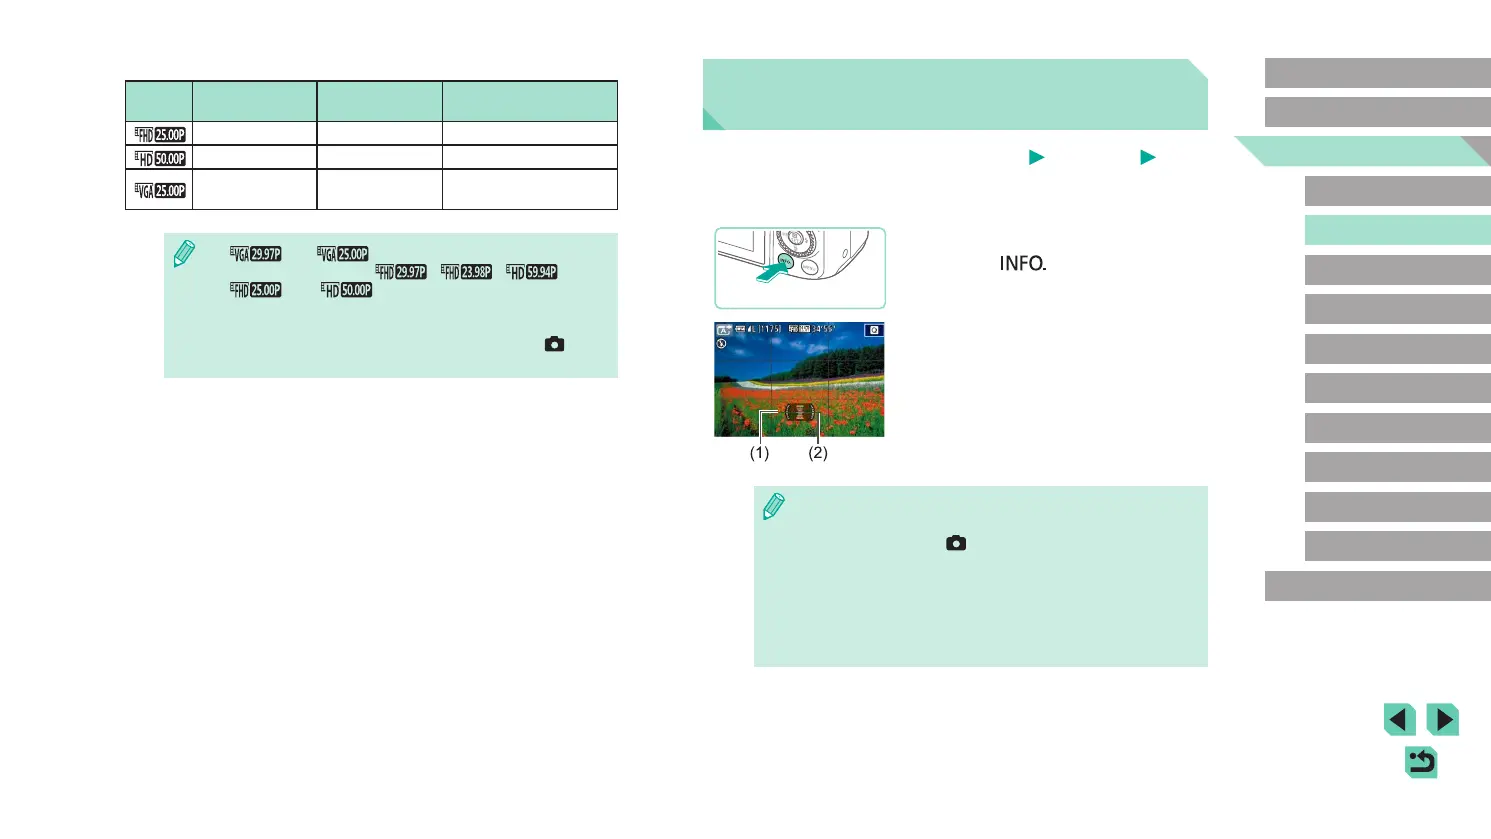
Still Images
Movies
An electronic level can be displayed as a guideline to ensure the camera
is level from front to back and left to right.
1
Display the electronic level.
● Press the [ ] button several times to
display the electronic level.
2
Straighten the camera.
● (1) indicates the front-back orientation
and (2) the left-right orientation.
● If the camera is tilted, move it so that the
red line changes to green.
● If the electronic level is not displayed in step 1, go to the menu
(
=
32) and check your settings in the [Shooting information
display] option on the [
1] tab (
=
87).
● The electronic level is not displayed during movie recording.
● If you hold the camera vertically, the orientation of the electronic
level will be updated automatically to match the camera
orientation.
● Calibrate the electronic level if it seems ineffective in helping you
level the camera (
=
139).
Video format set to [PAL]
Image
Quality
Resolution Frame Rate Details
1920 x 1080 25.00 fps For shooting in Full HD
1280 x 720 50.00 fps For shooting in HD
640 x 480 25.00 fps
For shooting in
standard denition
● [ ] and [ ] will display black bars on the left and
right sides of the screen. [
], [ ], [ ],
[
], and [ ] will display black bars on the top and
bottom of the screen. The black bars indicate image areas not
recorded.
● This can be set up in the menu (
=
32) by going to the [ 5]
tab and choosing the [Movie rec. size] option.