95
Advanced Guide
Basic Guide
1
Camera Basics
2
Auto Mode /
Hybrid Auto Mode
3
Other Shooting Modes
Tv, Av, and M Mode
6
Playback Mode
7
Wi-Fi Functions
8
Set-Up Menu
9
Accessories
10
Appendix
Index
4
P Mode
5
Tv, Av, M, and C Modes
Before Use
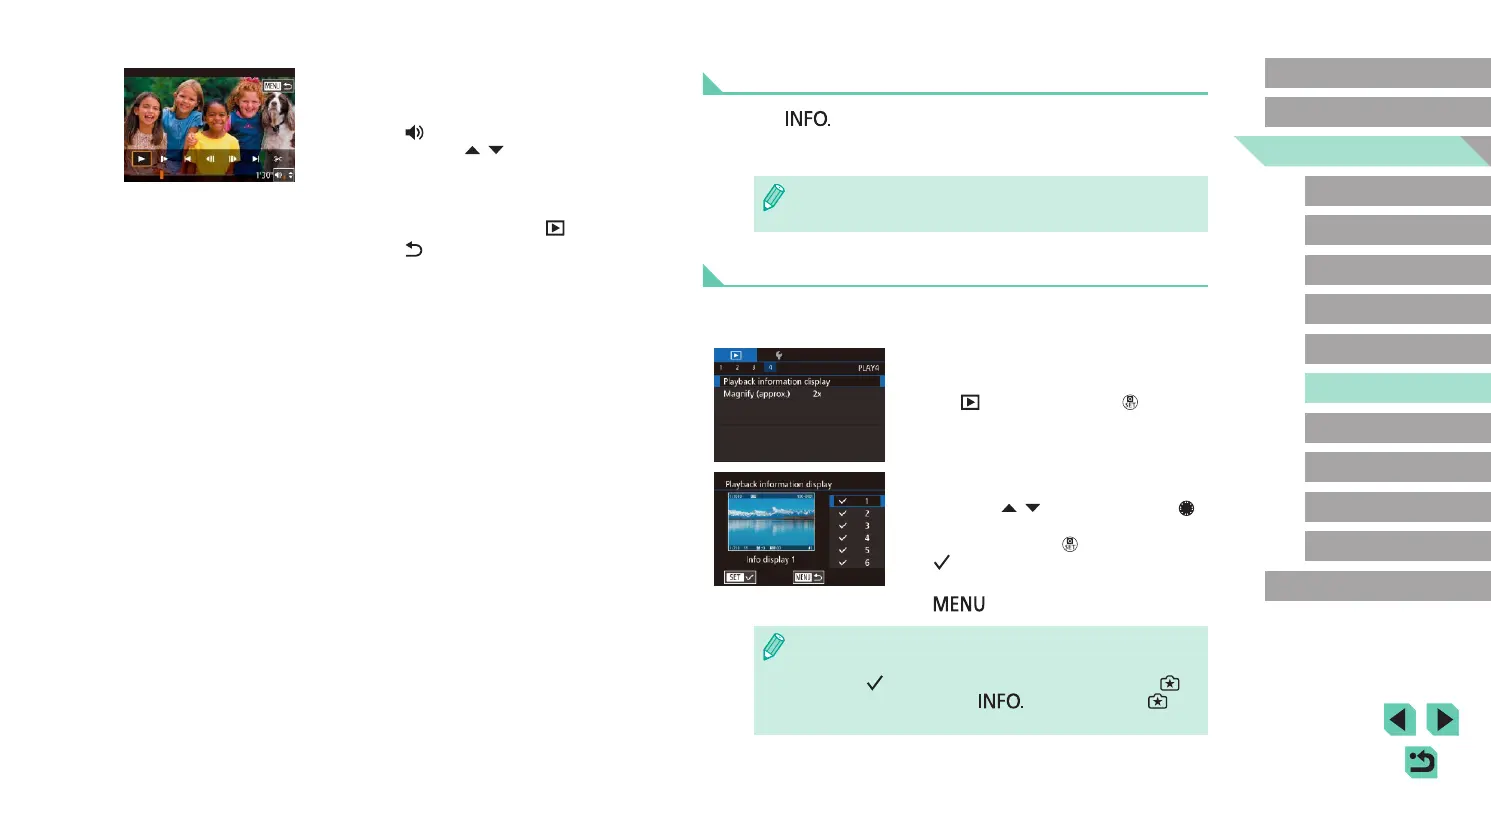
Switching Display Modes
Press the [ ] button in playback mode to switch between no
information display, information display 1 (basic info), and information
display 2 (details).
● Switching display modes is not possible while the camera is
connected via Wi-Fi to devices other than printers.
Dening Displayed Shooting Data
You can set up the screens to display the information you want. For details
on the information displayed on each screen, see “Playback” (
=
175).
1
Access the setting screen.
● Select [Playback information display] on
the [ 4] tab and press the [ ] button.
2
Select the information to display.
● Press the [ ][ ] buttons or turn the [ ]
dial to choose the info you want displayed
and then press the [ ] button to add a
[ ].
● To return to the menu screen, press the
[
] button.
● Use the display sample on the left side of the screen to see what
your selected effect in step 2 will look like.
● Place a [
] on [Info display 2] to display settings info from [ ]
mode. When you press the [
] button, you will see [ ]
settings, followed by [Info Display 2].
● To stop movie playback, touch the
screen. This screen is displayed, and the
camera is ready for your next operation.
- Touch [
] to display the volume panel,
and then touch [ ][ ] to adjust the
volume.
- To switch frames, touch the scrollbar or
drag left or right.
- To resume playback, touch [
].
- Touch [
] to return to the screen in
step 2 of “Viewing” (
=
93).