79
Advanced Guide
Basic Guide
1
Camera Basics
2
Auto Mode /
Hybrid Auto Mode
3
Other Shooting Modes
Tv, Av, and M Mode
6
Playback Mode
7
Wi-Fi Functions
8
Set-Up Menu
9
Accessories
10
Appendix
Index
4
P Mode
5
Tv, Av, M, and C Modes
Before Use
● Peripheral illumination correction and chromatic aberration
correction cannot be applied to JPEG images already taken.
● When using a non-Canon lens, setting the corrections to [Disable]
is recommended, even if [Correction data available] is displayed.
● RAW images can be corrected with the Digital Photo Professional
software (
=
158).
● Setting [Peripheral illumin.] to [Enable] may cause noise in the
image periphery, depending on shooting conditions.
● The effects of chromatic aberration correction cannot be
viewed on RAW images with the camera. Use the Digital Photo
Professional software (
=
158) to view the correction instead.
● Your settings will be retained even after changing lenses, but no
correction will take place if no correction data has been added for
the new lens. If [Correction data not available] is displayed in step
2, use the EOS Utility software (
=
158) to add lens correction
data to the camera.
● If the effect of the correction is not visible, magnify the image and
check it again.
● The corrections are also applied when an Extender or Life-size
Converter is attached.
● If the lens does not have distance information, the correction
amount will be lower.
● The correction amount applied with [Peripheral illumin.] will be
slightly lower than the maximum correction amount that can be
set with the Digital Photo Professional software.
● The higher the ISO speed, the lower the peripheral illumination
correction value will be.
Lens Peripheral Illumination/Chromatic
Aberration Correction
Still Images
Movies
The unique properties of a lens may cause vignetting or color bleeding
around the contours of the subject. These phenomena can be corrected.
The camera comes with around 35 lenses worth of peripheral illumination/
chromatic aberration correction data. Use the EOS Utility software to view
the lens settings available; if your camera has no data for your lens, you
can add it to the camera. For details, refer to the EOS Utility instruction
manual (
=
158).
* There is no need to add data for EF-M lenses.
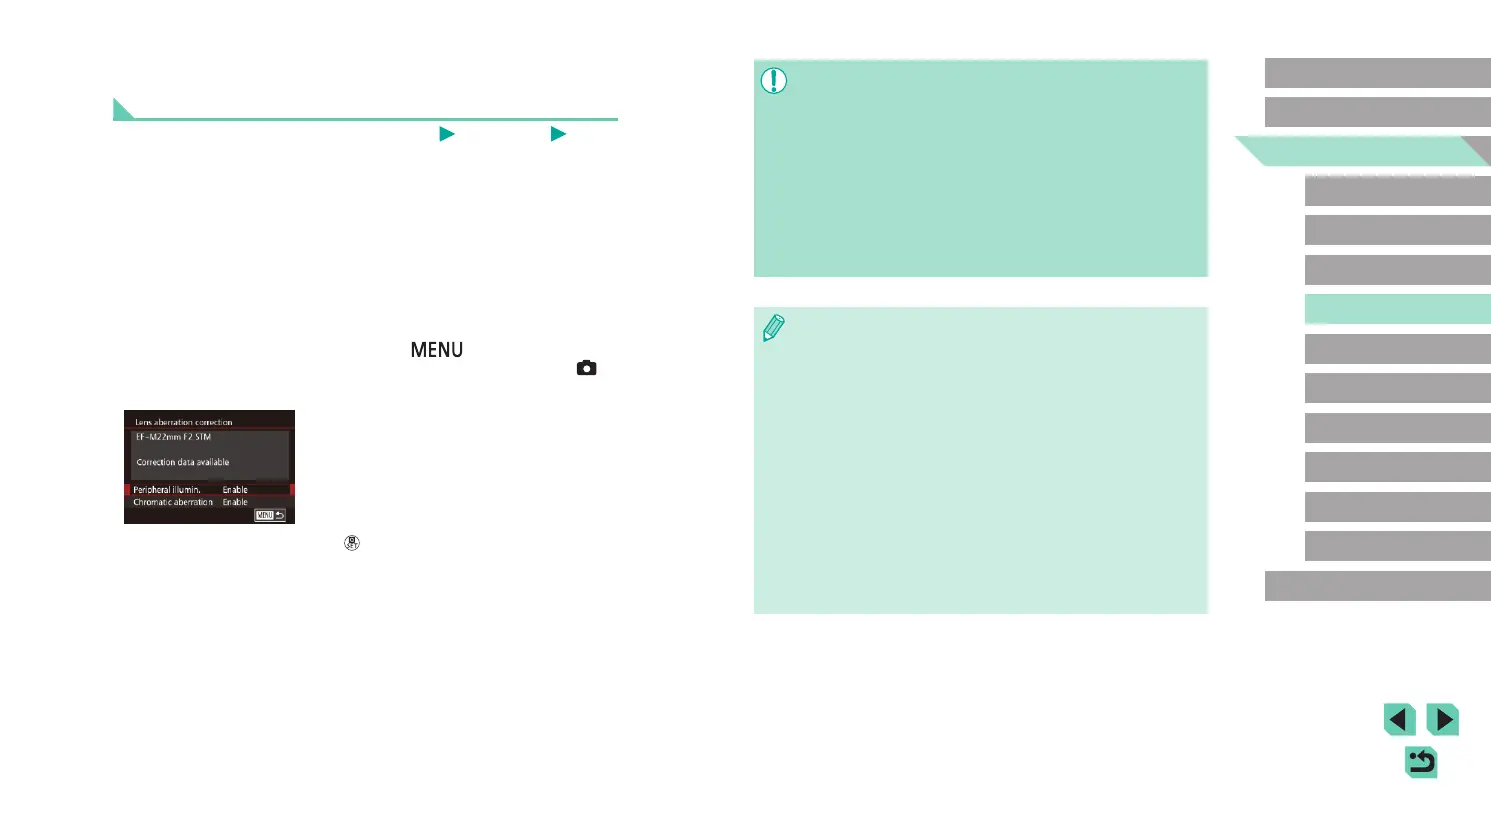
1
Select [Lens aberration correction].
● Press the [ ] button and choose
[Lens aberration correction] on the [ 2]
tab, and choose the option (
=
32).
2
Check if correction data is available.
● Conrm that [Correction data available] is
displayed for the attached lens.
3
Select the desired setting.
● Select the desired option and press the
[ ] button to set (
=
31).
 Loading...