[ ] (Mid-point eyedropper tool)
Click to move the tool to the part of the image (or the selected scan area) in the
pr
eview area that you want to be halftone. You can also manually enter a value from
5 up to 250 or move [
] on the slider.
[
] (White-point eyedropper
tool)
Click to move the tool to the part of the image (or the selected scan area) in the
pr
eview area that you want to be the lightest part. You can also manually enter a
value from 10 up to 255 or move [
] on the slider.
[ ] (Gray Balance eyedropper
tool)
For color images, click to move the tool to the part of the image (or the selected scan
ar
ea) in the preview area that you want to adjust gray balance. Grays in the scanned
image become halftone, while other original colors are faithfully reproduced.
[Reset] Restore all current settings to default settings.
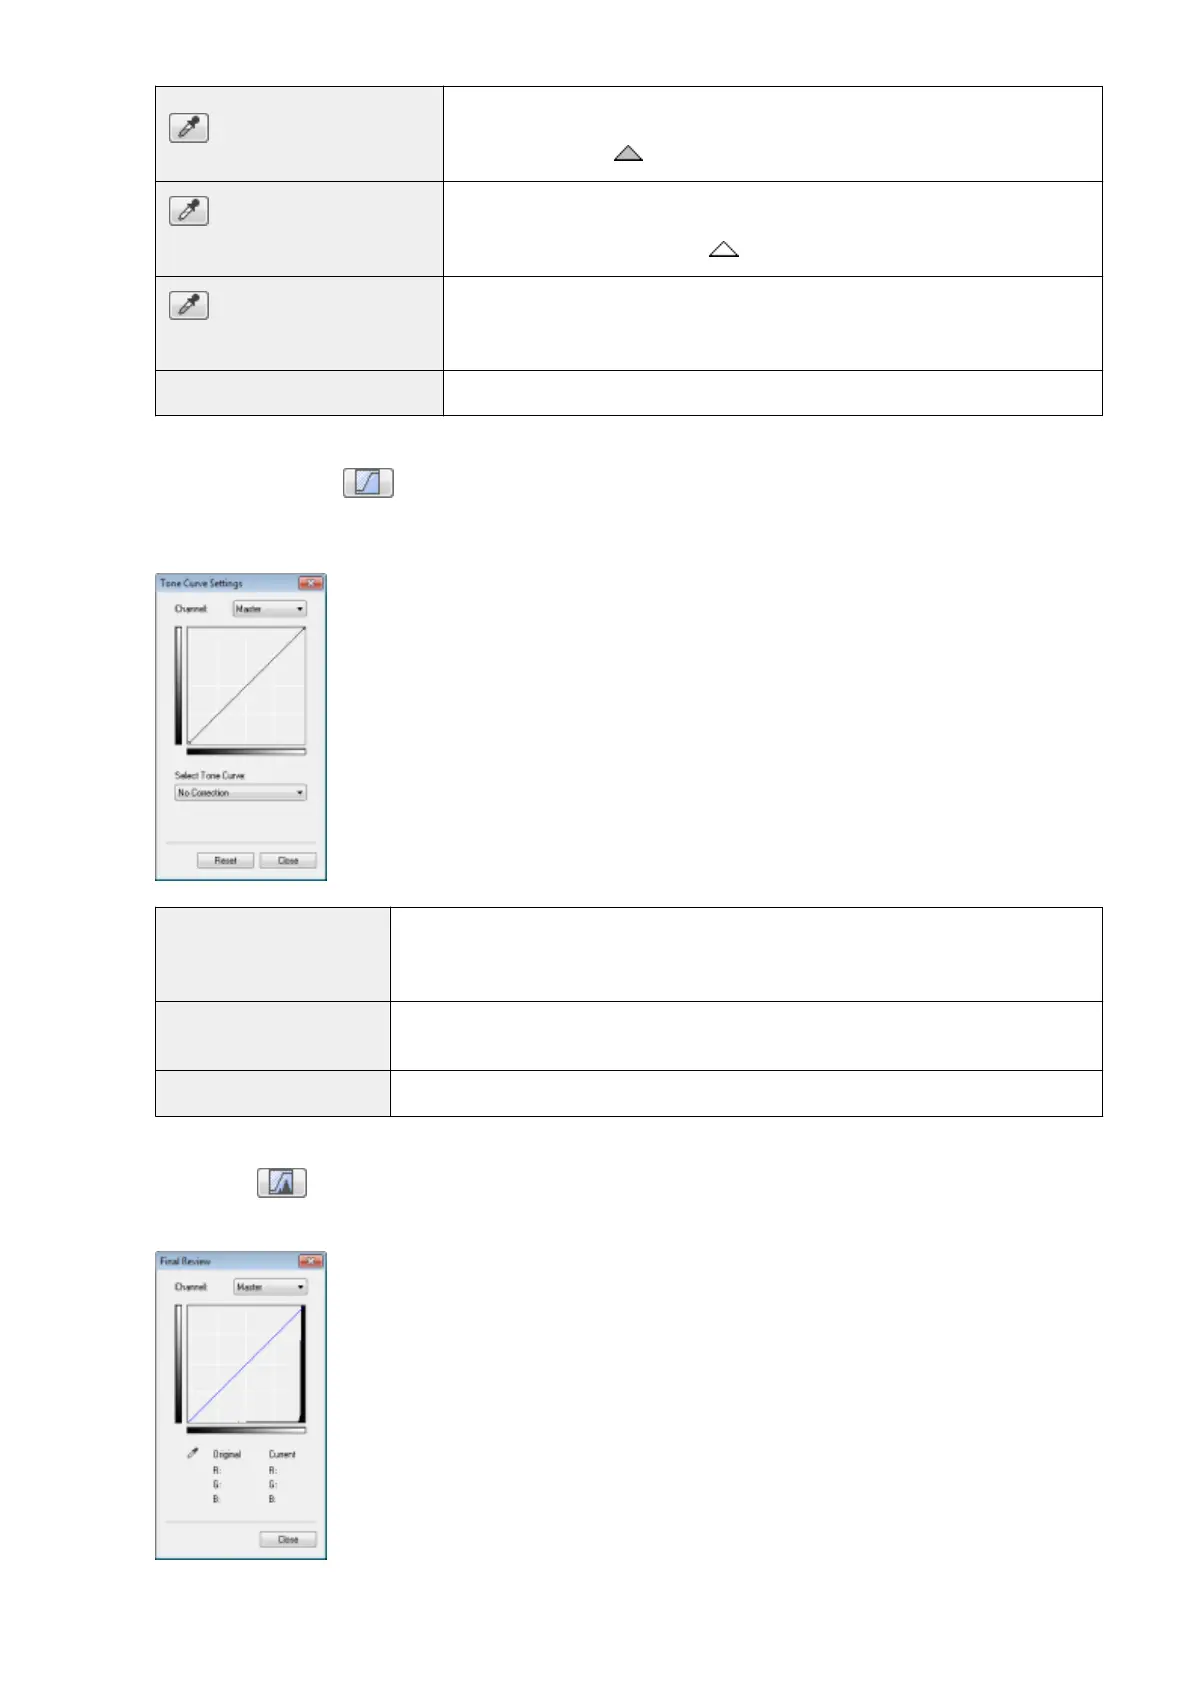
Tone Curve Settings
You can adjust the brightness of a specic part of the image b
y selecting your choice of tone curve in this dialog
box.
[Channel]
Select [Red], [Green], or [Blue] to adjust each color, or select [Master] to adjust all three
colors when [Color] or [Color (Documents)] is selected for [Color Mode].
Adjust gray when [Grayscale] is selected for [Color Mode].
[Select Tone Curve]
Select the tone curve type from [No Correction], [Over Exposure], [Under Exposure], [High
Contrast], and [Invert the Negative/Positive Image].
[Reset] Restore all current settings to default settings.
Final Review
You can conrm all the specied color settings in this dialog bo
x.
Scan
143