COPYRIGHT
©
2000 CANON INC. 2000 2000 2000 2000 CANON iR5000/iR6000 REV.0 JULY 2000
CHAPTER 3 INSTALLATION
3-10 S
Checks/remarks
Step
5
6
7
8
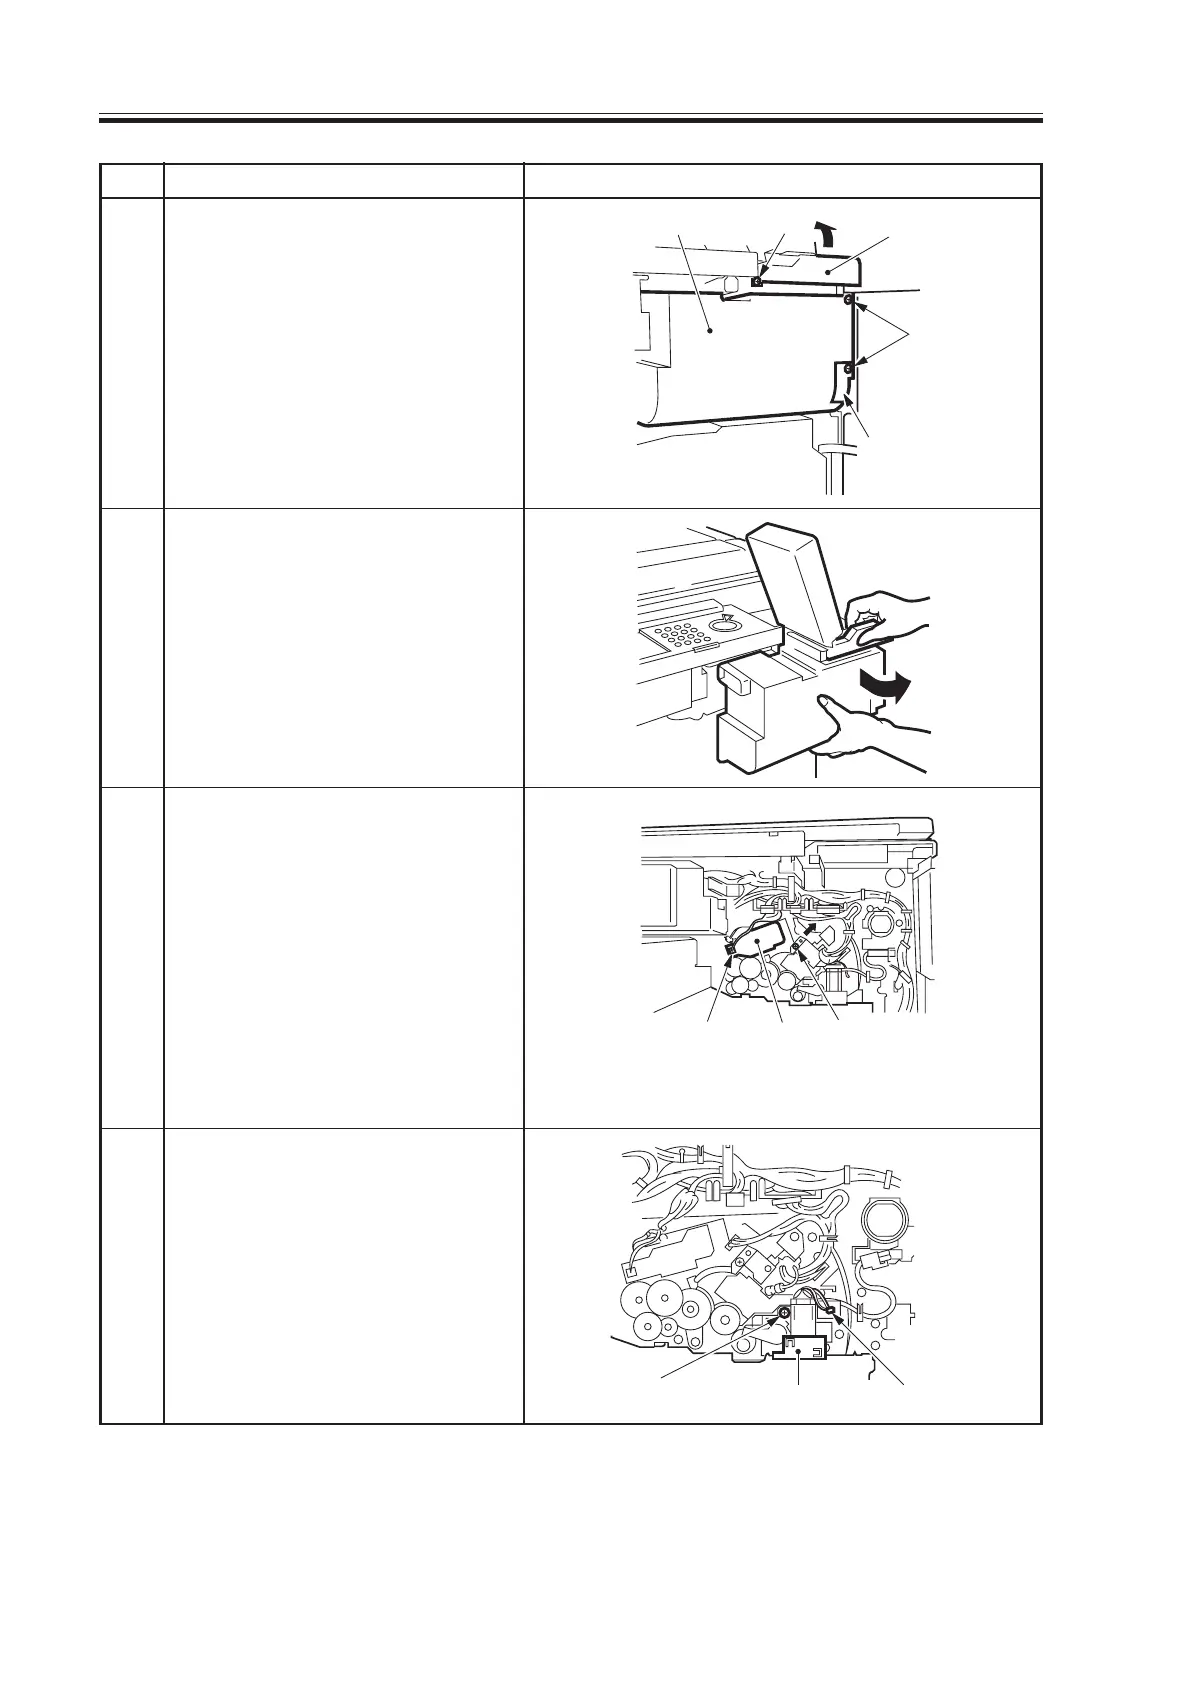
Work
Open the hopper cover, and re-
move the three screws and con-
nector cover; then disconnect the
connector.
Slide out the hopper unit to the
front, and turn it to the front right
by 90°.
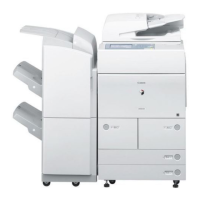
Loosen the screw; then shift the
charging assembly fixing mem-
ber in the direction of the arrow
(right upper), and secure it in
place with a screw.
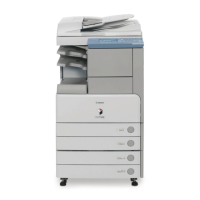
Disconnect the connector, and
take out the primary charging as-
sembly.
Check the primary charging as-
sembly; if dirt or paper lint are
found, clean it with alcohol.
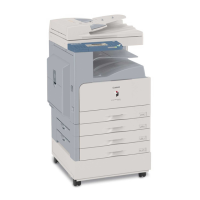
Disconnect the connector, and
remove the screw; then take out
the pre-transfer charging assem-
bly.
Check the pre-transfer charging
assembly; if dirt or paper lint are
found, clean it with alcohol.
Hopper assembly Screw Hopper cover
Connector cover
Connector Primary
charging
assembly
Screw
Screw
Cleaner screw retainer
Connector
Download Free Service Manual at http://printer1.blogspot.com