14
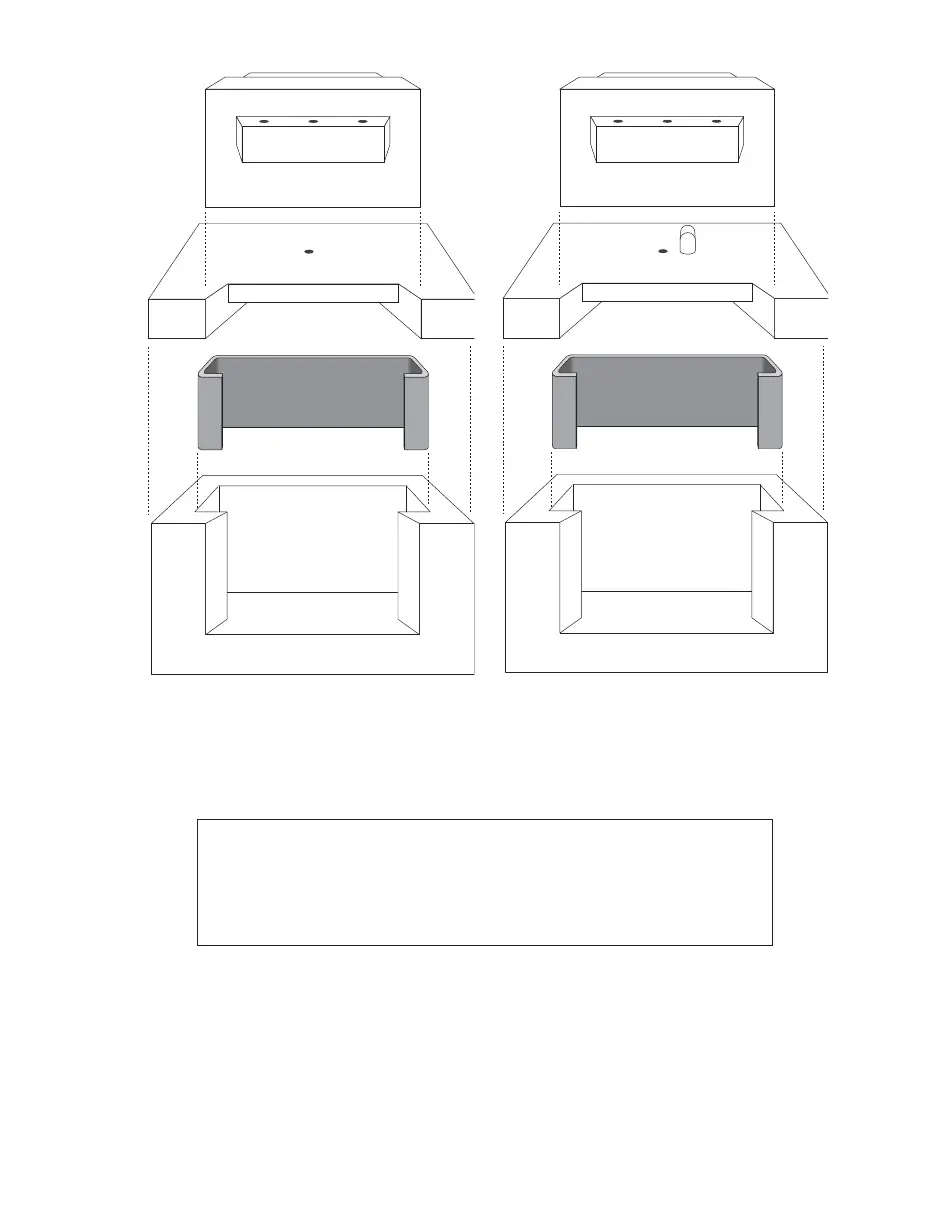
Figure 8. Phoenix Furnace
(Exploded View)
Figure 9. Phoenix AirWave Furnace
(Exploded View)
13. Remove the thermocouple access door from the top of the cover.
CAUTION
The thermocouple ports in the muffl e furnace and the instrument
cavity must be properly aligned to avoid damage to the muffl e fur-
nace.
14. Carefully lower the thermocouple through the thermocouple port of the
instrument into the port in the top of the muffl e furnace.
15. Place the furnace door in position.
16. Tighten the thermocouple nut fi nger tight; then, using the 7/16” wrench
provided with the instrument accessories, tighten the nut an additional 3/4 turn.