(10) Cradle assembly is now ready to be removed
from vehicle using the following procedure. A helper
will be required when removing cradle assembly
from vehicle.
• Loosen but do not fully remove the 2 rear cradle
assembly to body attaching bolts (Fig. 17).
• Loosen and remove the 2 front cradle assembly to
body attaching bolts (Fig. 17).
• With a helper supporting rear of cradle assembly
and the jack stand supporting transaxle. Remove the
2 rear cradle assembly to body attaching bolts (Fig.
17).
• Slowly lower front jack stand until weight of en-
gine is supported by engine support fixture and mo-
tor mount bolts are clear of cradle assembly. With a
helper at rear of cradle assembly, lift front of cradle
assembly off jack stand and remove from vehicle.
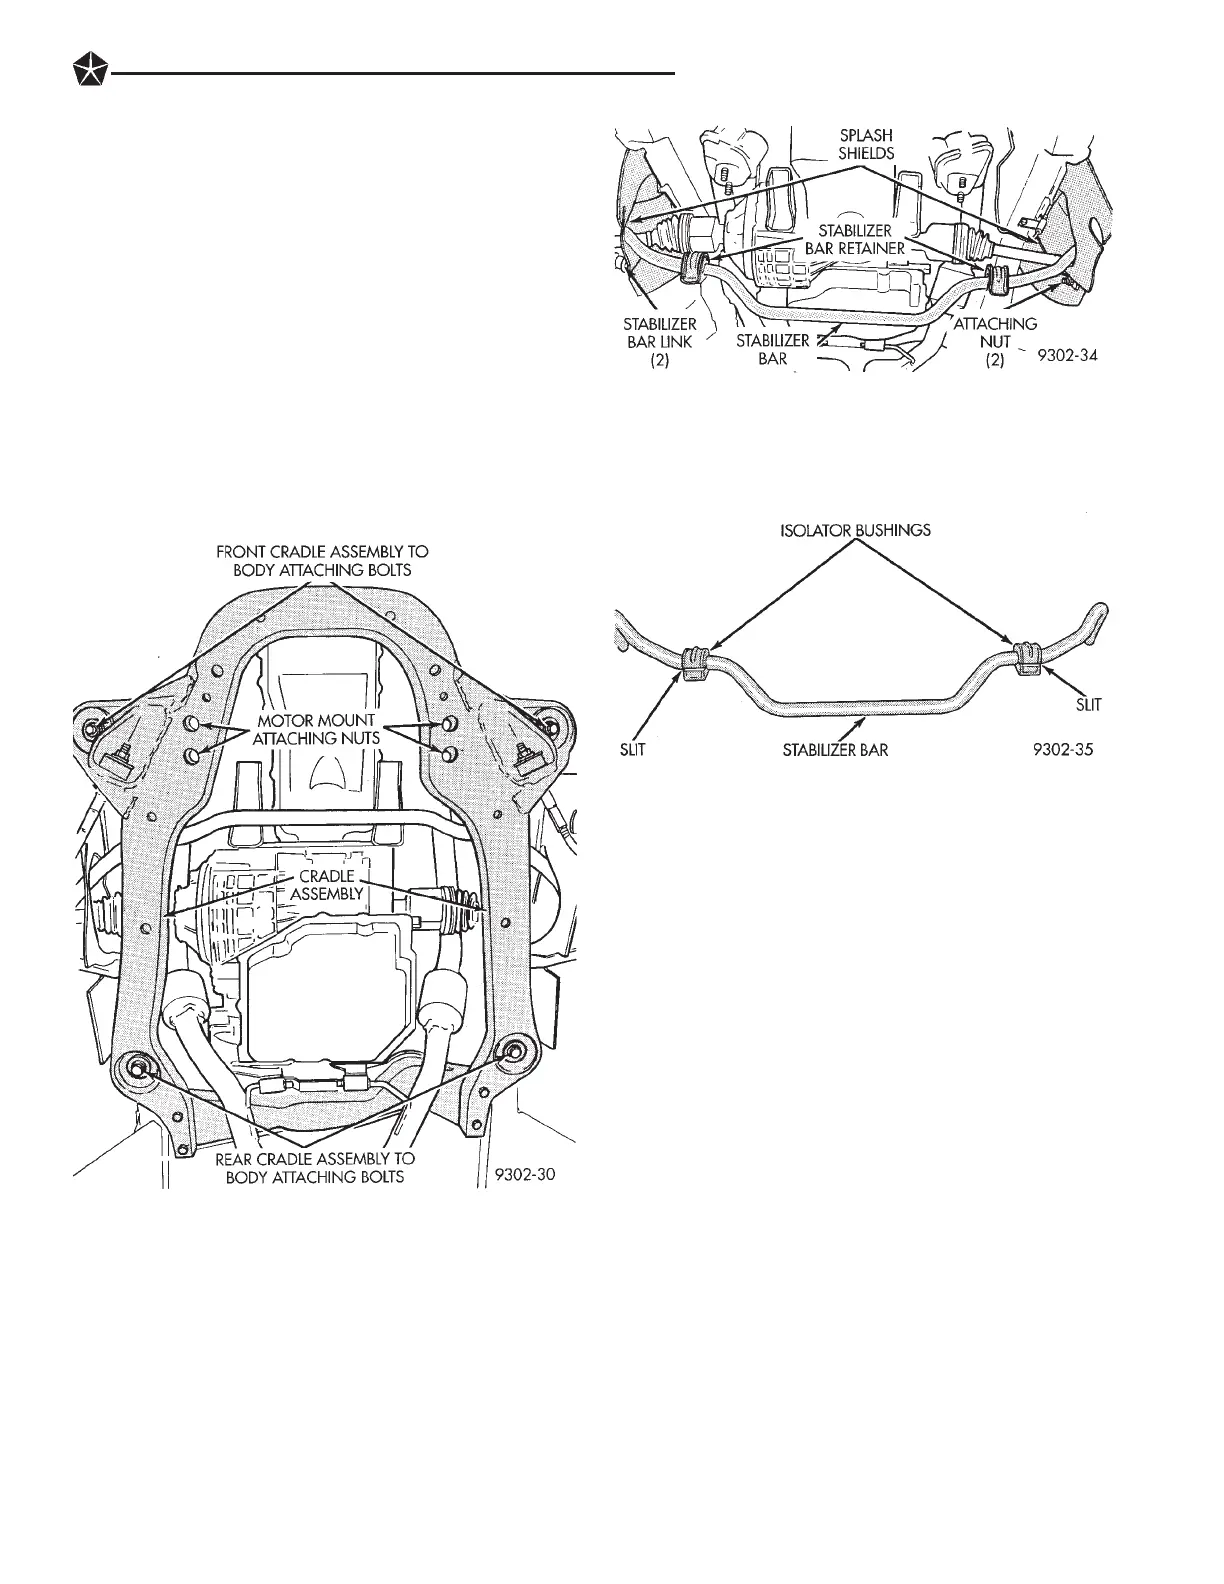
(11) After cradle assembly is removed from vehi-
cle. Remove the 2 stabilizer bar, to stabilizer bar link
attaching nuts (Fig. 18). Remove stabilizer bar as-
sembly from vehicle.
STABILIZER BAR AND BUSHING INSPECTION
Inspect for broken or distorted retainers and bush-
ings. If bushing replacement is required, bushing can
be removed by opening slit in bushing and removing
bushing from around stabilizer bar. The stabilizer
bar to cradle assembly bushings, should be positioned
on stabilizer bar, so slit in bushing is positioned to-
ward front of vehicle (Fig. 19).
CRADLE ASSEMBLY INSTALLATION ALL ENGINES
(1) Install stabilizer bar, isolator bushings and re-
tainers back in vehicle as an assembly (Fig. 18). Be
sure stabilizer bar in installed through openings in
splash shields (Fig. 18). Install the stabilizer bar link
to stabilizer bar attaching nuts. Torque stabilizer bar
link to stabilizer bar attaching nut to 95 NIm (70 ft.
lbs.).
(2) Tie stabilizer bar up against the 2 transaxle to
engine block brackets (Fig. 20). This will keep stabi-
lizer bar out of the way when installing cradle as-
sembly.
(3) With the aid of a helper raise cradle assembly
(Fig. 1) back up into vehicle, resting front of cradle
assembly on a jack stand. Then use following proce-
dure to install cradle assembly back into vehicle.
• With the aid of a helper, raise rear of cradle as-
sembly up far enough by hand to start the 2 rear cra-
dle assembly to body attaching bolts (Fig. 21). Install
bolts far enough to securely hold cradle assembly in
place but DO NOT TIGHTEN.
• Using jack stand raise front of cradle assembly up
against bottom of motor mounts. Be sure all 4 motor
mount studs come through holes in cradle assembly.
Fig. 17 Cradle Assembly To Body Attaching
Locations
Fig. 18 Stabilizer Bar Removal And Installation
Fig. 19 Isolator Bushings Installed On Stabilizer Bar
SUSPENSION AND DRIVESHAFTS 2 - 27
 Loading...