Step 3
Hold the chassis in position against the mounting rails while the second person finger-tightens a screw to the rack rails
on each side of the chassis.
Step 4
Finger-tighten screws to the rack rails on each side of the chassis.
Step 5
Tighten all screws on each side to secure the chassis to the equipment rack (see the following image).
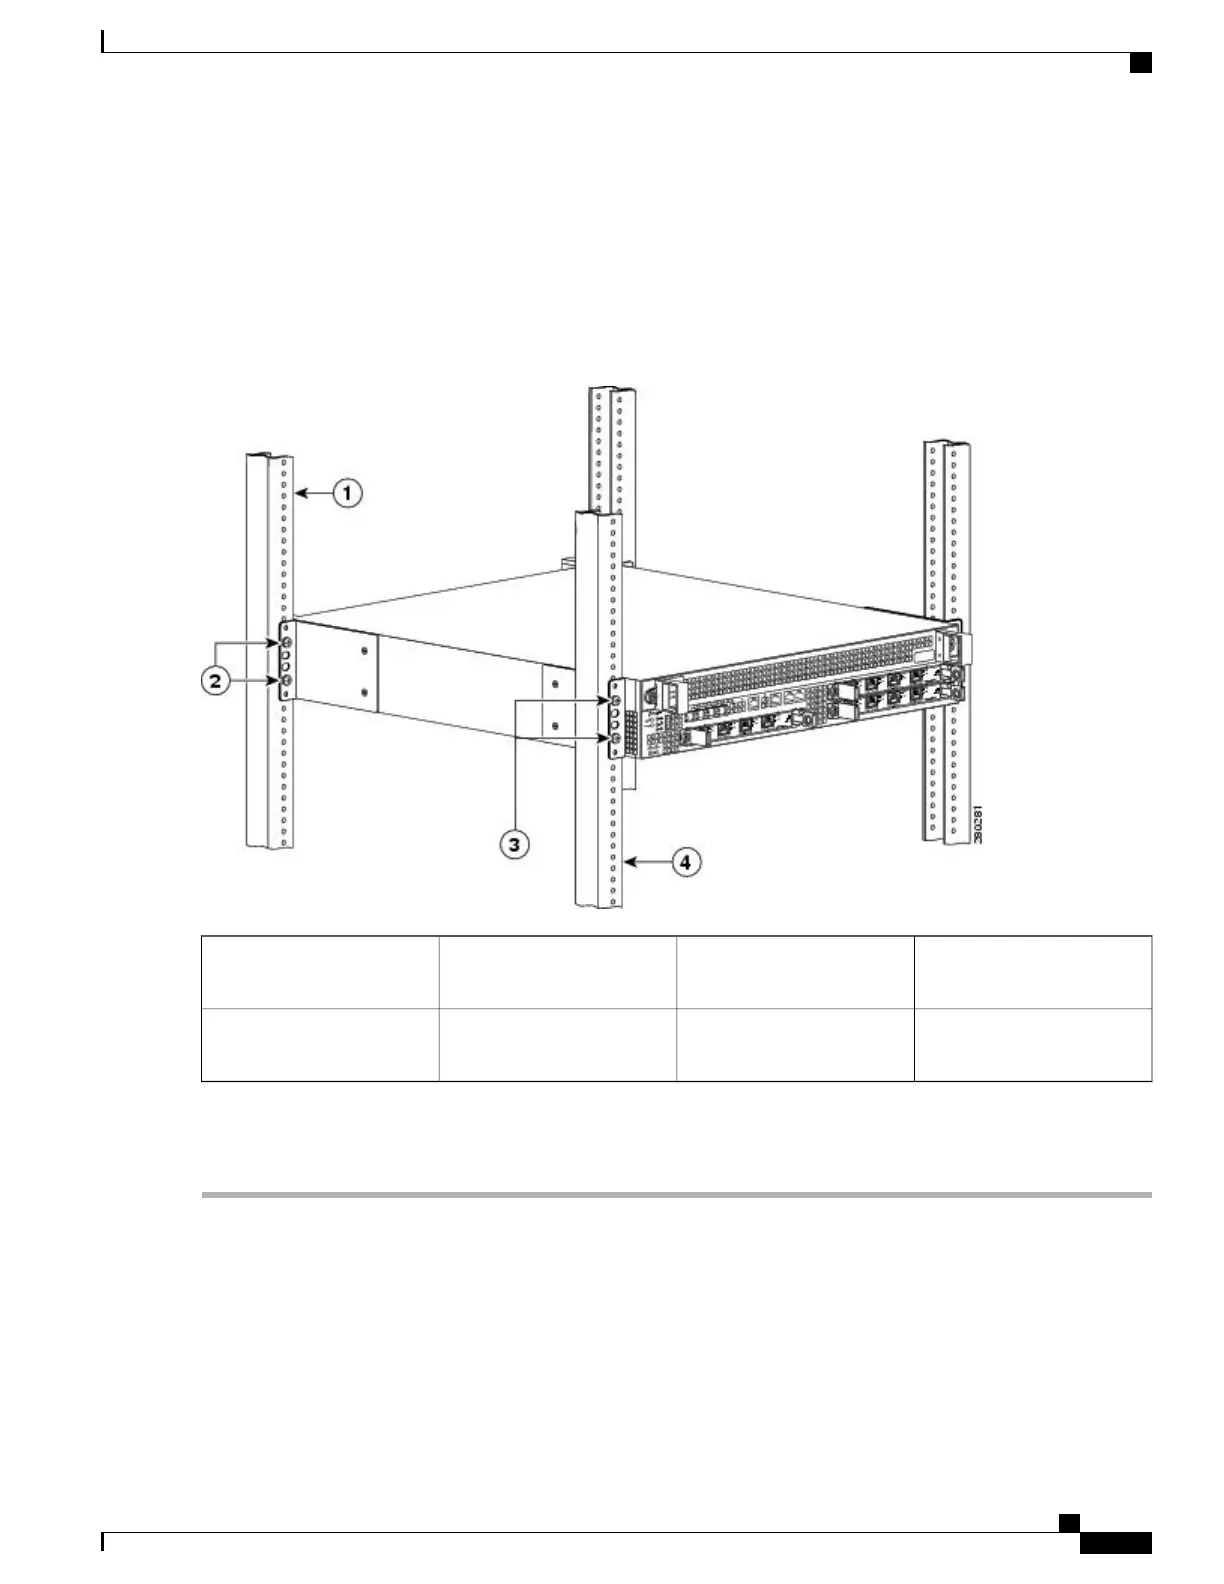
Figure 93: Cisco ASR 1002 Router on a Four-Post Rack
—
Front and Rear Rack-Mounting
Front rack-mount bracket ear
and holes
3Rear rack equipment rail1
Front rack equipment rail4Rear rack-mount bracket ear
and holes
2
Step 6
Use a level to verify that the tops of the two brackets are level, or use a measuring tape to verify that both brackets are
the same distance from the top of the rack rails.
What to Do Next
This completes the procedure for installing the chassis in the rack. Proceed to the Attaching the
Cable-Management Bracket, on page 248 to continue the installation.
Cisco ASR 1000 Series Router Hardware Installation Guide
247
Cisco ASR 1002 Router Overview and Installation
Four-Post Rack Installation

 Loading...


