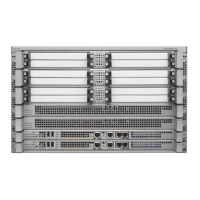
Attaching the Cable-Management Bracket
The cable-management brackets mount to each rack-mount bracket on the chassis to provide cable-management
to both sides of the chassis (parallel with card orientation). These brackets are screw mounted to the rack-mount
brackets to allow easy installation and removal of cables.
The cable-management brackets for the Cisco ASR 1013 are used in four places on the chassis. Each section
contain four independent cable-management “U” type feature hooks with two screws each as shown in Figure
185: Cable-Management Brackets Installed on the Cisco ASR 1013 Router, on page 387. For Cisco ASR 1000
SIPs, these brackets work in tandem with shared port adapter product feature cable-management device to
allow installation and removal of adjacent cards without the need to remove cables.
Make certain that the cable-management bracket “U” type feature is facing upwards when you attach it to
the chassis.
Note
Follow these steps to attach two cable-management brackets to each side of the Cisco ASR 1013 Router in
the rack:
SUMMARY STEPS
1.
Align the cable-management bracket to the rack-mount bracket on the top of each side of the Cisco ASR
1013 Router. The cable-management bracket aligns to the top hole of the chassis rack-mount bracket.
2.
Using a Phillips screwdriver, insert the screw through cable-management bracket and into the chassis
rack-mount and tighten the screw.
3.
Using the bottom rack-mount ear hole on each side of the chassis, insert the screw through
cable-management bracket and into the chassis rack-mount)
DETAILED STEPS
Step 1
Align the cable-management bracket to the rack-mount bracket on the top of each side of the Cisco ASR 1013 Router.
The cable-management bracket aligns to the top hole of the chassis rack-mount bracket.
Step 2
Using a Phillips screwdriver, insert the screw through cable-management bracket and into the chassis rack-mount and
tighten the screw.
Use the package of screws that came with your chassis containing eight screws.Note
Step 3
Using the bottom rack-mount ear hole on each side of the chassis, insert the screw through cable-management bracket
and into the chassis rack-mount)
Cisco ASR 1000 Series Router Hardware Installation Guide
386
Cisco ASR 1013 Router Overview and Installation
Attaching the Cable-Management Bracket

 Loading...


