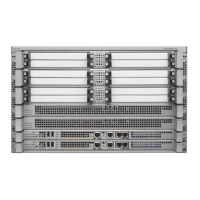
Two-post equipment rack
rail
2Cisco ASR 1013 Router
front rack-mount bracket
1
Inner clearance (the width between the inner sides of the two posts or rails) must be at least 19 inches
(48.26cm). The height of the chassis is 10.45 inches (26.543 cm). Airflow through the chassis is from
front to back.
Note
If you are using a two-post rack secure the rack to the floor surface to prevent tipping and avoid bodily
injury and component damage.
Caution
To install the Cisco ASR 1013 chassis on a two-post equipment rack, with the forward rack-mount brackets,
follow these steps:
SUMMARY STEPS
1.
Position the chassis so the front is closest to you and lift it carefully into the rack. To prevent injury, avoid
any sudden twists or moves.
2.
Slide the chassis into the rack, pushing it back until the brackets meet the mounting strips or posts on both
sides of the rack.
3.
Keeping the brackets flush against the posts or mounting strips, align the holes in the brackets with the
holes on the rack or mounting strip.
4.
For each bracket, insert and tighten two screws to the rack on both sides.
DETAILED STEPS
Step 1
Position the chassis so the front is closest to you and lift it carefully into the rack. To prevent injury, avoid any sudden
twists or moves.
Step 2
Slide the chassis into the rack, pushing it back until the brackets meet the mounting strips or posts on both sides of the
rack.
Step 3
Keeping the brackets flush against the posts or mounting strips, align the holes in the brackets with the holes on the rack
or mounting strip.
Step 4
For each bracket, insert and tighten two screws to the rack on both sides.
Use the third hole up from the bottom of the rack-mount bracket and the third hole down from the top of the
rack-mount bracket. See “Cable-Management Brackets Installed on the Cisco ASR 1013 Router” figure in the
Attaching the Cable-Management Bracket section for the position and location of the ear holes on the rack-mount
bracket.
Note
What to Do Next
This completes the procedure for installing the chassis on a two-post rack. Proceed to the Attaching a Chassis
Ground Connection, on page 388 to continue the installation.
Cisco ASR 1000 Series Router Hardware Installation Guide
382
Cisco ASR 1013 Router Overview and Installation
Two-Post Rack Installation

 Loading...


