Managing the System
Network Services
Cisco Small Business NSS300 Series Smart Storage Administration Guide 144
3
To configure advanced options:
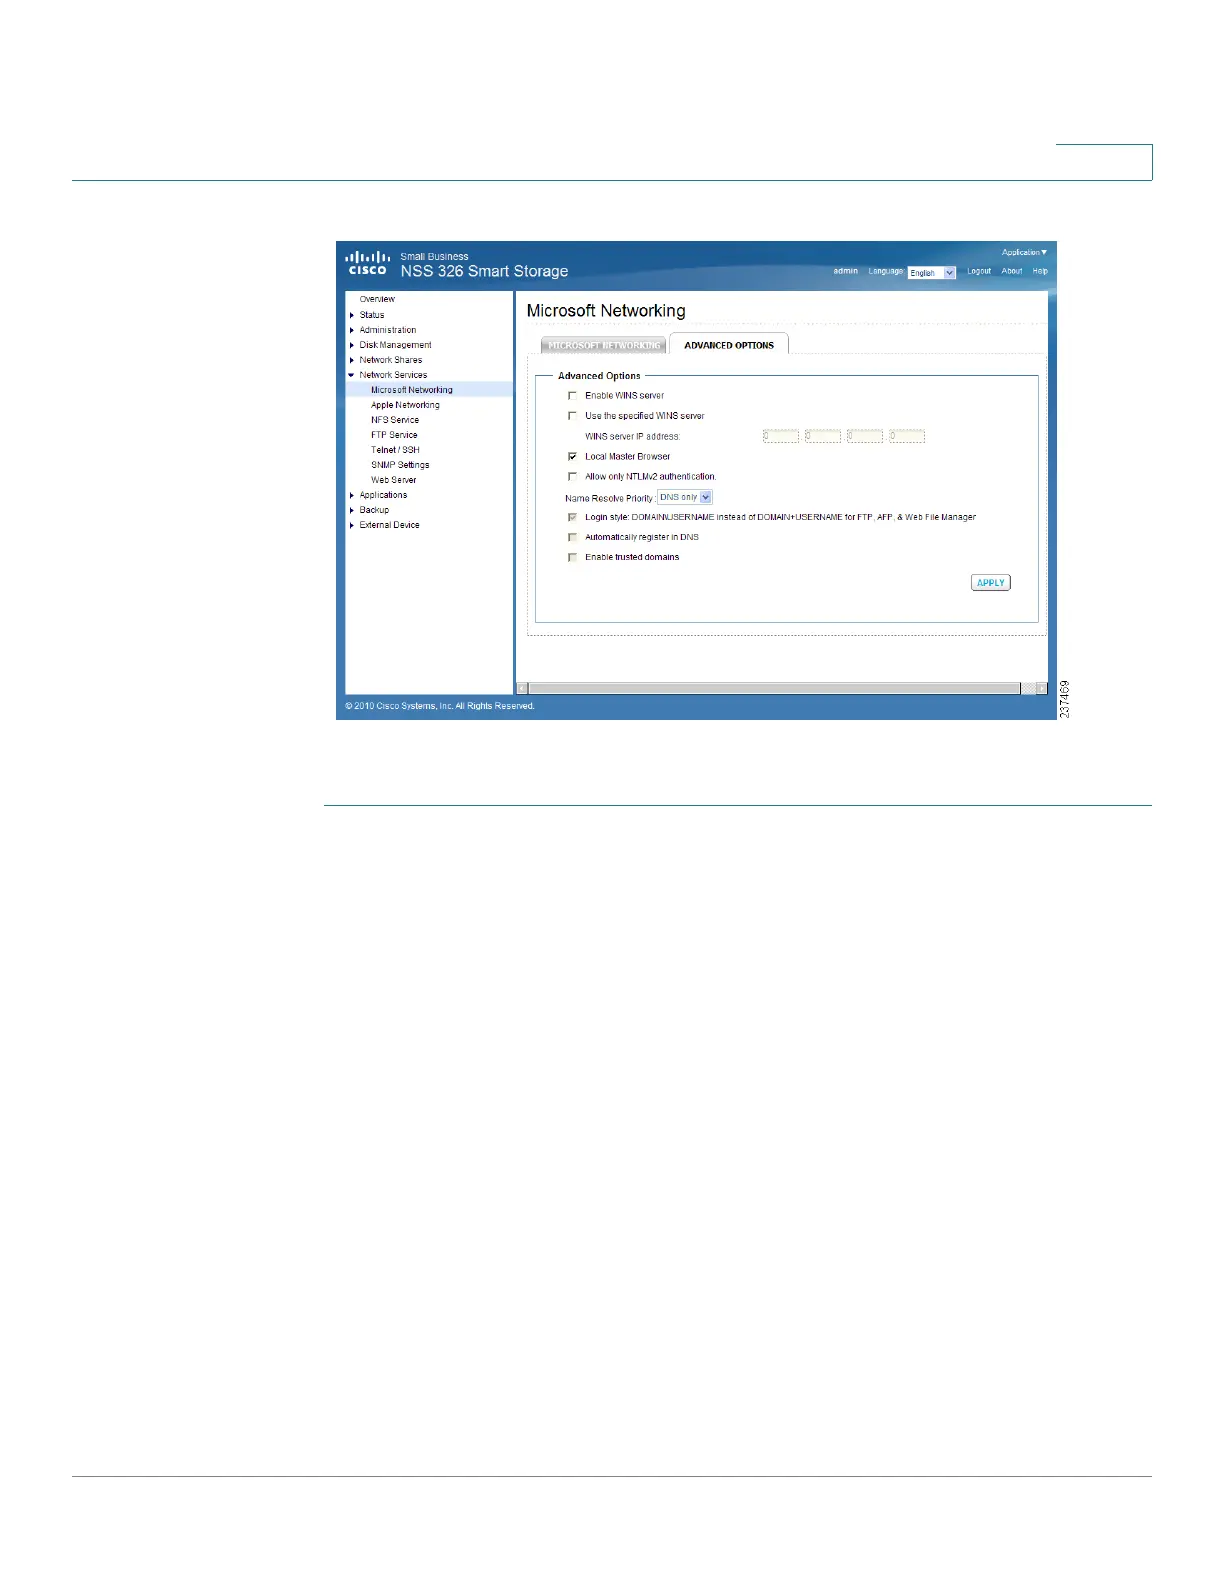
STEP 1 Choose Network Services > Microsoft Networking > Advanced Options from
the Navigation menu. The Advanced Options window opens.
STEP 2 Click Enable WINS server to allow the NAS AD configuration to support WINS
server functionality.
STEP 3 If there is an existing WINS server on your network and your workstation is
configured to use that WINS server for name resolution, you must specify your
WINS server IP address on the NAS. Click the check box Use the specified WINS
server to enable the specified WINS server and enter the WINS server IP address.
STEP 4 Click Local Master Browser to make the NAS responsible for keeping track of
computers available on the network or the computers that have announced
themselves as master browser for offering services.
NOTE Do not set this NAS to be the domain master if a Windows system is
already set as the domain master within your network.
STEP 5 Click Allow only NTLMv2 authentication to require login to the shared folders
only with NTLMv2 authentication. If the option is turned off, NTLM (NT LAN
Manager) will be used by default and NTLMv2 can be negotiated by the client.
The default setting is disabled.