Managing the System
Administration
Cisco Small Business NSS300 Series Smart Storage Administration Guide 55
3
To set the daylight savings time:
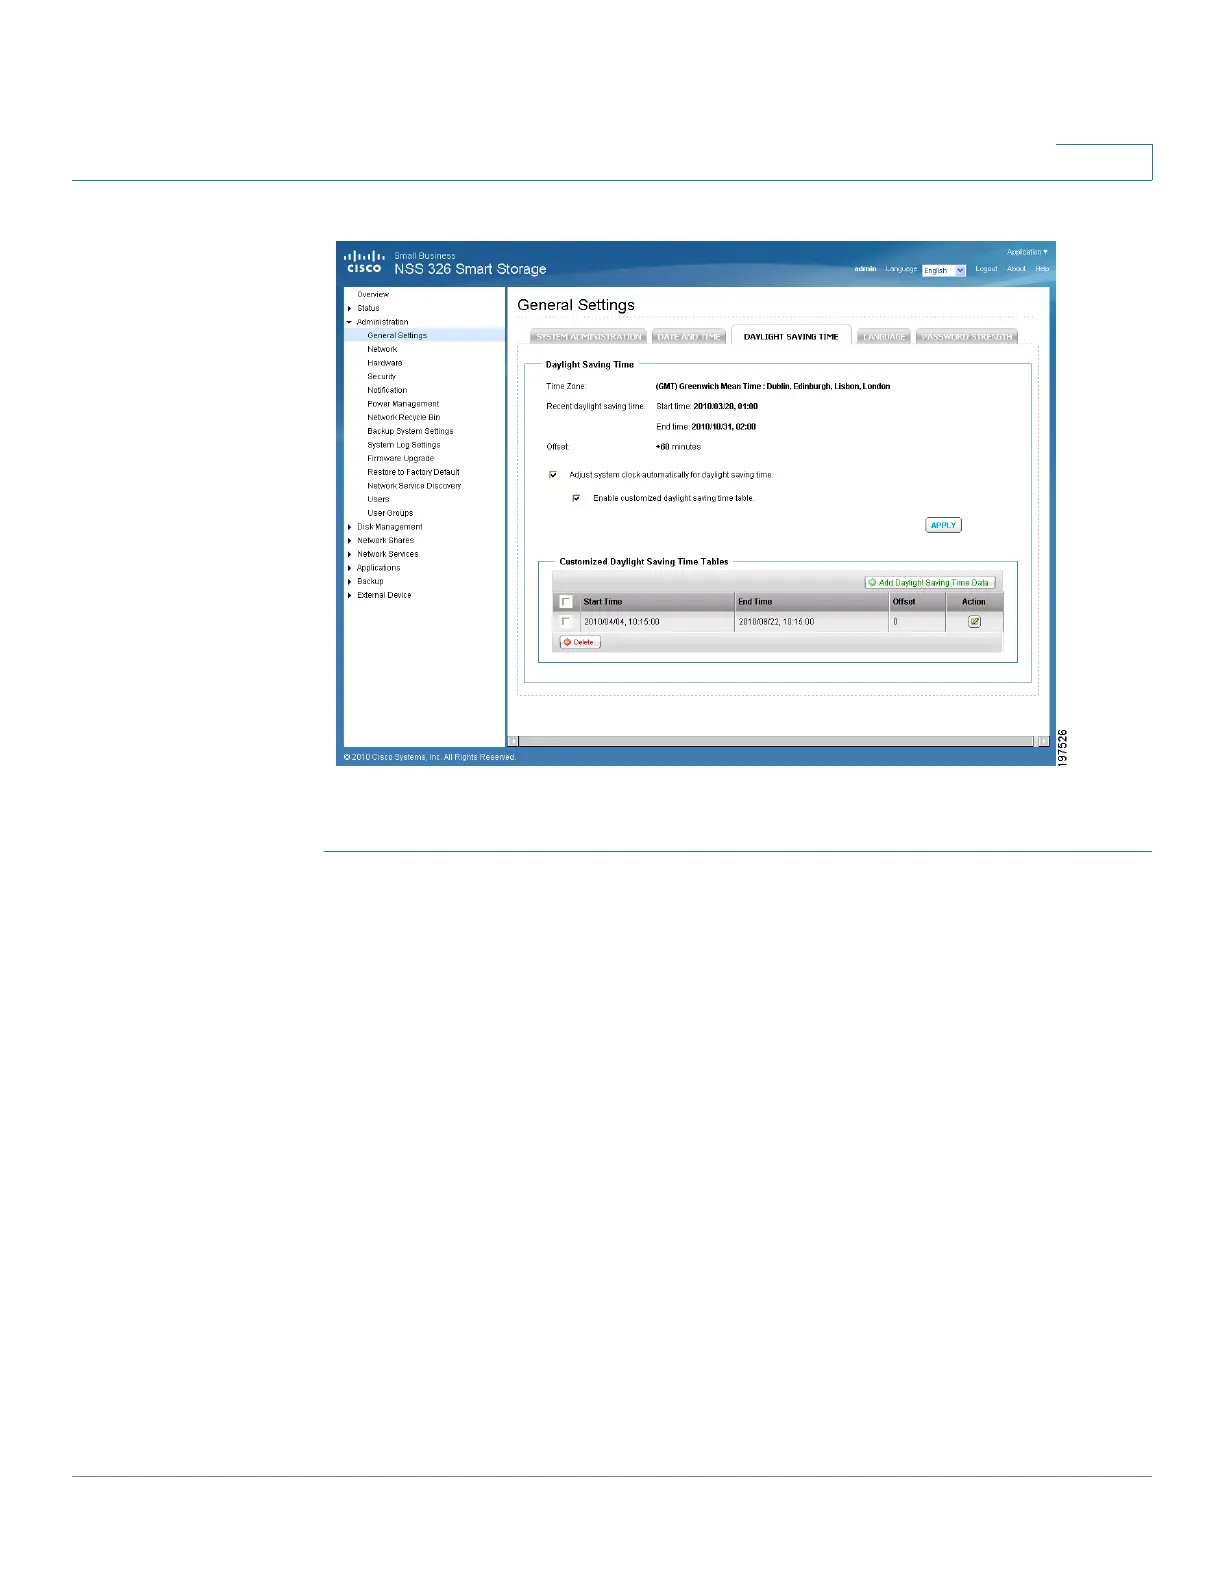
STEP 1 Choose Administration > General Settings > Daylight Savings Time from the
Navigation menu. The Daylight Savings Time window opens.
The following parameters are displayed:
• Time Zone—Current time zone that the NAS is set to. To change this value,
see Date and Time, page 53.
• Recent daylight saving time—Range of time set by the current Daylight
Saving Time settings.
• Offset—Current time offset by daylight savings time.
STEP 2 If needed, set the following parameters:
• Adjust system clock automatically for daylight saving time—Click the
check box to enable the NAS to automatically adjusts its time settings to
accommodate daylight savings time.
- Enable customized daylight saving time table—Click the check box to
create a custom Daylight Savings Time table. When selected, the
Customized Daylight Saving Time Tables opens. Click Add Daylight