Configuration 5
October 2013 GB 33 /80
4
Tap the <OK> button.
– The entries are saved.
–
The menu "Timer Start/Stop" appears.
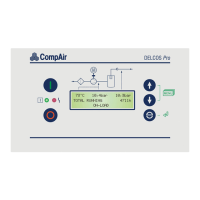
Programming the compressor for the late
shift
1
Tap button <Channel 2>.
– The input menu for setting start time, end
time and weekday appears.
Timer Start/Stop
Set Channel 2
Start
OK
Mo.
Tu.
We.
Th. Fr. Sa.
Su.
Delete Channel
Cancel
Stop
Day of the Week
16
50
24
00
Fig. 5-27: Input menu "Timer Start/Stop" for timer con-
trol channel 2 (condition after programming)
2
Press buttons <+> and <-> to set the start and
end times.
3
Tap button <Day of the Week>, to specify the
weekdays on which the time setting should be-
come effective.
Button <Delete Channel> causes all entries to
be discarded.
Data entry is cancelled by tapping the button
<Cancel>. The functionality previously allocated
to the timer control channel is used.
4
Tap the <OK> button.
– The entries are saved.
–
The menu "Timer Start/Stop" appears.
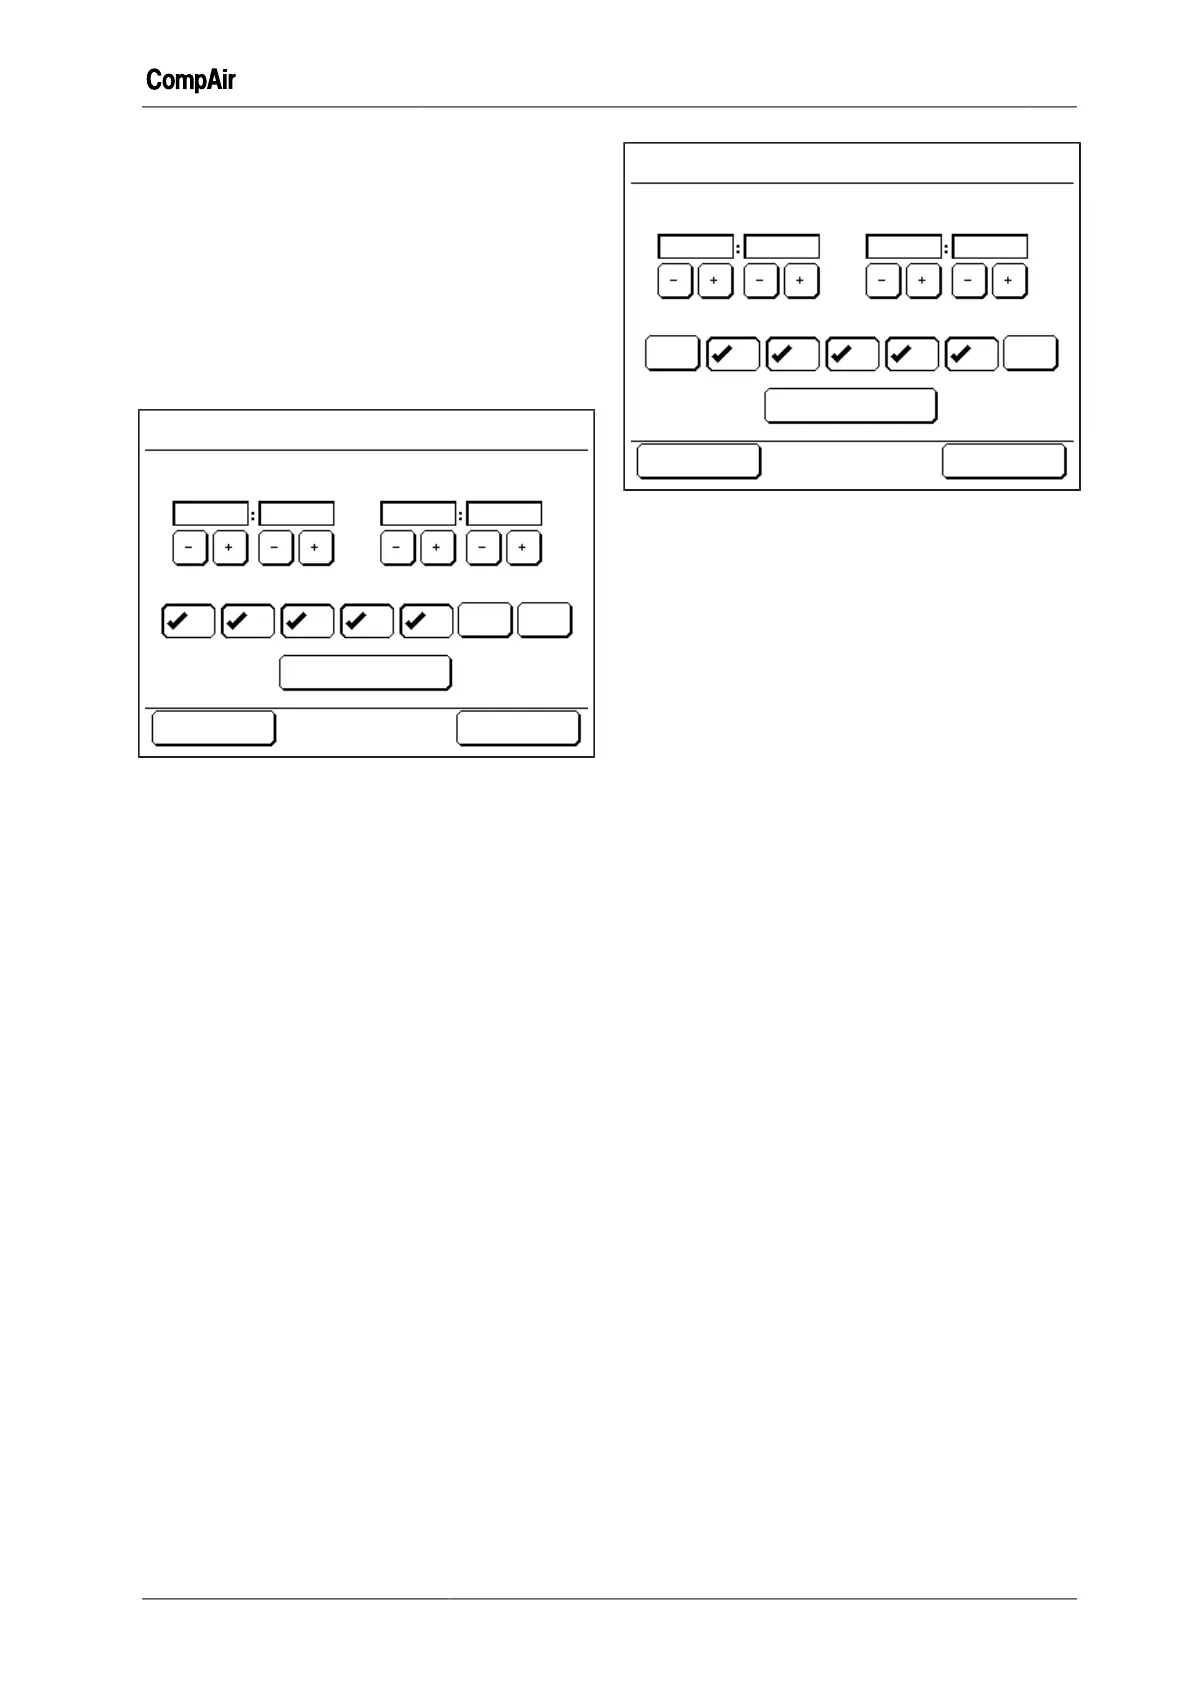
Programming additionally required timer con-
trol channels
Each timer control channel can only cover a range
from 00:00 to 24:00. An additional timer control
channel is required for the period from 00:00 to
01:10.
1
Tap button <Channel 3>.
– The input menu for setting start time, end
time and weekday appears.
Timer Start/Stop
Set Channel 3
Start
OK
Mo.
Tu.
We.
Th. Fr. Sa.
Su.
Delete Channel
Cancel
Stop
Day of the Week
00
00
01
10
Fig. 5-28: Input menu "Timer Start/Stop" for timer con-
trol channel 3 (condition after programming)
2
Press buttons <+> and <-> to set the start and
end times.
3
Tap button <Day of the Week>, to specify the
weekdays on which the time setting should be-
come effective.
Button <Delete Channel> causes all entries to
be discarded.
Data entry is cancelled by tapping the button
<Cancel>. The functionality previously allocated
to the timer control channel is used.
4
Tap the <OK> button.
– The entries are saved.
–
The menu "Timer Start/Stop" appears.
Start/Stop Schedule
The summary screen "Start/Stop Schedule"
makes it possible to graphically summarise the
settings made.
1
Tap the <Settings> tab.
2
Tap the <Timer Control...> button.
3
Tap button <Timer Start/Stop>.
4
Tap button <Start/Stop Schedule>.
–
The screen "Start/Stop Schedule" appears.

 Loading...