15
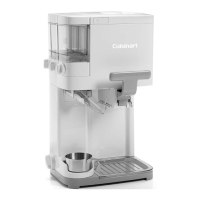
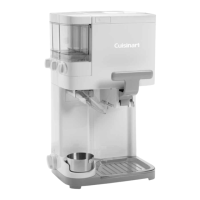
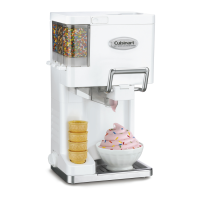
3. PRODUCT FEATURES (refer to cover)
1. Easy-Lock Lid with Opening
2. Three Topping Containers
3. Topping Dispensing Dials
4. Toppings Chute
5. Dispensing Handle
6. Keep Warm with Stainless Steel Cup
7. Removable Drip Tray
8. Cone Holder (Not Shown)
9. Mixing Paddle (Not Shown)
10. 1.42L Ice Cream Bowl (Not Shown)
11. Power Dial (Not Shown)
12. Toppings Mix In Gauge (Not Shown)
4. USE
A. BEFORE FIRST USE
Before using your Soft Serve Ice Cream Maker for the rst time, ensure all packaging is removed
and it’s placed on a at surface. Clean the lid, freezer bowl and mixing paddle in warm, soapy
water.
N.B. Do not clean any of the parts with abrasive cleaners or hard implements.
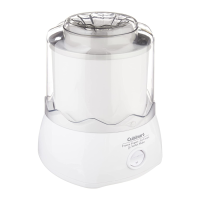
Preparing the Freezer Bowl
The freezer bowl must be completely frozen before you begin. Before freezing, wash and dry the
bowl. Wrap it in a plastic bag to prevent freezer burn. The length of time required to freeze in the
freezer, depends on the temperature of your freezer.
In general, freezing time should be a minimum of 24 hours, with a freezer temperature of -18˚C
or cooler. To determine whether the bowl is completely frozen, shake it. If you do not hear liquid
moving, the cooling liquid is frozen.
We recommend that you place the freezer bowl in the back of your freezer, where it is coldest.
Place the freezer bowl on a at surface, in its upright position, for even freezing. For convenience,
leave your freezer bowl in the freezer at all times. It will be ready for immediate use, at any time.
Assembling the Soft Serve Ice Cream Maker
N.B: The bowl will begin to defrost rapidly after being removed from the freezer. Have your recipe
prepared before assembling the ice cream maker, to ensure perfect results.
1. Remove the freezer bowl from the freezer. Place the freezer bowl into the main housing of the
ice cream maker. Locate and align the mixing paddle into the hole, on the underside of the lid.
Align and push into place until it clicks and locks into place. (Fig.1)
2. Slide the topping containers into the indent on the side of the ice cream maker, so they are
rmly in place. Place the lids over the top.
NOTE: The topping containers with the rounded edges should be inserted into the side spaces.
3. Attach the dispensing arm with the handle. Place the dispensing arm, so that it sits right