95XF series Removal and installation
EXPLANATORY NOTES ON THE MAINTENANCE ACTIVITIES
4-35
7. Slide the appropriate centring flange (D) on
the c entring spindle (E).
8. Fit the locking plate (C) and the nut (B) on
the c entring spindle (E).
9. Align the centring flange (D) on the outer
race of the outer wheel bearing and
hand-tighten nut (B) (max. 20 Nm). The
centring s pindle (E) must be installed in the
hub (2) f ree of play.
Note:
Fit the dummy sensor ring (G) to the
draw-in flange (H) if the wheel hub (2) is
notequipped with a sensor ring (5).
Fit the draw-in flange (H) without the
dummy sensor ring if t he hub (2) does have
a s ensor ring (5).
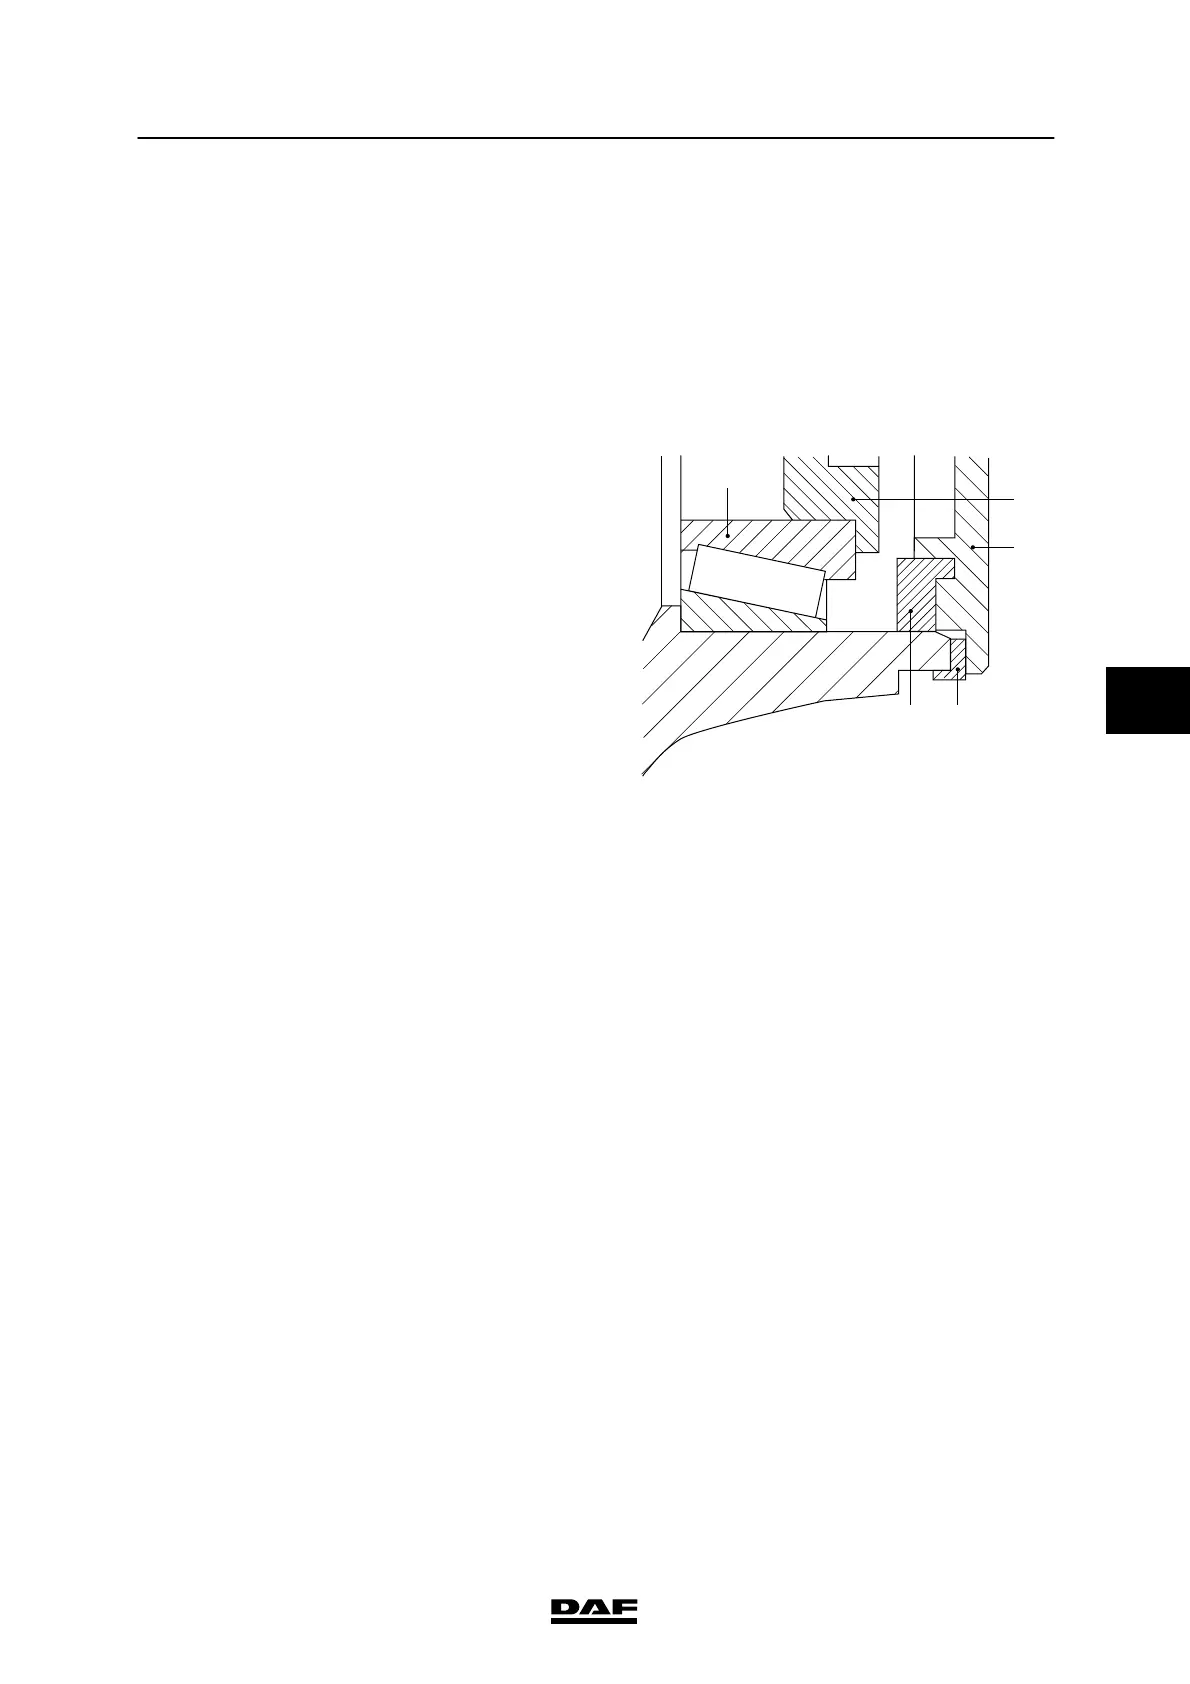
10. Position the seal (4) in front of the hub with
the s eal lip pointing to the outside of the
hub. Slide t he draw-in flange (H) over the
centring s pindle (E) against the seal (4).
11. Fit the locking plate (I) and the nut (K).
12. Push the seal (4) evenly into the hub (2)
using t he nut (K). In the case of a hub with
sensor ring (5) the oil seal should be
pressed in until draw-in flange (H) abuts the
sensor ring (5). In the case of a wheel hub
without sensor ring (5) the oil seal should
be pressed in until the dummy sensor
ring (G) abuts the hub rim.
13. Remove t he special tool.
14. Apply grease to the sealing lips of the oil
seal (4).
15. Install the hub on the axle journal.
3
F
H
54
S7 00 182
5
200424