EXPLANATORY NOTES ON THE MAINTENANCE ACTIVITIES
Removal and installation 95XF series
4-38
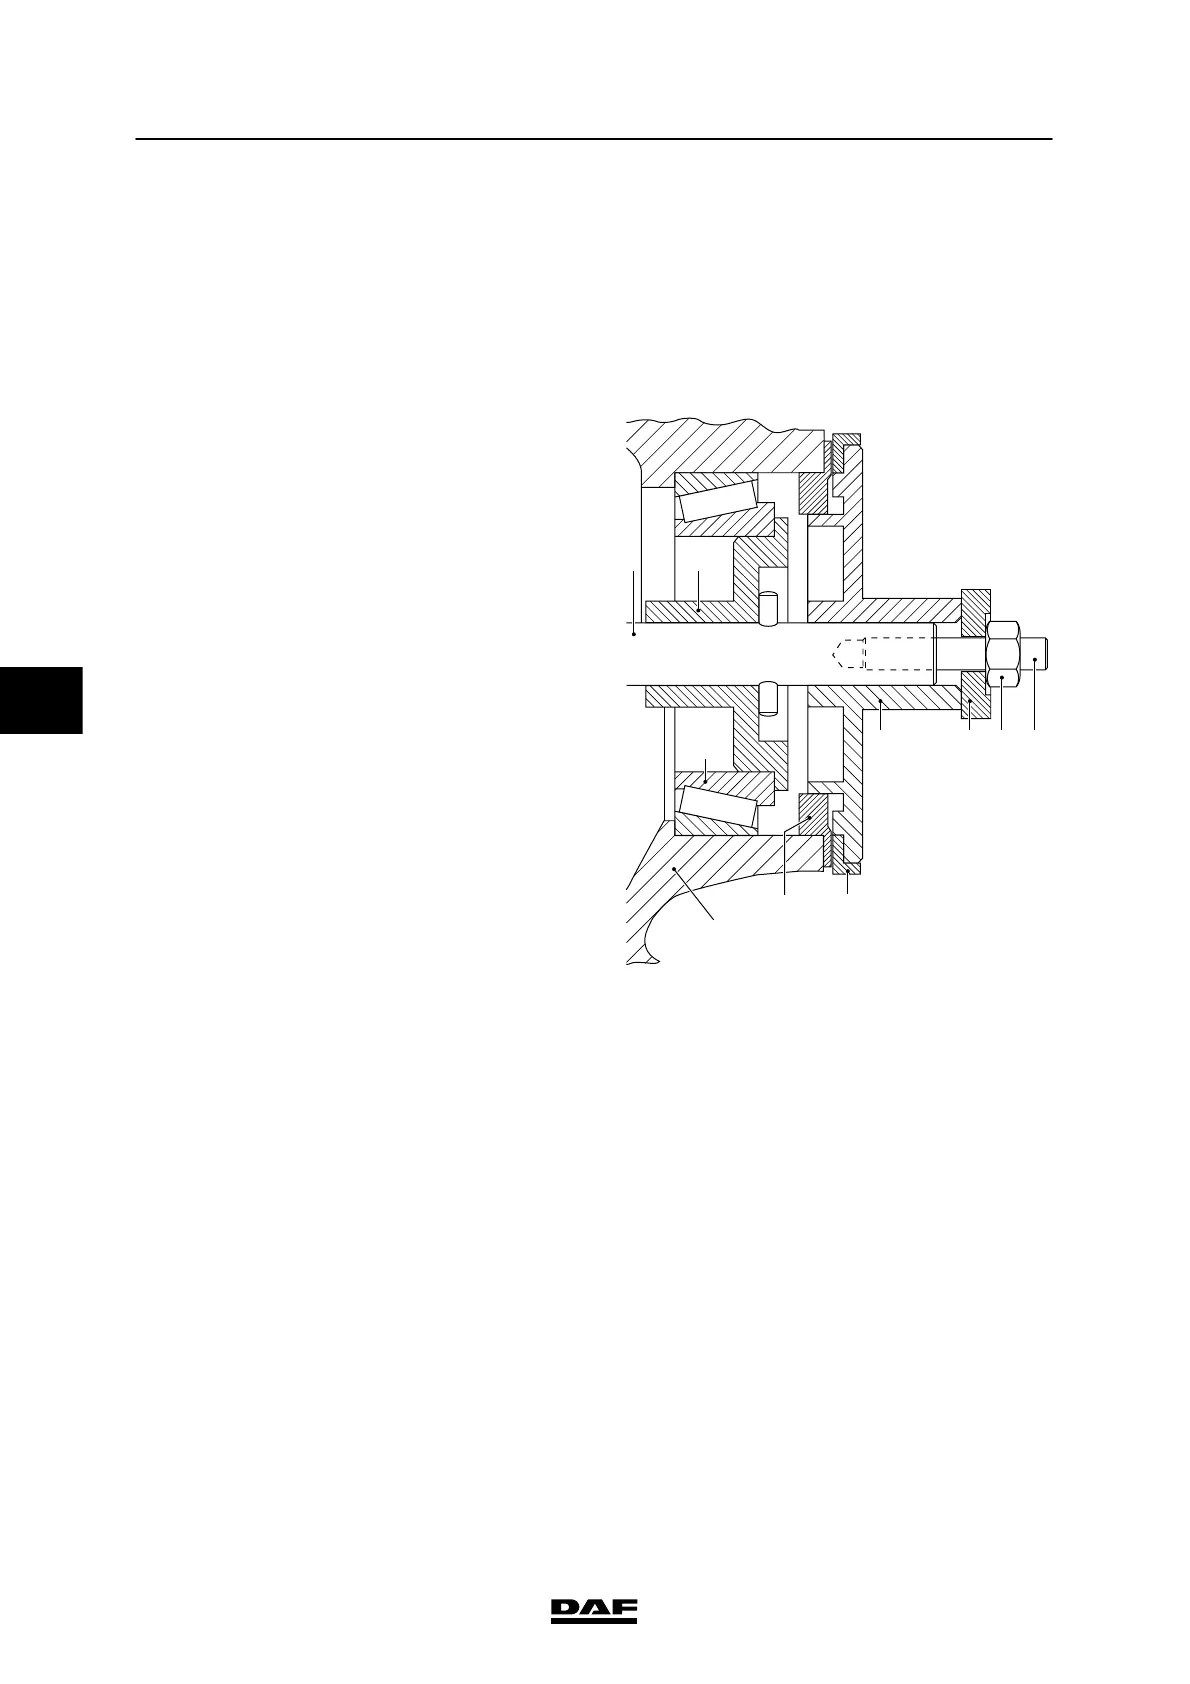
3. Assemble the special tool: turn the threaded
ends (A) and (L) into the centring
spindle (E).
Assemble t he short stud (L) on the side
where t he pin is located in the centring
spindle (E).
4. Slide the appropriate centring flange (F)
over the centring spindle (E).
5. Install the inner wheel bearing (3).
6. Slide the centring spindle (E) with the
centring f lange (F) into the hub (2).
7. Press the centring flange (F) into the inner
wheel bearing (3).
8. Slide the appropriate centring flange (D) on
the c entring spindle (E).
9. Fit the locking plate (C) and the nut (B) on
the c entring spindle (E).
10. Align t he centring flange (D) on the outer
race of the outer wheel bearing and
hand-tighten nut (B) (max. 20 Nm). The
centring s pindle (E) must be installed in the
hub (2) f ree of play.
11. Fit the ring (G) on the draw-in flange (H).
12. Position the seal (4) in front of the hub (2).
Slide t he draw-in flange (H) with the
washer (G) over the centring spindle (E)
against the seal (4).
13. Fit the locking plate (I) and the nut (K).
14. Press the oil seal (4) evenly into the wheel
hub (2) using nut (K), until the sensor ring
abuts the wheel hub (2).
15. Remove t he special tool.
16. Apply grease to the sealing lips of the oil
seal (4).
17. Install the hub on the axle journal.
3
FE
H
G4
I K L
2
S7 00 411
5
200424