Getting Started 9
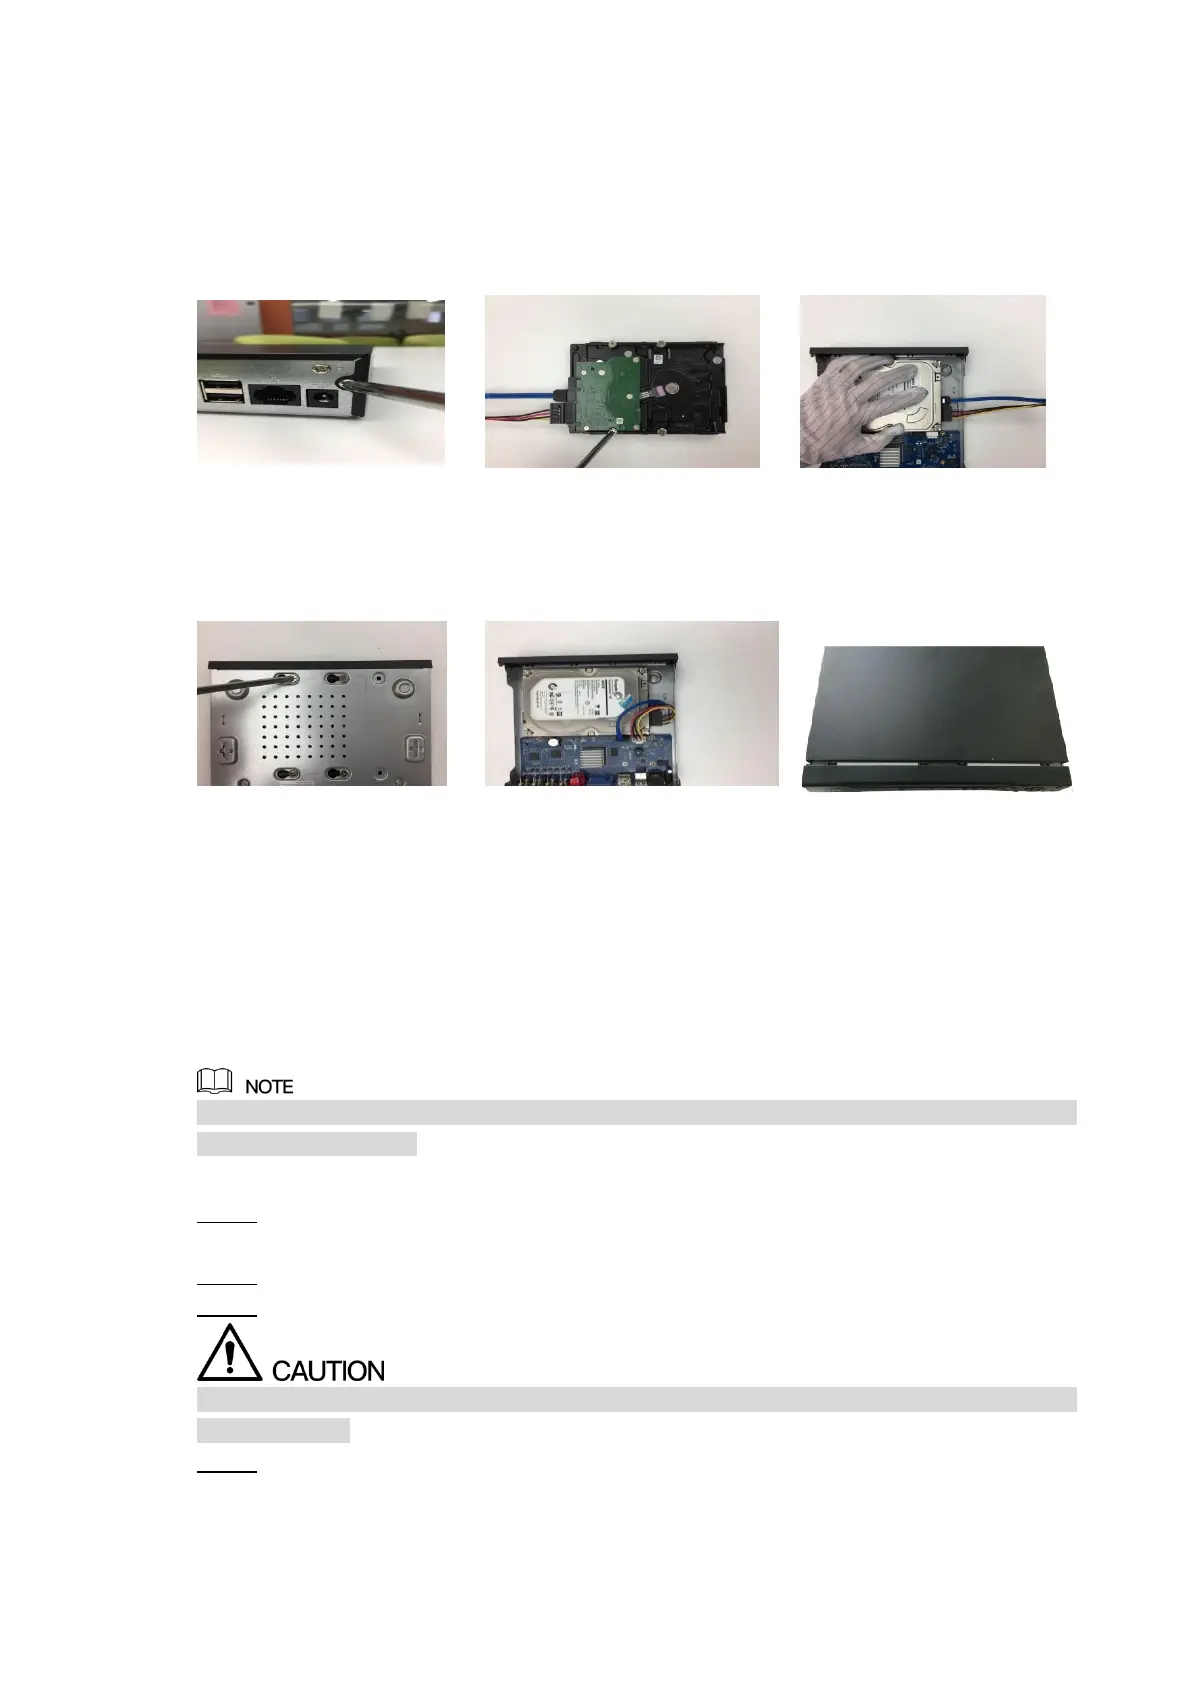
2.2.7 DH-XVR1B04/DH-XVR1B04H/DH-XVR1B08/DH-XVR1B08H/
DH-XVR1B16/DH-XVR1B16H
1. Remove the screws on
the cover.
2. Connect the HDD cable
and power cable to HDD,
and fasten the screws in
HDD.
3. Align the screws of the
HDD with the holes on
the back of the device.
4. Turn the Device upside
down and then fasten
the screws.
5. Connect the HDD cable
and the power cable to the
mainboard.
6. Put back the cover and
fasten the screws.
2.3 Installing Device into Rack
Only DH-XVR7416L-4KL-X/DH-XVR5432L-X/DH-XVR7816S-4KL-X/DH-XVR5832S-X models
support this installation.
To install the DVR into rack, do the following:
Check whether the in-house temperature is lower than 35℃(95℉) and make sure the
Step 1
15 cm (6 inches) spacing around the Device for ventilation.
Use six screws to fix the DVR on each side. Step 2
Install from the bottom up. Step 3
If you want to install more accessories to the rack, take preventive measures to avoid power
socket overload.
(Optional) Install more accessories to the rack if needed.Step 4
 Loading...