LS10 Installation and Operating Guide Page 43
LS10 Installation & Operating Guide Document # 9301H66300 Ver. 1.01
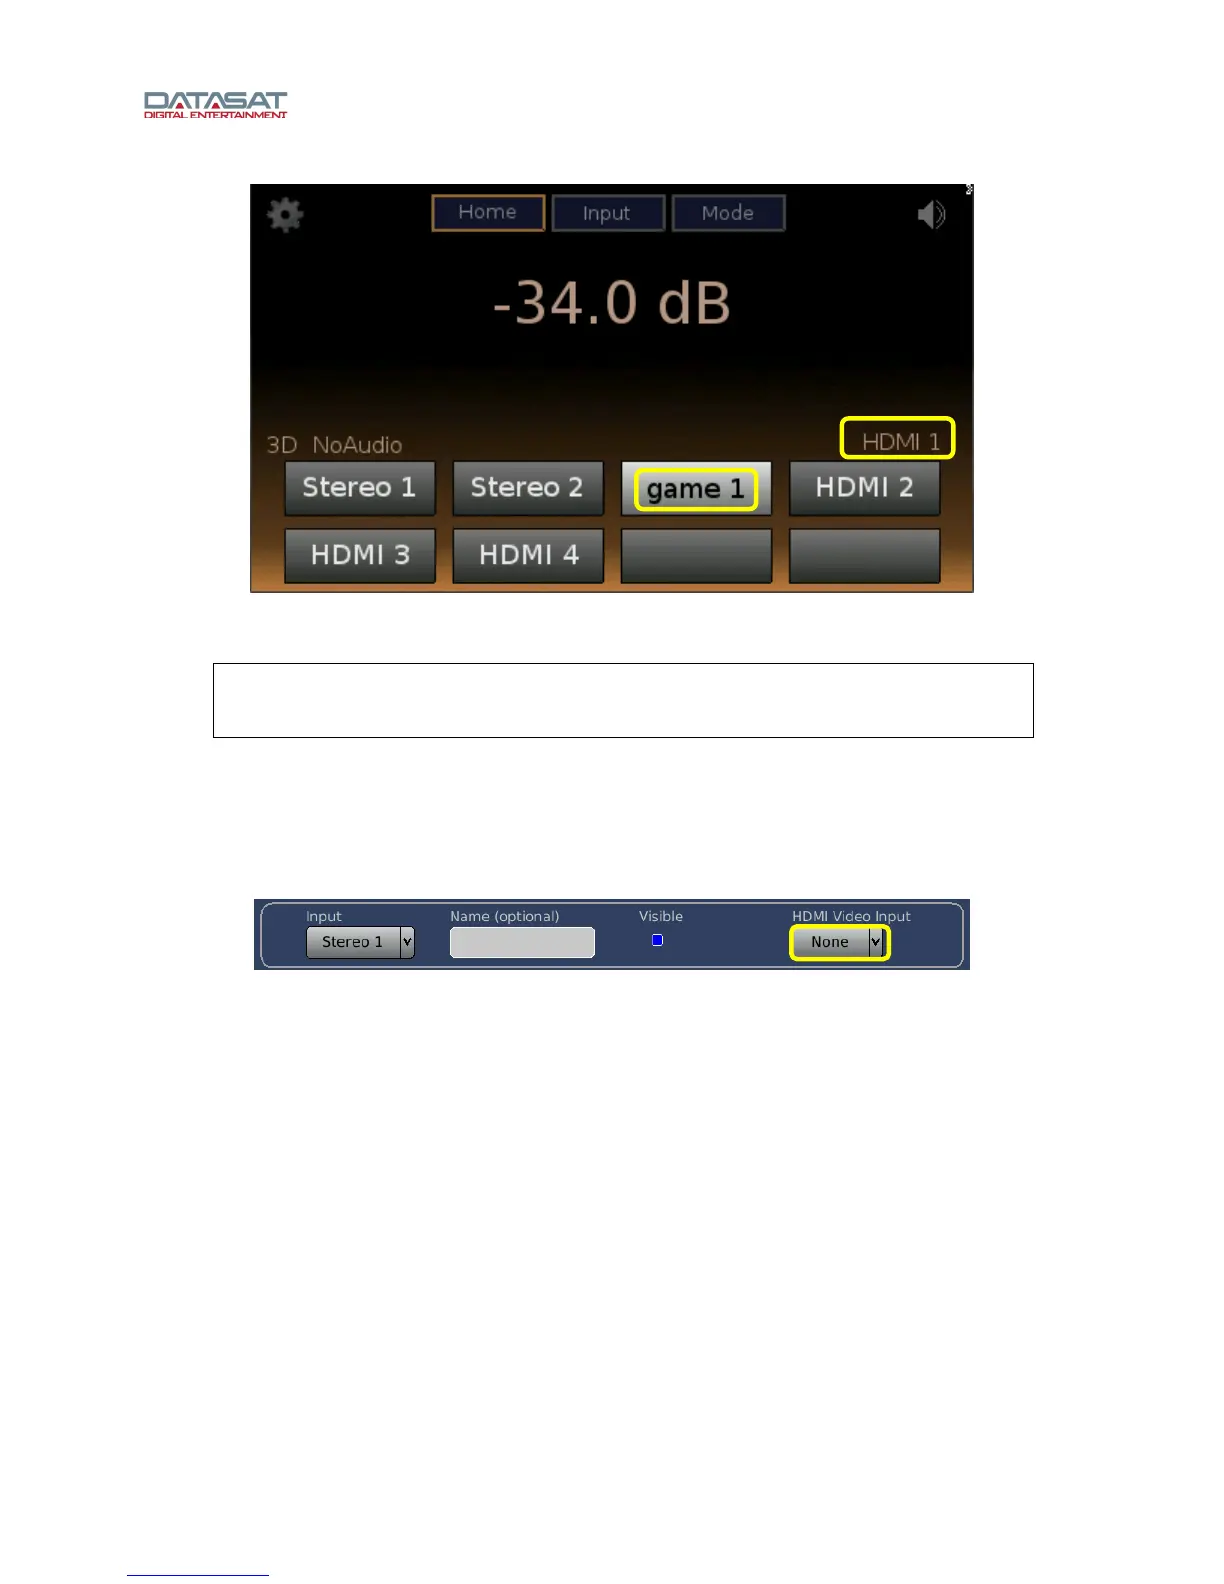
Figure 31. Touch screen with HDMI 1 named “game 1”
In this example, HDMI 1 has been named “game 1” and made visible on the touch screen.
Note: Changing existing input names will affect external automation control for that input.
Verify that automation is sending the correct command (see Appendix E Remote Control
API).
4. When selecting an audio input other than HDMI 1-8, you have an option to select whether or not to
pass through HDMI video from one of the HDMI inputs. This is selected on the dropdown box
labeled HDMI Video Input that appears on the upper right side. The options are None and HDMI 1
through HDMI 8. See Figure 32, below.
Figure 32. Non-HDMI input selected
3.5 Audio Levels
Tap the Levels button on the Setup Home screen to open the Levels screen for the selected input. Use
this screen to adjust audio levels for each of the channels.
The Speaker Configuration affects the channels that show up on the Audio Levels screen. If you do not
see the expected channels displayed, then check the Speaker Configuration in the Bass Management
section.
The Audio Levels screen can be used for these functions:
• Set the levels. You can turn on the pink noise on any single channel to check and adjust the
level. With Master Volume control set to -15dB the output on each speaker should be 85dBC
when using an SPL meter.
• Check channel phase. This is done by enabling the pink noise on more than one channel
and checking the difference in sound level with an SPL meter or RTA.