3 If applicable, remove the bezel.
4 Using the management software, prepare the hard drive for removal.
CAUTION: To prevent data loss, ensure that your operating system supports hot-swap drive installation. See the documentation
supplied with your operating system.
Steps
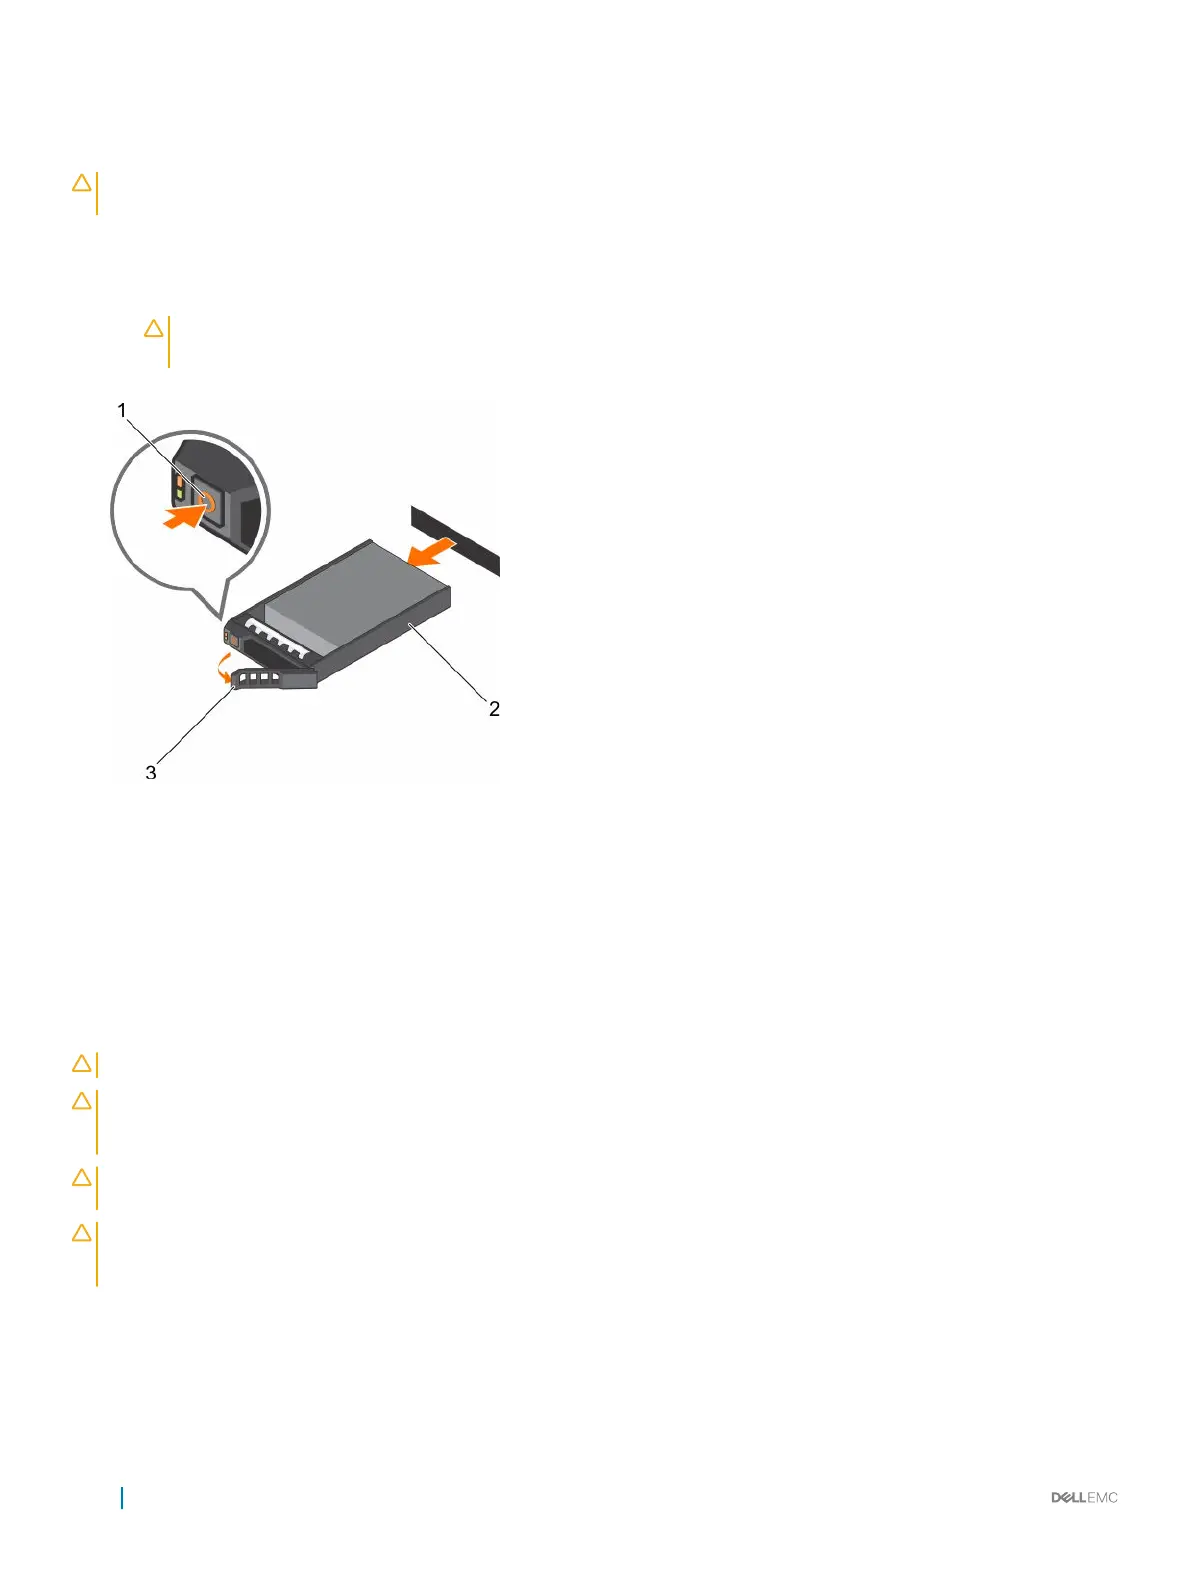
1 Press the release button to open the hard drive or SSD carrier release handle.
2 Slide the hard drive or SSD carrier out of the hard drive slot.
CAUTION: To maintain proper appliance cooling, all empty hard drive or SSD slots must have hard drive or SSD blanks
installed.
3 If you are not replacing the hard drive or SSD immediately, insert a hard drive or SSD blank in the empty hard drive slot.
Figure 24. Removing a hot swappable hard drive or SSD
1
release button 2 hard drive or SSD carrier
3 hard drive or SSD carrier handle
Installing a hot swappable hard drive
Prerequisites
CAUTION
: Use only hard drives that have been tested and approved for use with the hard drive backplane.
CAUTION: When installing a hard drive, ensure that the adjacent drives are fully installed. Inserting a hard drive carrier and
attempting to lock its handle next to a partially installed carrier can damage the partially installed carrier's shield spring and make
it unusable.
CAUTION: To prevent data loss, ensure that your operating system supports hot-swap drive installation. See the documentation
supplied with your operating system.
CAUTION: When a replacement hot swappable hard drive is installed and the appliance is powered on, the hard drive
automatically begins to rebuild. Make absolutely sure that the replacement hard drive is blank or contains data that you wish to
have over-written. Any data on the replacement hard drive is immediately lost after the hard drive is installed.
1 Follow the safety guidelines listed in Safety instructions section.
Steps
1 If a hard drive blank is installed in the hard drive slot, remove it.
2 Install a hard drive in the hard drive carrier. For more information, see the Installing a hot swappable hard drive into a hot swappable
hard drive carrier section.
66
Installing and removing components