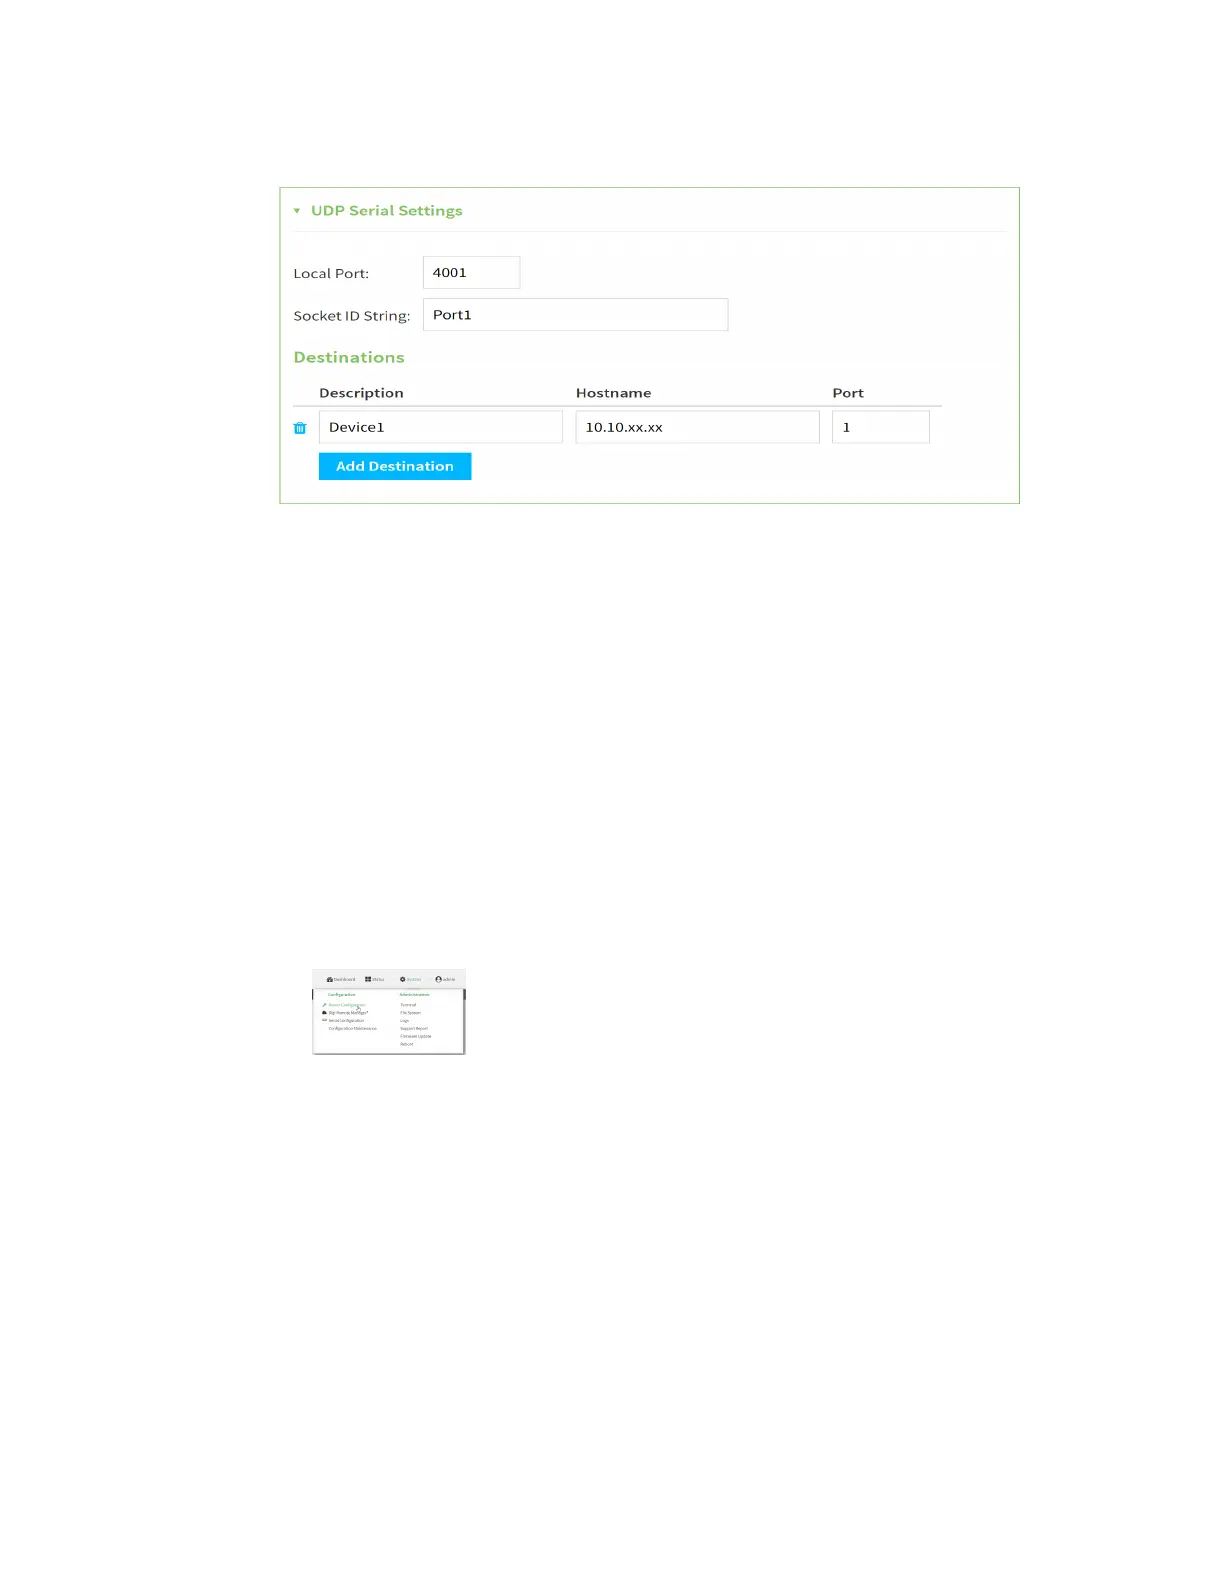
Serial port Configure UDP serial mode
Digi Connect EZ Mini User Guide
133
9. Expand UDPSerial Settings.
a. For Local port, enter the UDPport. The default is 4001 or serial port 1, 4002 for serial port
2, etc.
b. (Optional) For Socket String ID, enter a string that should be added at the beginning of
each packet.
c. For Destinations, you can configure the remote sites to which you want to send data. If
you do not specify any destinations, the Connect EZ sends new data from the last IP
address and port from which data was received. To add a destination:
i. Click Add Destination. A destination row is added.
ii. (Optional) For Description, enter a description of the destination.
iii. For Hostname, enter the host name or IP address of the remote site to which data
should be sent.
iv. For Port, enter the port number of the remote site to which data should be sent.
You can also configure access control for the serial port.
To do this, you need to go to Device Configuration:
a. On the menu, click System. Under Configuration, click Device Configuration.
The Configuration window is displayed.
b. Access the configuration for the appropriate type of service:
i. Click to expand Serial.
ii. Click to expand the appropriate serial port.
iii. Click to expand UDP serial.
iv. Click to expand Access Control List.
 Loading...