Get started with Connect EZ
This section explains what comes with each Connect EZ model, how to install the necessary software,
and how to connect the hardware.
Step 1: Verify product components
Step 2: Connect the power supply
Step 3: Connect to site network using an Ethernet LAN
Step 4: Discover the IPaddress using the Digi Navigator
Step 5: Configure RealPort from the Digi Navigator
Step 6: Connect to the web UI and update the Connect EZ firmware
Step 7: Connect to Digi Remote Manager
Optional
n Change the password on the Connect EZ
n Mount the Connect EZ
n Connect equipment to the Connect EZ serial port
Administrators only
n Additional configuration to the device can be done in Remote Manager or in the device's local
web user interface.
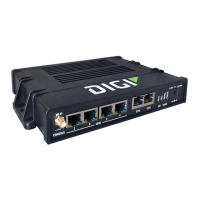
Step 1: Verify product components
Verify that you have the following included equipment.
NEXTSTEP: If you are performing the initial device set-up, proceed to the next step after verifying the
components: Step 2: Connect the power supply.
Included equipment
Equipment Description
Connect EZ
Mini
For detailed information about the panels, see:
n Top panel and LEDs
n Bottom panel
Digi Connect EZ Mini User Guide
18