EasyManua.ls Logo

Digital Design EVOLUTION II User Manual

Digital Design EVOLUTION II
102 pages
To Next Page IconTo Next Page
Page #1 background imageLoading...
Page #1 background image
1 EVOLUTION 1 SYSTEM MANUAL Issue 1.1 20 Dec 2006
EVOLUTION II
INK JET PRINTERS
INSTALLATION AND OPERATION MANUAL
digital design inc.
67 Sand Park Road
Cedar Grove, NJ 07009
(973) 857-9500
http://www.evolutioninkjet.com/
This manual is for use in operating and maintaining the EVOLUTION 1I Ink Jet
Printer. This includes various optional features, which may not be included in
your basic model printer. For basic start-up instructions, please refer to PART 1
Installation Procedures.
All rights reserved. No part of this document may be reproduced, stored on a
retrieval system, or transmitted in any form, or by any means electronic,
mechanical, photocopying, recording or otherwise, without the prior permission of
Digital Design Inc.
Digital Design Inc. has a policy of continual product improvement. The Company
therefore reserves the right to modify the information contained in this manual
without prior notice.
ALL PRINT CARTRIDGES SUPPLIED BY DIGITAL DESIGN INC.
ARE FACTORY TESTED AND PROFILED TO PRODUCE AN
OPTIMUM AND CONSISTANT CODE. USING OTHER THAN
AUTHORIZED CARTRIDGES WILL CAUSE UNDESIRABLE
RESULTS.
EACH FLASH DATA CARD IS PROFILED EXPLICITELY FOR ITS’
INTENDED PRINTER, AND IS SECURITY LOCKED PROHIBITING
USE IN OTHER THAN THE ORIGINAL PRINTER FOR WHICH IT
WAS PURCHASED. KEEP ALL UPGRADE CARDS IN A SECURE
PLACE.
EVOLUTION II IS A FULLY FEATURED MODEL WITH VARIABLE
FIELD PROGRAMMING AND BARCODE CAPABILITIES.
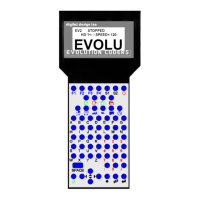
Table of Contents

Questions and Answers:

Digital Design EVOLUTION II Specifications

General IconGeneral
BrandDigital Design
ModelEVOLUTION II
CategoryPrinter
LanguageEnglish

Summary

Part 1: Installation Procedures

Installing the Evolution II Printing System

Procedures for installing the Evolution II printing system on equipment.

Mounting on Production Line

Steps and considerations for mounting the printer on a production line.

Grounding Strap Installation

Instructions for installing the grounding strap for static discharge.

Input Power Connection and Modification

Connecting the printer to a power source and any necessary modifications.

Installing the Print Cartridge

Step-by-step guide for inserting the ink print cartridge into the carriage.

Connecting the Controller to the Carriage

How to connect the controller to the print carriage using the provided cable.

Configuring the Printer

Initial setup and configuration steps for the printer.

System Reset

Procedures for performing soft and hard resets on the printer.

Part 2: Operation Procedures

Turning on the Print Station for the First Time

Initial power-up sequence and expected display states.

Part 3: Maintenance Procedures

Print Cartridge Maintenance

Instructions on cleaning and maintaining the ink print cartridge.

Part 4: Troubleshooting and Repairs

Faults

A chart listing common faults, their probable causes, and remedies.

Part 7: Option Jumpers and Cabling

Part 8: Specifications

Default Settings

Table of default settings for various printer functions and their ranges.

Appendix A – Producing Reliable Bar Codes

Barcode Integrity

Focuses on the validity of data and ratio of dark to light bars in barcodes.

Programming Bar Codes:

Barcode Type

Lists supported barcode types and their characteristics.

Minimum Bar Width

Controls the number of columns in a narrow bar for linear and 2D codes.

Barcode Types