57
4
7.3.4.4 Sewing unit with one light barrier
Caution: danger of injury
During the reference run the feed clamps move forwards or
back and forth several times.
Do not reach into the path of the feed clamps.
Folding station must be swung out
–
Press function key “F3”.
The reference run is carried out.
–
Press “8” and select the clamp position (see page 33).
Hint:
The light barriers must be aligned to the clamp position
–
Press “9”.
The flap clamp opens.
–
Press function key “F4”.
The needles are switched on.
–
Turn the hand-wheel in the direction of rotation to lower the
needles to about 2 mm above the material.
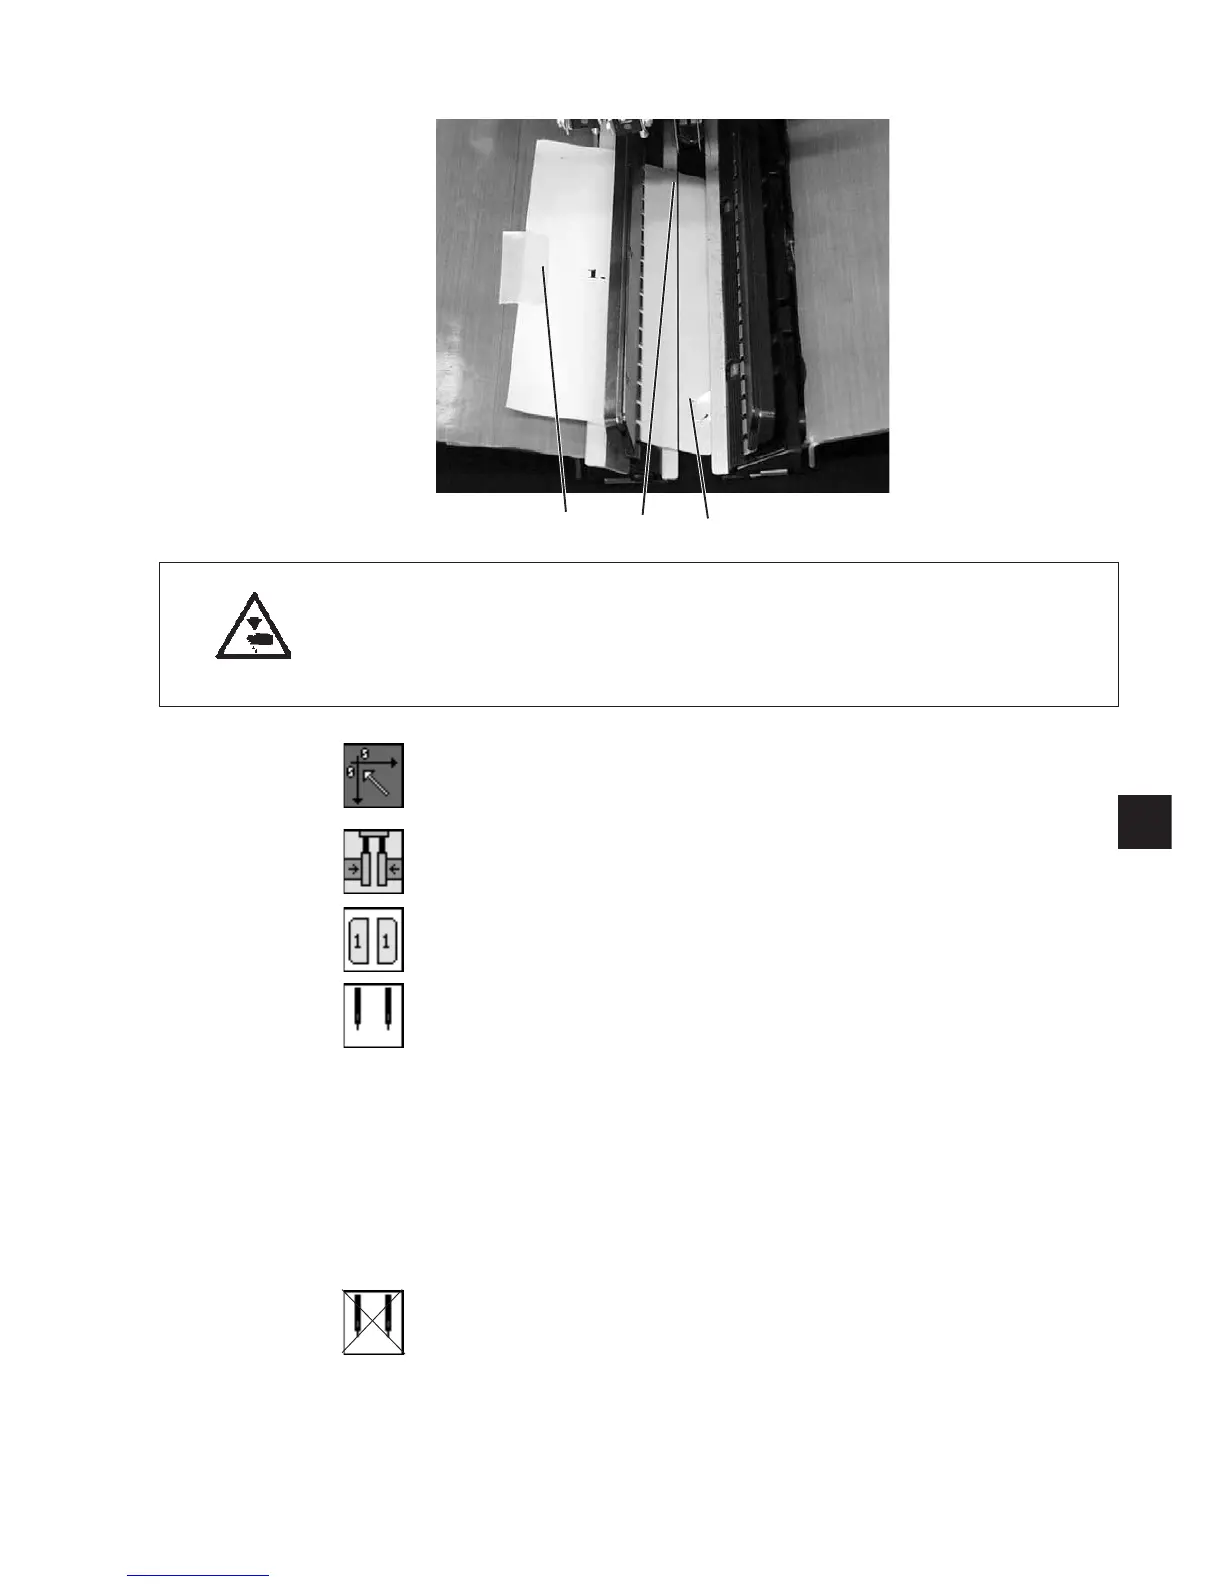
–
Insert the straight-pocket template 1 so that line 2 points to the left
needle and is parallel to the right feed clamp. Both reflecting foils
must be covered.
Hint:
Place the template under the clamp on which the light barrier is
mounted, left or right.
–
Press “9”toclosetheflapclamp.
–
Stick the left, proud side of the template to the clamp with a strip of
adhesive tape 3.
–
Press function key “F4”.
The needles are switched off.
–
Turn the hand-wheel in the opposite direction to the direction of
rotation to bring the needle back to upper dead center.
321

 Loading...


