Setting the stitch length adjusting wheels
Service Instructions 667 - 00.0 - 04/2016 29
5. Carefully turn the shaft (5) clockwise using a size 10 wrench.
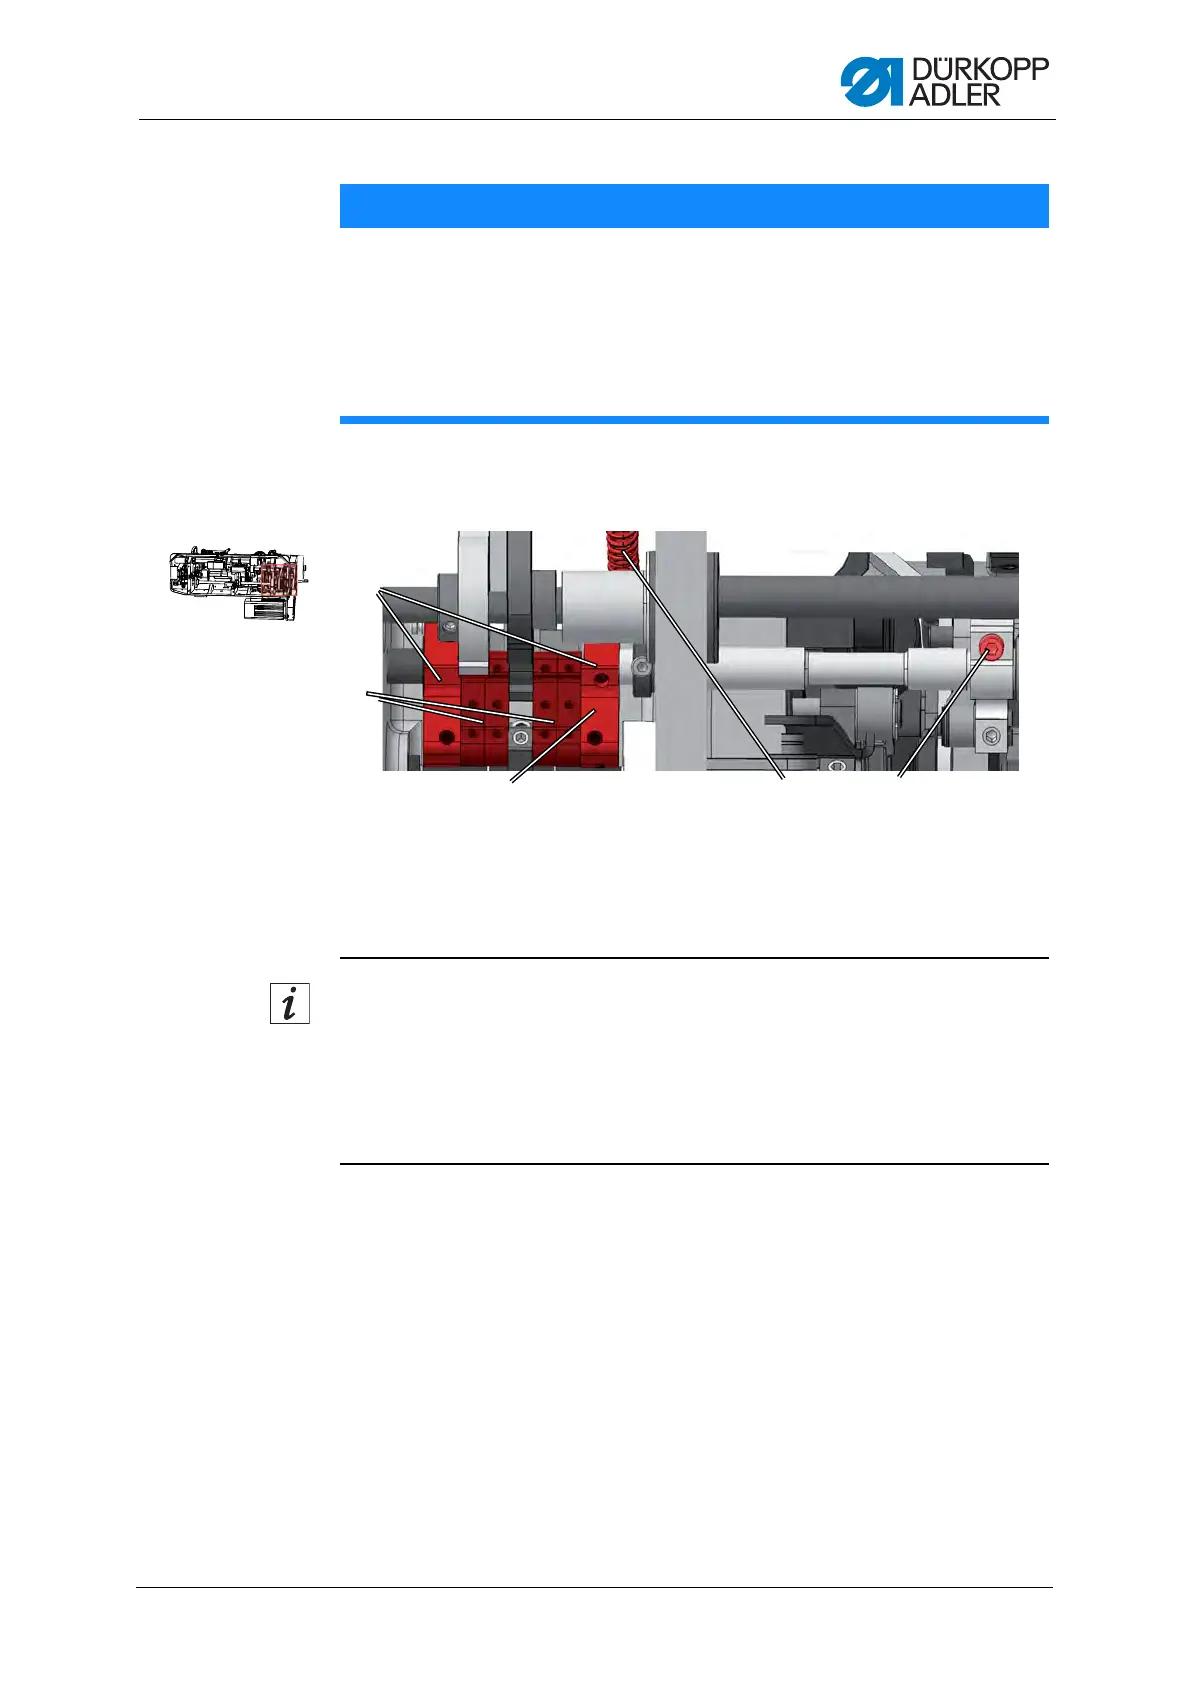
Fig. 17: Setting the upper stitch length adjusting wheel (2)
6. Check whether the frame (8) for the stitch regulator gear can be moved.
Information
In machines that have a stitch adjustment lever, check this by pressing
the stitch adjustment lever.
In machines that do not have a stitch adjustment lever, insert the arrest-
ing pin or a hex key into the opening (10) and try to move the frame (8) up
and down.
7. As soon as the frame (8) stops moving: Remove the wrench from the
shaft (5).
8. Turn the scale (6) so that the 0 is exactly next to the adjusting mark (4).
9. Place the upper stitch length adjusting wheel (1) onto the shaft (5) and
tighten it with a wrench (7).
10. Tighten the upper stitch length adjusting wheel (1) using screw (2).
11. Check whether the plates for the stitch regulator gear (9) are parallel
to one another.
NOTICE
Property damage may occur!
Risk of machine damage if the shaft is turned too hard.
If you turn the shaft too far, parts on the stitch regulator gear may
bend or get stuck.
Turn the shaft carefully and stop as soon as you feel a slight
resistance.
(8) - Frame for the stitch regulator gear
(9) - Plates for the stitch regulator gear
(10) - Hole
(11) - Tension spring
(12) - Screw
⑨
⑧
⑪⑩ ⑫
 Loading...