Winder
Service Instructions 667 - 00.0 - 04/2016 61
13 Winder
13.1 Setting the winder
Proper setting
The winder wheel runs smoothly and without axial play.
The winding process will stop automatically when the required filling quan-
tity of the bobbin is reached.
Cover
• Arm cover ( p. 11)
Removing the winder
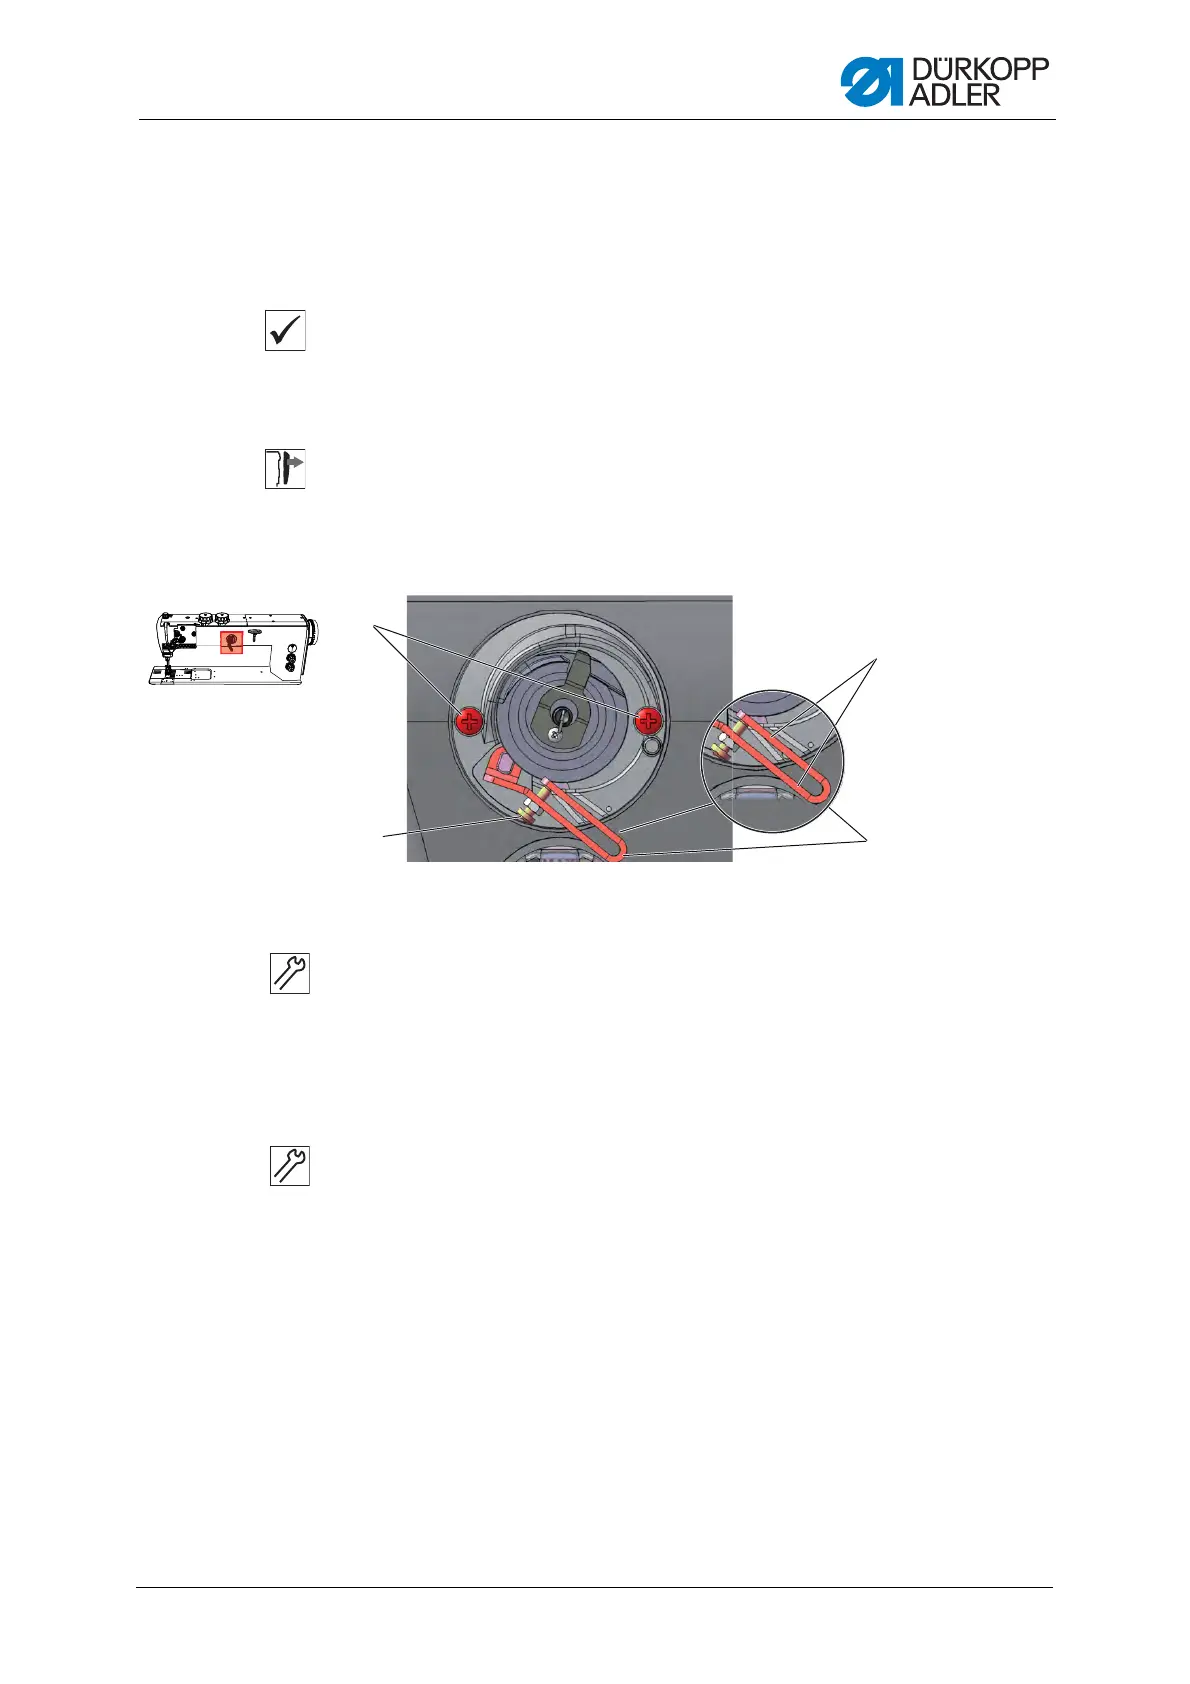
Fig. 42: Removing the winder
To remove the winder:
1. Loosen the screws (1).
2. Remove the winder.
Setting the winder filling quantity
To set the winder filling quantity:
The position of the arms on the screw (2) determines the filling quantity:
• Parallel: Automatic winding stop at 0.5 mm below the edge of the
winder
• Closer together: Automatic stop with larger filling quantity
• Further apart from each other: Automatic stop with smaller filling
quantity
3. Turn the screw (2):
• Arms closer together: turn counterclockwise
• Arms further apart from each other: turn clockwise
4. Put the completely filled bobbin onto the winder.
5. Fold the winder lever (3) upwards as far as it will go to the thread.
2
3
4
1
(1) - Screws
(2) - Screw
(3) - Winder lever
(4) - Arm