Setting the stitch length adjusting wheels
30 Service Instructions 667 - 00.0 - 04/2016
Important
If the plates (8) are not parallel to one another:
12. Remove the tension spring (11).
13. Loosen the screw (12).
14. Manually position the plates (9) so that they are parallel.
15. Tighten the screw (12).
16. Attach the tension spring (11).
7.2 Setting the lower stitch length adjusting wheel
Checking the proper setting
Sewing with 2 different stitch lengths:
• The stitch lengths on the seam correspond with the set stitch lengths.
• The lower stitch length adjusting wheel can only be turned up to the
stitch length set on the upper stitch length adjusting wheel.
Cover
• Tilt the machine head ( p. 10)
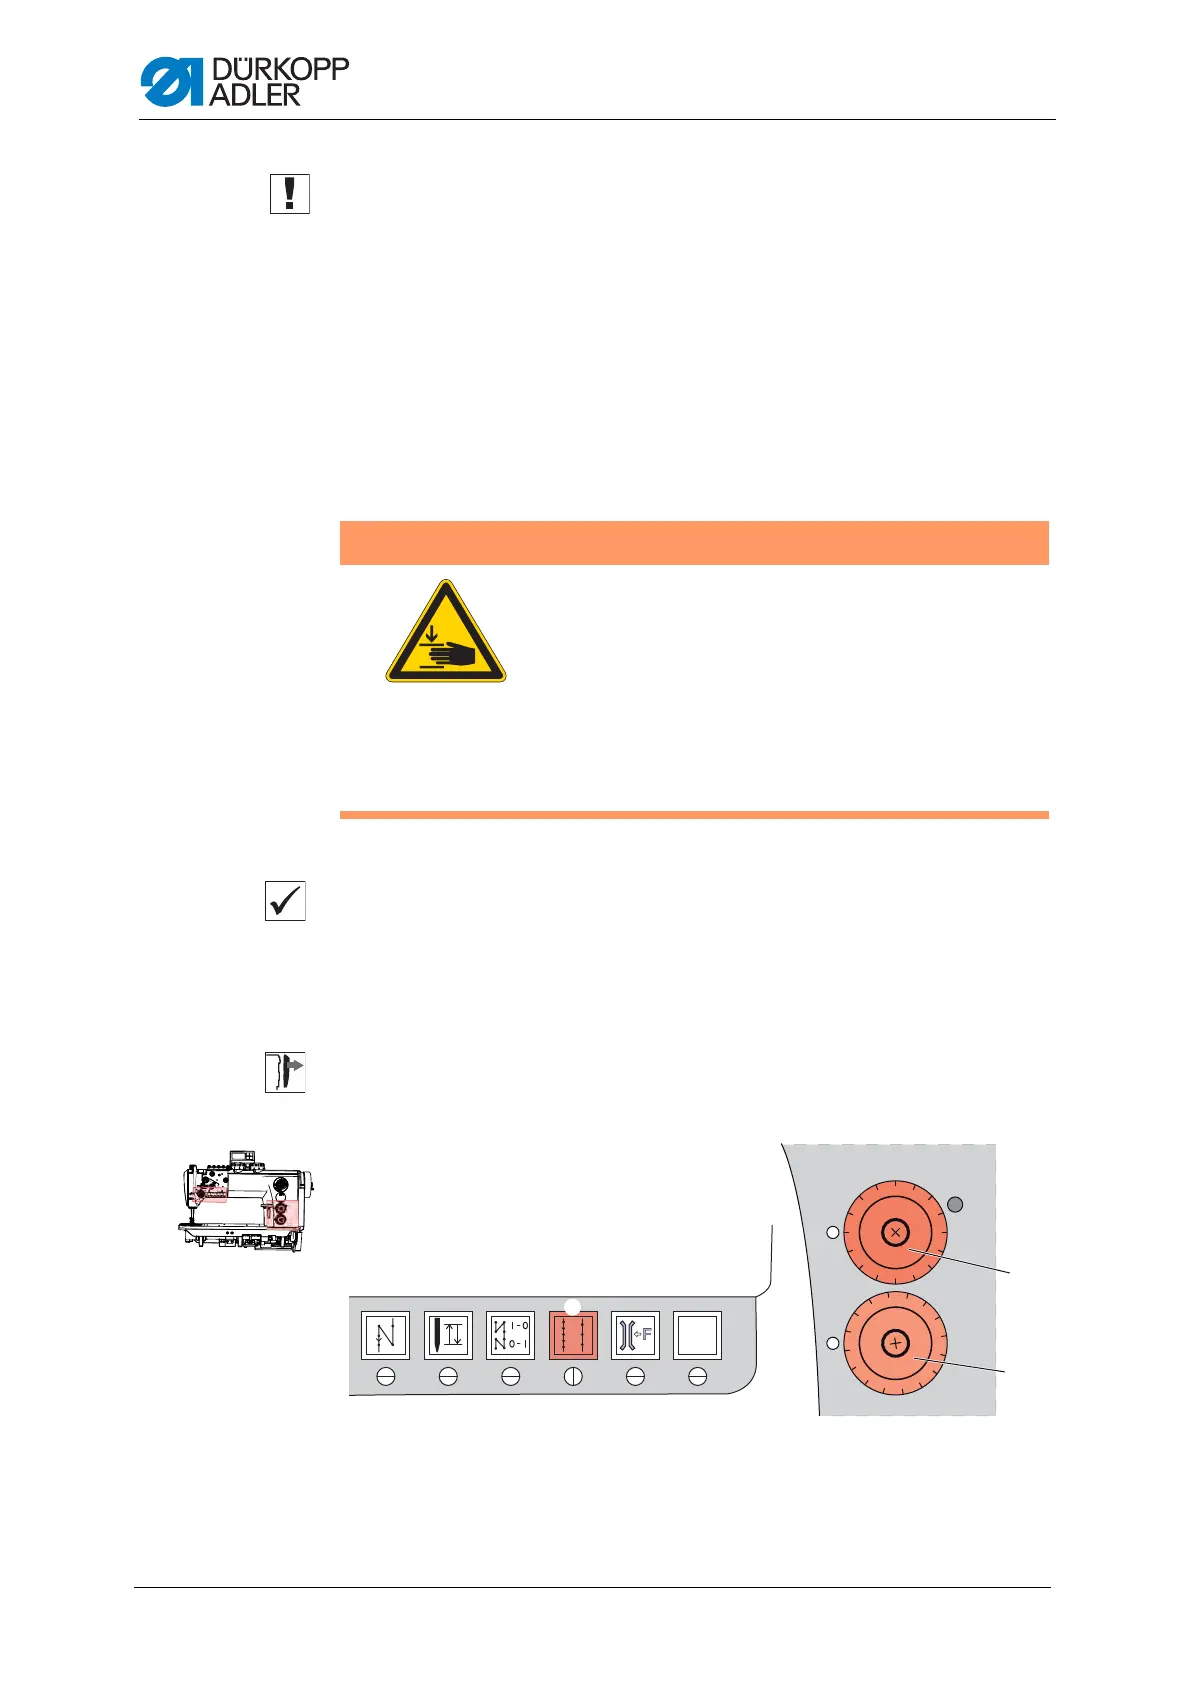
Fig. 18: Setting the lower stitch length adjusting wheel (1)
WARNING
Risk of injury from moving parts!
Crushing possible.
The lower stitch length adjusting wheel has to be
set when the machine is switched on because
a switchover is automatically made to the upper
stitch length adjusting wheel when the machine is
switched off.
Carry out all work with extreme caution.
(1) - Button for the stitch length
on the machine arm
(2) - Upper stitch length adjusting wheel
(3) - Lower stitch length adjusting wheel
0
1
2
4
3
5
6
7
8
9
10
11
12
0
1
2
4
3
5
6
7
8
9
10
11
12
+/–
3
1
2