33
support@edgeovens.com
Technical Support: +1 (724) 628 3050
INSTALLATION
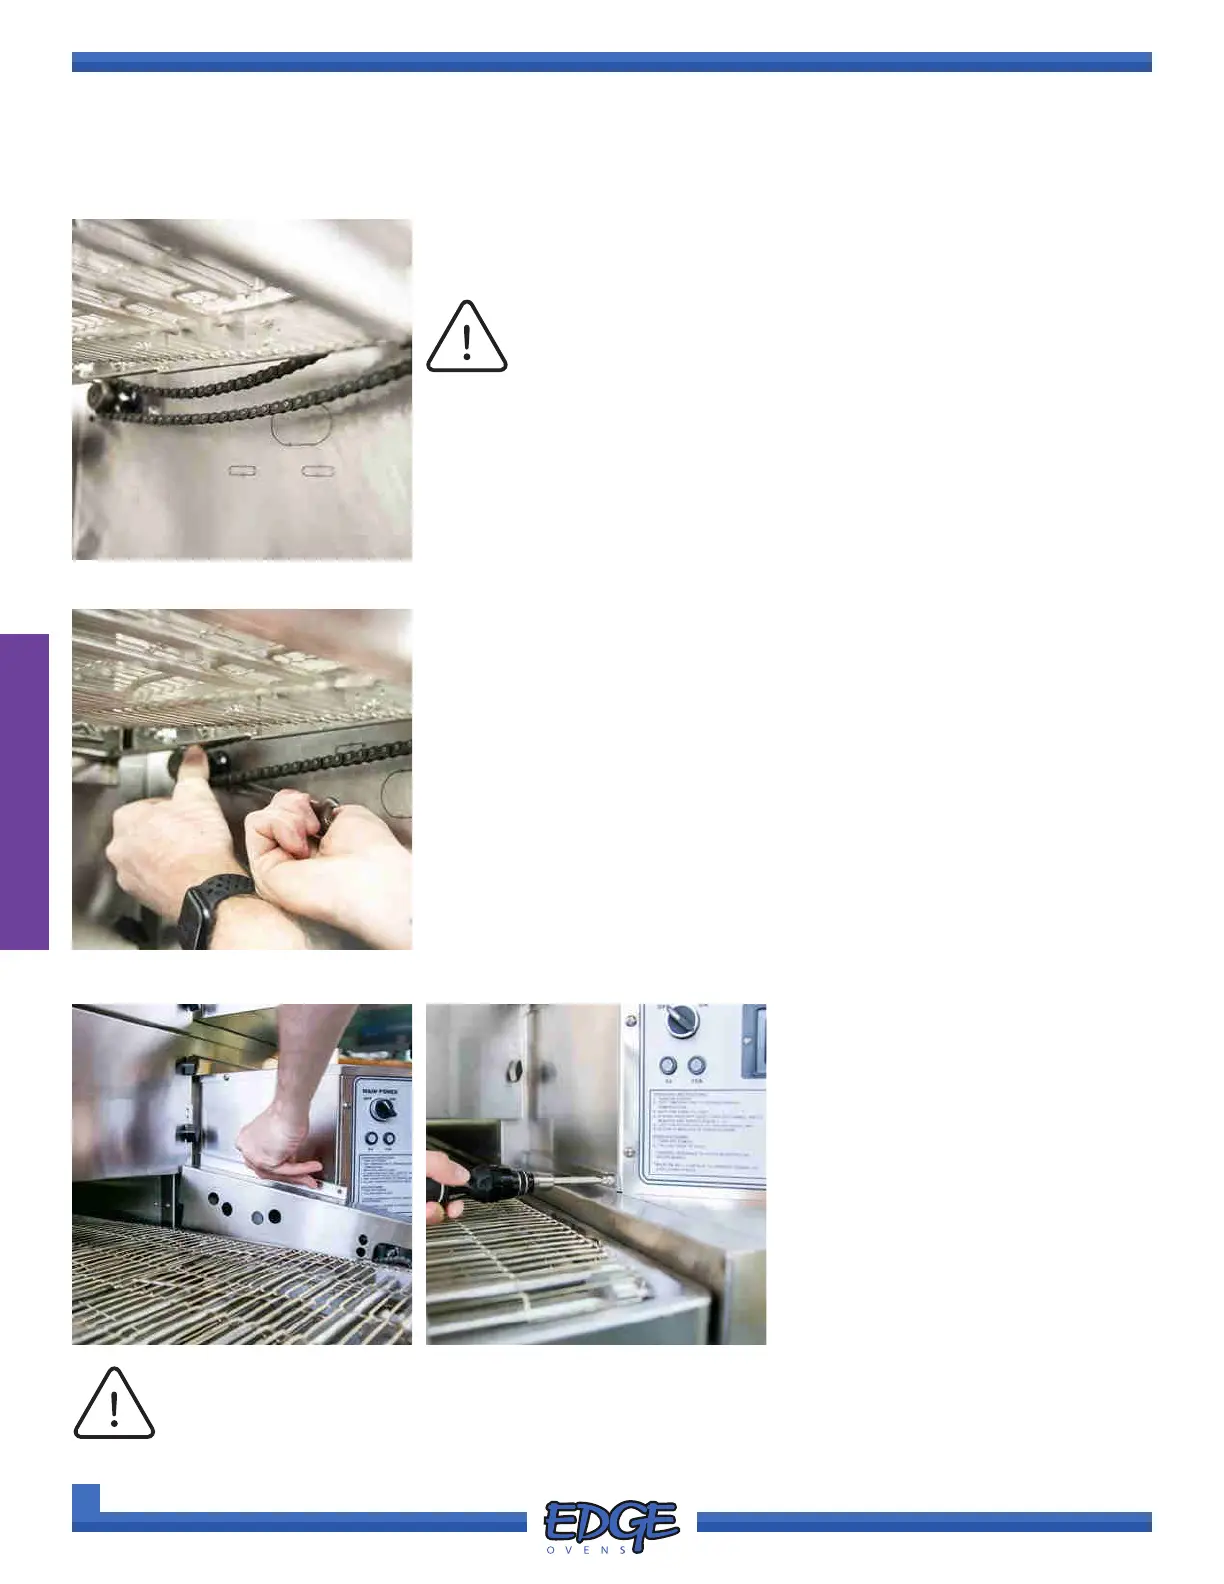
8. Check the tension of the conveyor drive chain. The conveyor drive
chain when properly installed will sit taught with very little slack on the
upper and lower side of the chain. (Figure 2-67)
FIGURE 2-67
FIGURE 2-68
9. If excessive slack does exist on the conveyor drive chain, loosen the
four (4) conveyor motor 1/2” x 1/4-20 bolts with a 7/16” spanner and
push the conveyor motor towards the oven mouth until the slack has
been removed from the upper and lower side of the chain. (Figure
2-68)
OVEN ASSEMBLY
STANDARD CONVEYOR DRIVE SYSTEM ASSEMBLY (CONTINUED)
FIGURE 2-69
10. Tighten the conveyor motor bolts
and recheck tension. DO NOT
exceed 40 inch-lbs torque on the
motor bolts. (Figure 2-68)
11. Install the removed chain guard
(Figure 2-69) and secure in place
with the previously removed
Phillips screw (Figure 2-70).
Removing and reversing the belt when changing the oven belt direction is NOT required.
The conveyor belting used for the EDGE Oven is C-CureEdge, a product of Wire Belt Company of
America. This belting is BI-DIRECTIONAL.
NOTICE
FIGURE 2-70
NOTICE
Excessive slack may result in the drive chain slipping which
causes excessive ware and can result in premature failure.