Document ID: OMM-00131 Rev. E
42
3.12 Media Belt Alignment and Tensioning
After installation, the Media Belt must be aligned and tensioned. Fist check alignment as described. Then check and tension
using the special fixture provided. Finally, adjust tension as described in this Section.
3.12.1 Measurement and Alignment Checks
Check the Media Belt Measurement and Alignment as follows:
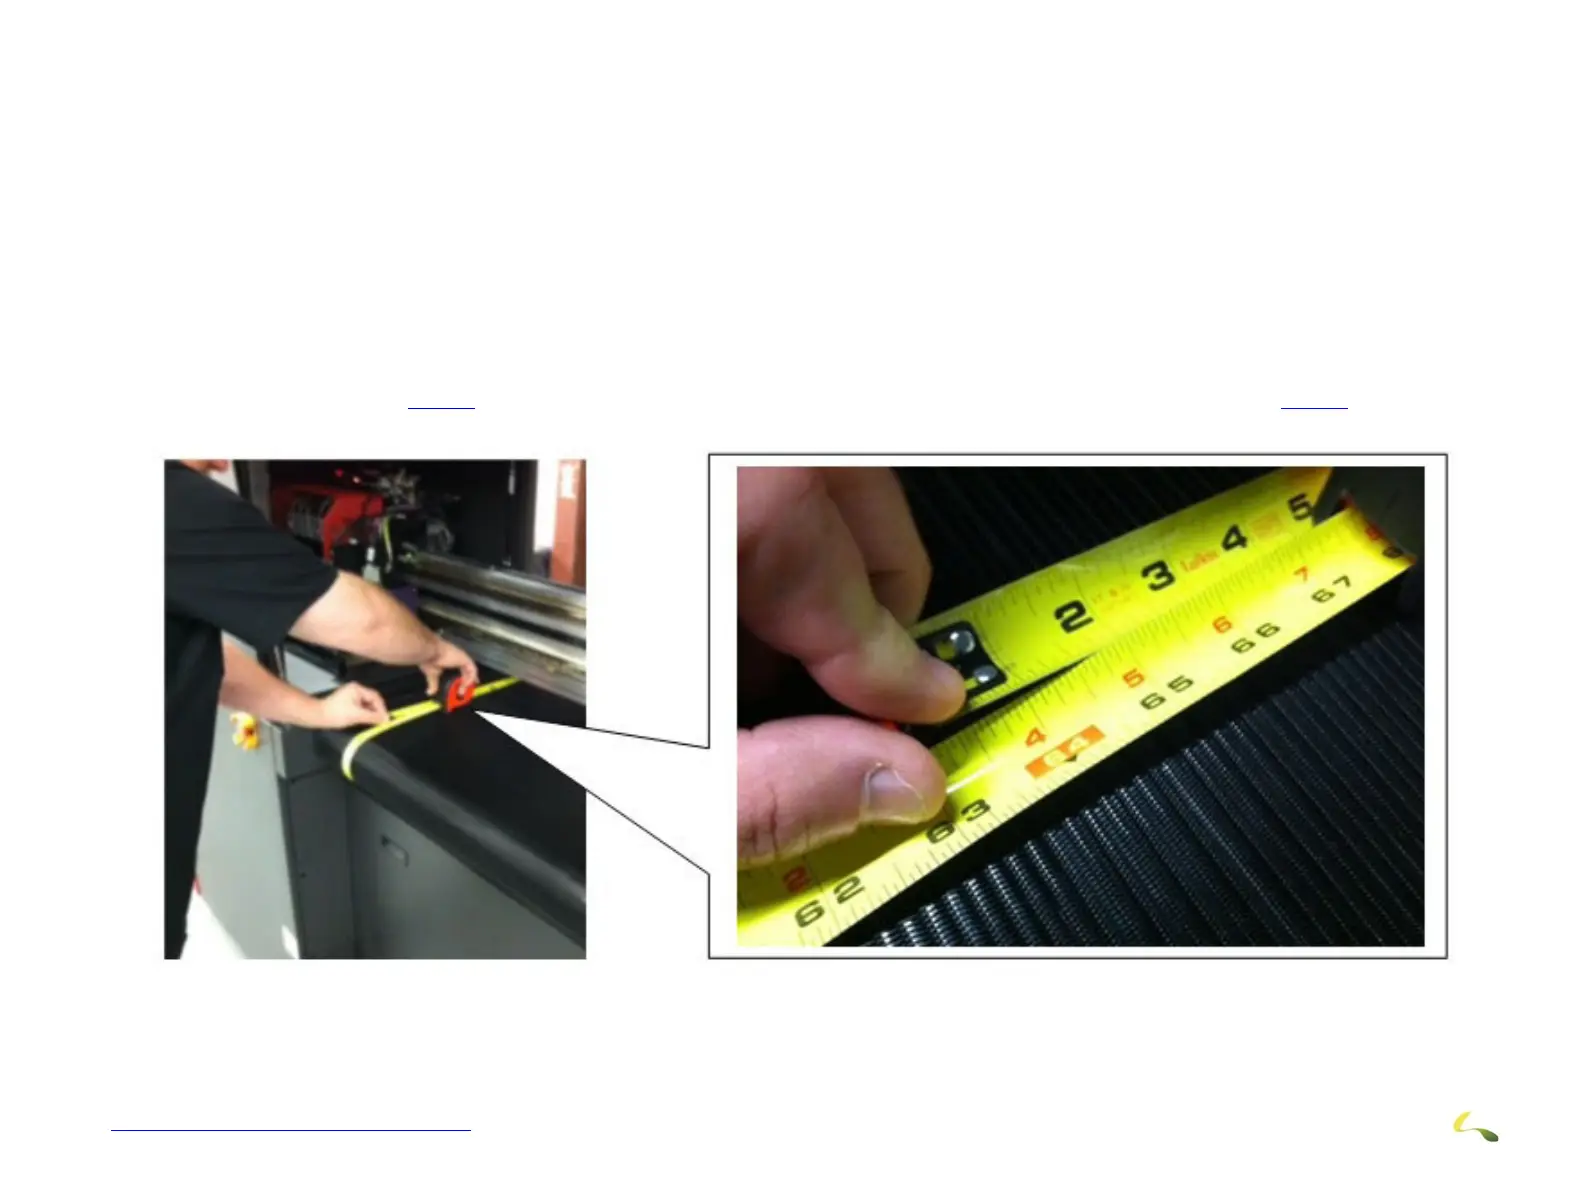
1.At about 2 inches from the left edge of the belt, push a tape measure under the media belt on the left side and wrap it around the belt as
shown. This will give a measurement of the circumference of the belt. (This should be around 63”). Note the dimension.
2. Do the same on the right side of the belt (also about 2 inches away from the edge of the belt) and also note the dimension.
3. The dimensions should not vary. A smaller dimension on one side or the other indicates that the belt will track (or slip) in the direc-
tion of the smaller dimension.
4. If the dimension vary, the belt will have to be tensioned using the tensioning adjustment screws on the rear of the printer. This is
explained in Section
3.12.3. This tension adjustment will also increase belt tension as discussed in Section 3.12.2.
Figure 3-40: Media Belt Measurements (Left Side Shown)