Service
100
Pos: 9. 1 /002 0 Übersc hrift en/ELT RA 1. Üb erschr ifte n/1 Ser vice E LTRA @ 6\mod_1369640568215_9.docx @ 42168 @ 2222221 @ 1
5 Service
Pos: 9.2 / 00 20 Ü bers chr ift en/E LTR A 1.1 Ü bers chr ift en/ 11 I R-p aths, cl eaning and repl acing ELTRA @ 6\mod_1369640666897_9.docx @ 42179 @ 24 @ 1
5.1 52BIR-paths, cleaning and replacing
Pos: 9.3 / 00 10 ELTR A/0 015 s er vice _i nstr ucti ons /CS- 800_ Ser vice/0 025 Ser vice/ 0305 Mo dul IR-p aths, cleani ng and r eplacing @ 6\mod_1377688640144_9.docx @ 47083 @ 32222211 @ 1
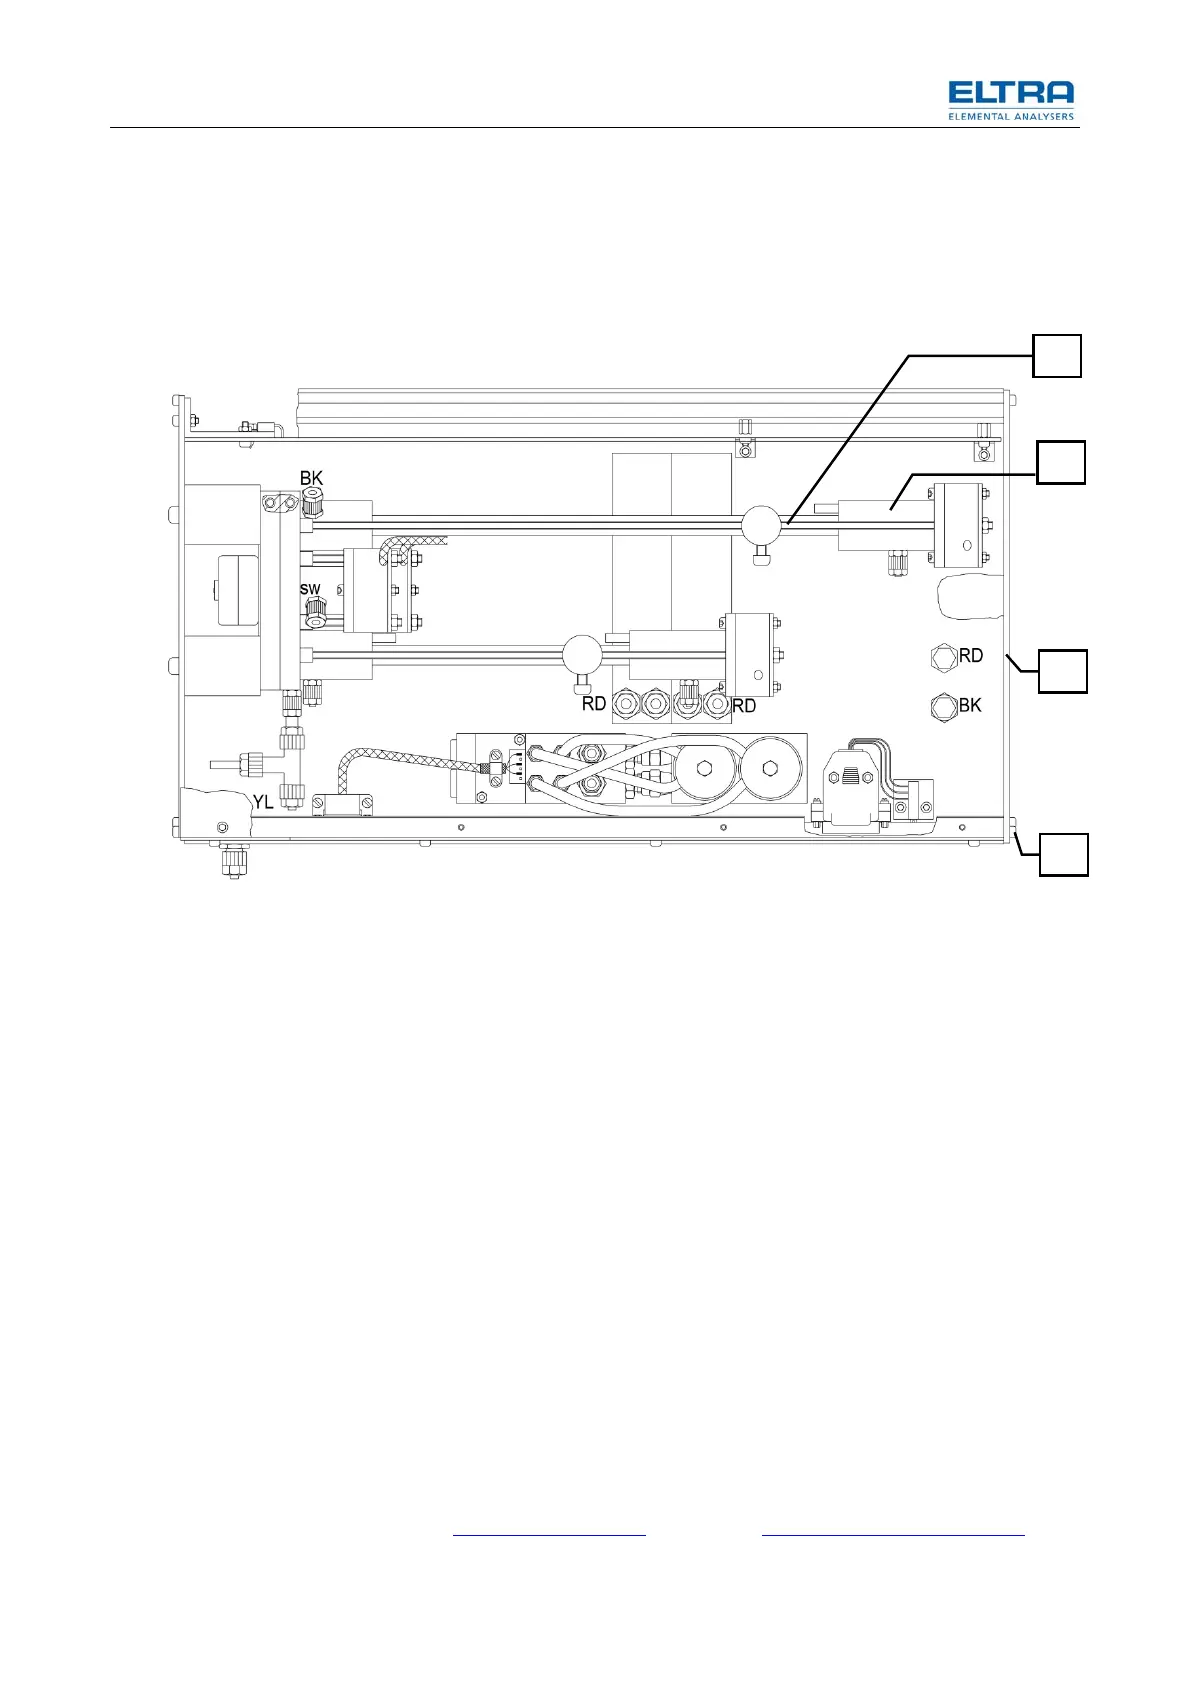
Fig. 34: IR-paths (3-1-1S)
• Unscrew and remove the tubes from the IR-paths.
• Remove the nuts (2) (Size 7); in doing this, the threaded rods (3) should
be held tight to prevent them from turning with the nut.
• To be able to remove the nut (2) from the maximum length IR-path (10),
remove the plate (4) by unscrewing the four screws (5).
• Take out the pre-amplifiers (6) together with the spacers (7).
• Clean the paths with a cleaning solvent, e.g., ethanol.
– With a three part path, such as (B) and (C), the windows can be cleaned on
the inside using a cotton swab.
• In case of a single part path, such as (A), the path is filled with ethanol and,
after a few minutes, oxygen is blown in, to clean and dry out the path.
Soiling, which can accumulate from the analysis of materials that contains a lot of
sulphur and moisture or hydrogen, can be very difficult to clean. In such cases, the
paths should be replaced.
– Before reassembling the paths, the threaded rods (3) should be screwed in
by hand, in order to ensure that they are firmly installed.
– Assembly of the paths follows in the reverse order.
• Reconnect the plugs (17) of the preamplifiers (6), in case they were
removed.
- Readjust the base lines.
See chapter Infrared power supply and chapter Infrared baseline adjustments
5
4
10
3