Service
108
Pos: 9.14 /0 020 Über sc hrif ten /ELT RA 1.1 Über sc hri ften /11 Lea k ch ec king ELTR A @ 6 \mod_1369642077339_9.docx @ 42311 @ 222223222 @ 1
5.7 58BLeak checking
Pos: 9. 15 /00 10 E LTR A/00 15 s er vice _ins truc ti ons/C S-8 00_S ervic e/002 5 Servic e/03 35 Mod ul Leak ch ecki ng @ 6\mod_1377688641992_9.docx @ 47155 @ 233333343344 @ 1
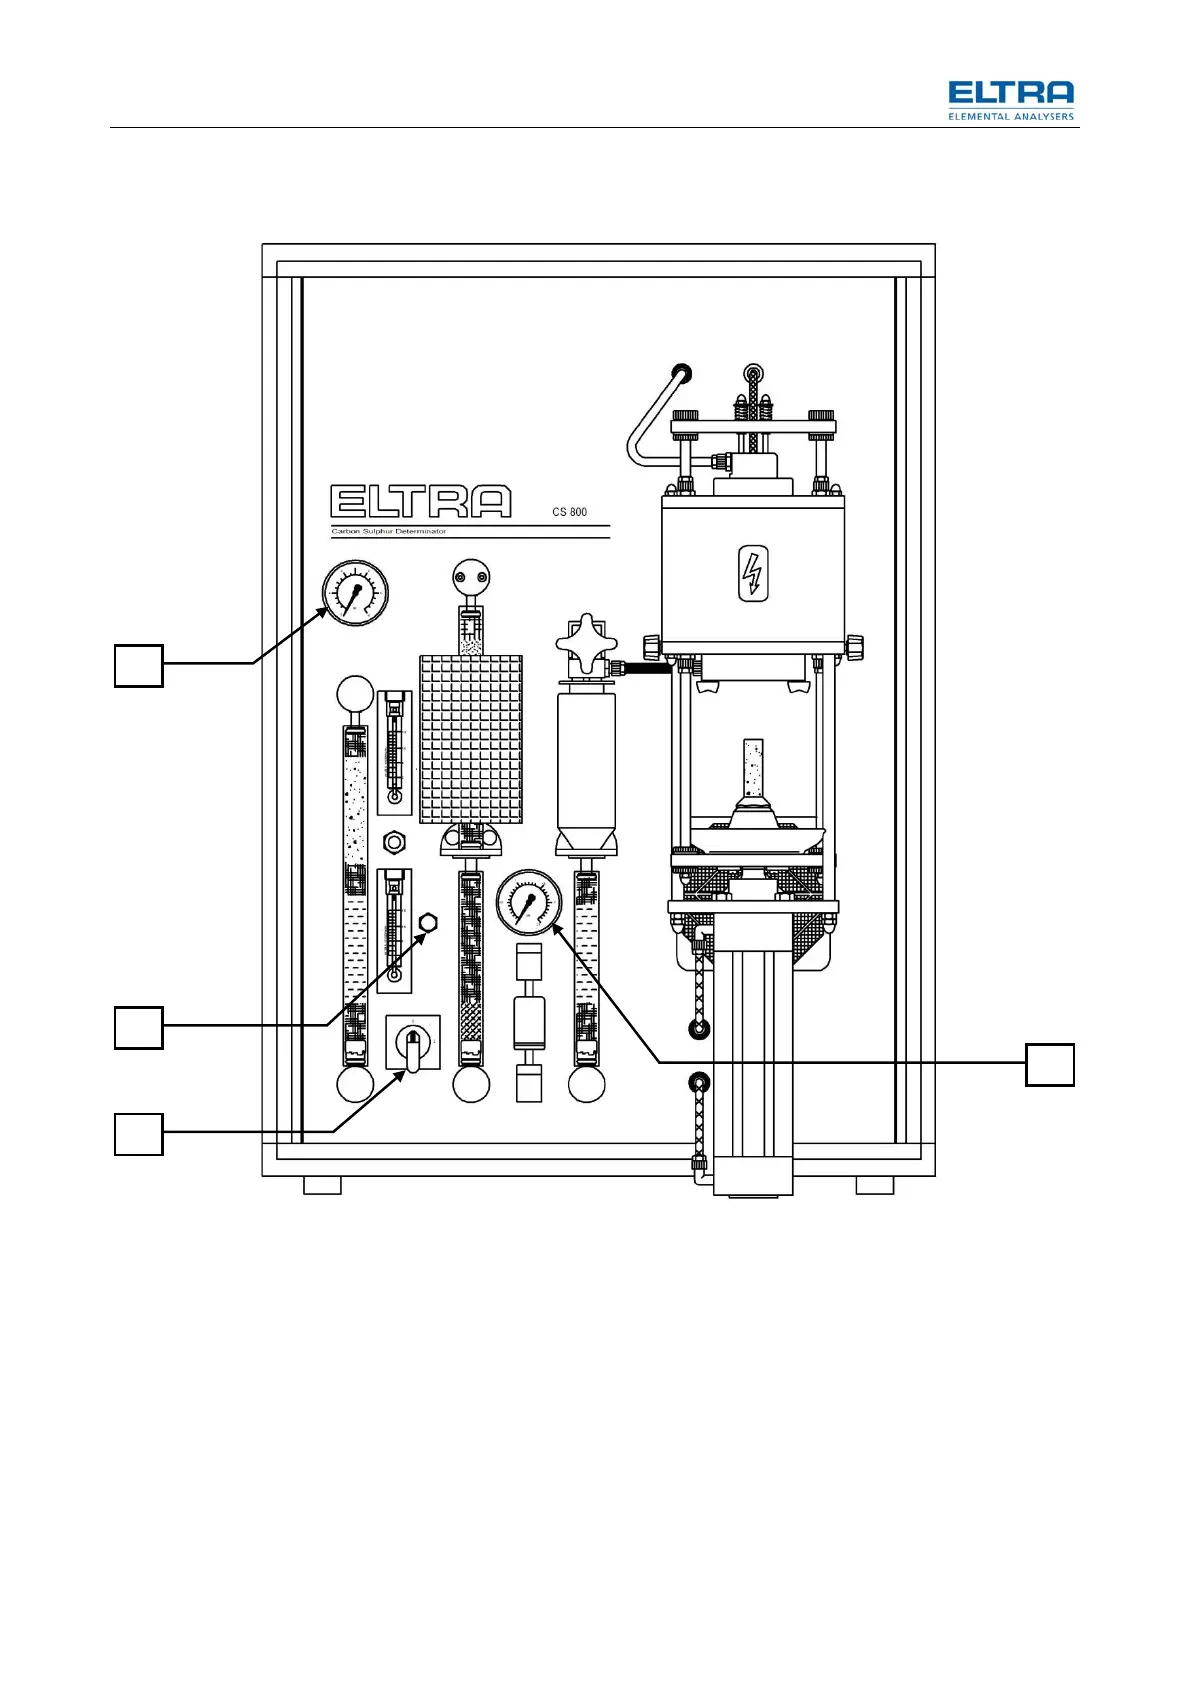
Fig. 59: Front side (without cover)
• Set the power switch (1) to pos. 2.
• Close the furnace.
• Press and hold the button (43).
– The entire system will be checked for leaks.
The leakage test is completed when the initial pressure drops (about 5 seconds) on
gauge (12) and then remains constant, the gas system is ok.
• Should there be a continuous pressure drop, then release the button (43),
open the furnace, press and hold the button (43) again.
– If the pressure is stable then the leakage will found in the furnace.
– If the pressure still decreases, then the leakage is to found inside the
analyzer.
12
43

 Loading...