1019567 REV. 03 103
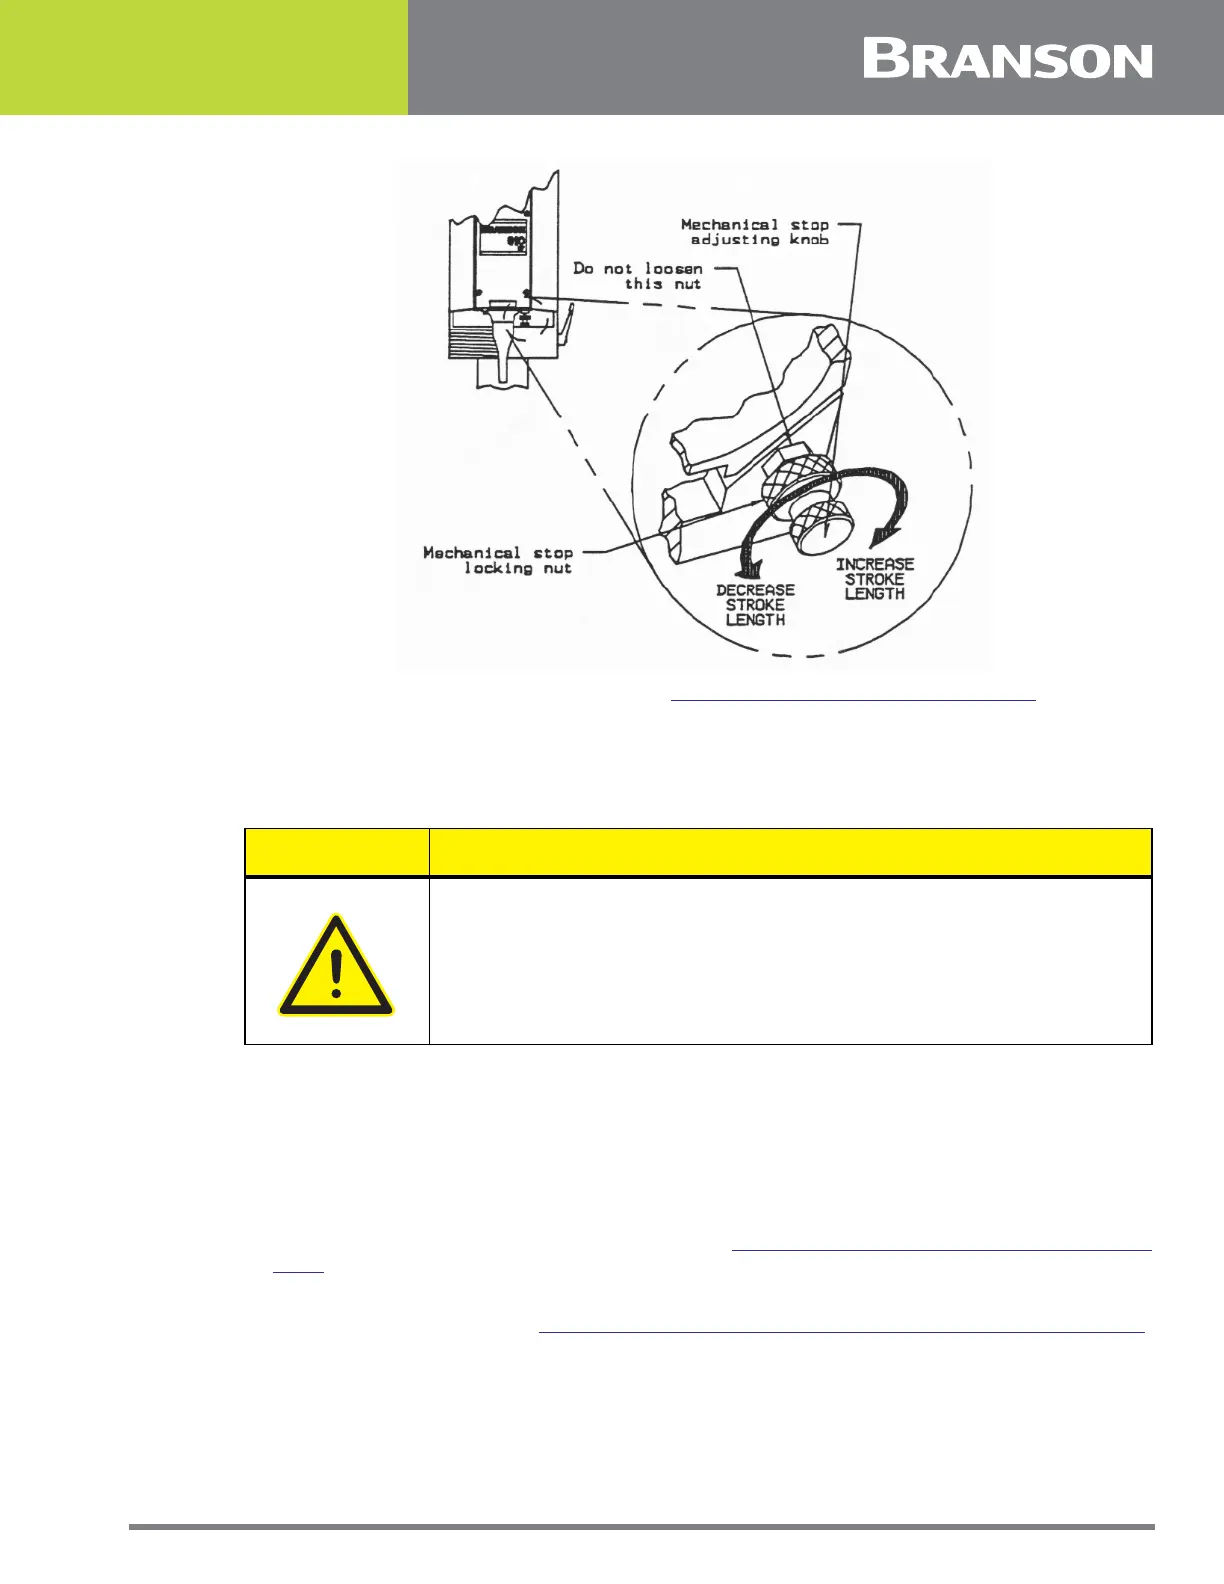
Figure 5.25 Adjusting the Mechanical Stop
6. Remove the Trigger Guard retaining screw (
Figure 5.24 Removing the Trigger Guard).
7. Remove the Trigger Guard.
5.5.9.2 Replacing the Trigger Guard
1. Place the Trigger Guard onto the welder and insert the retaining screw, but do not tighten.
2. Pull the top of the Trigger Guard away from the Main Support. When the Trigger Guard no longer
contacts the Main Support, hold the Trigger Guard in place and tighten the retaining screw.
3. Check for proper installation of the Trigger Guard:
4. Push the Trigger Guard towards the main support. If the Trigger Guard flexes, it is properly
installed.
5. If it does not flex, loosen the retaining screw and repeat step 2.
6. Install the Converter-Booster-Horn Stack (Section
5.5.8.1 Removing the Converter-Booster-Horn
Stack).
7. Connect the main air supply.
8. Close the left side cover. See
5.3 Opening and Removing the Left Side Cover (EDP 100-032-338).
CAUTION General Warning
Make sure to install the Trigger Guard so it does not contact the Main
Support. If the Trigger Guard contacts the Main Support during a
weld cycle, an alarm can occur.