1019567 REV. 03 107
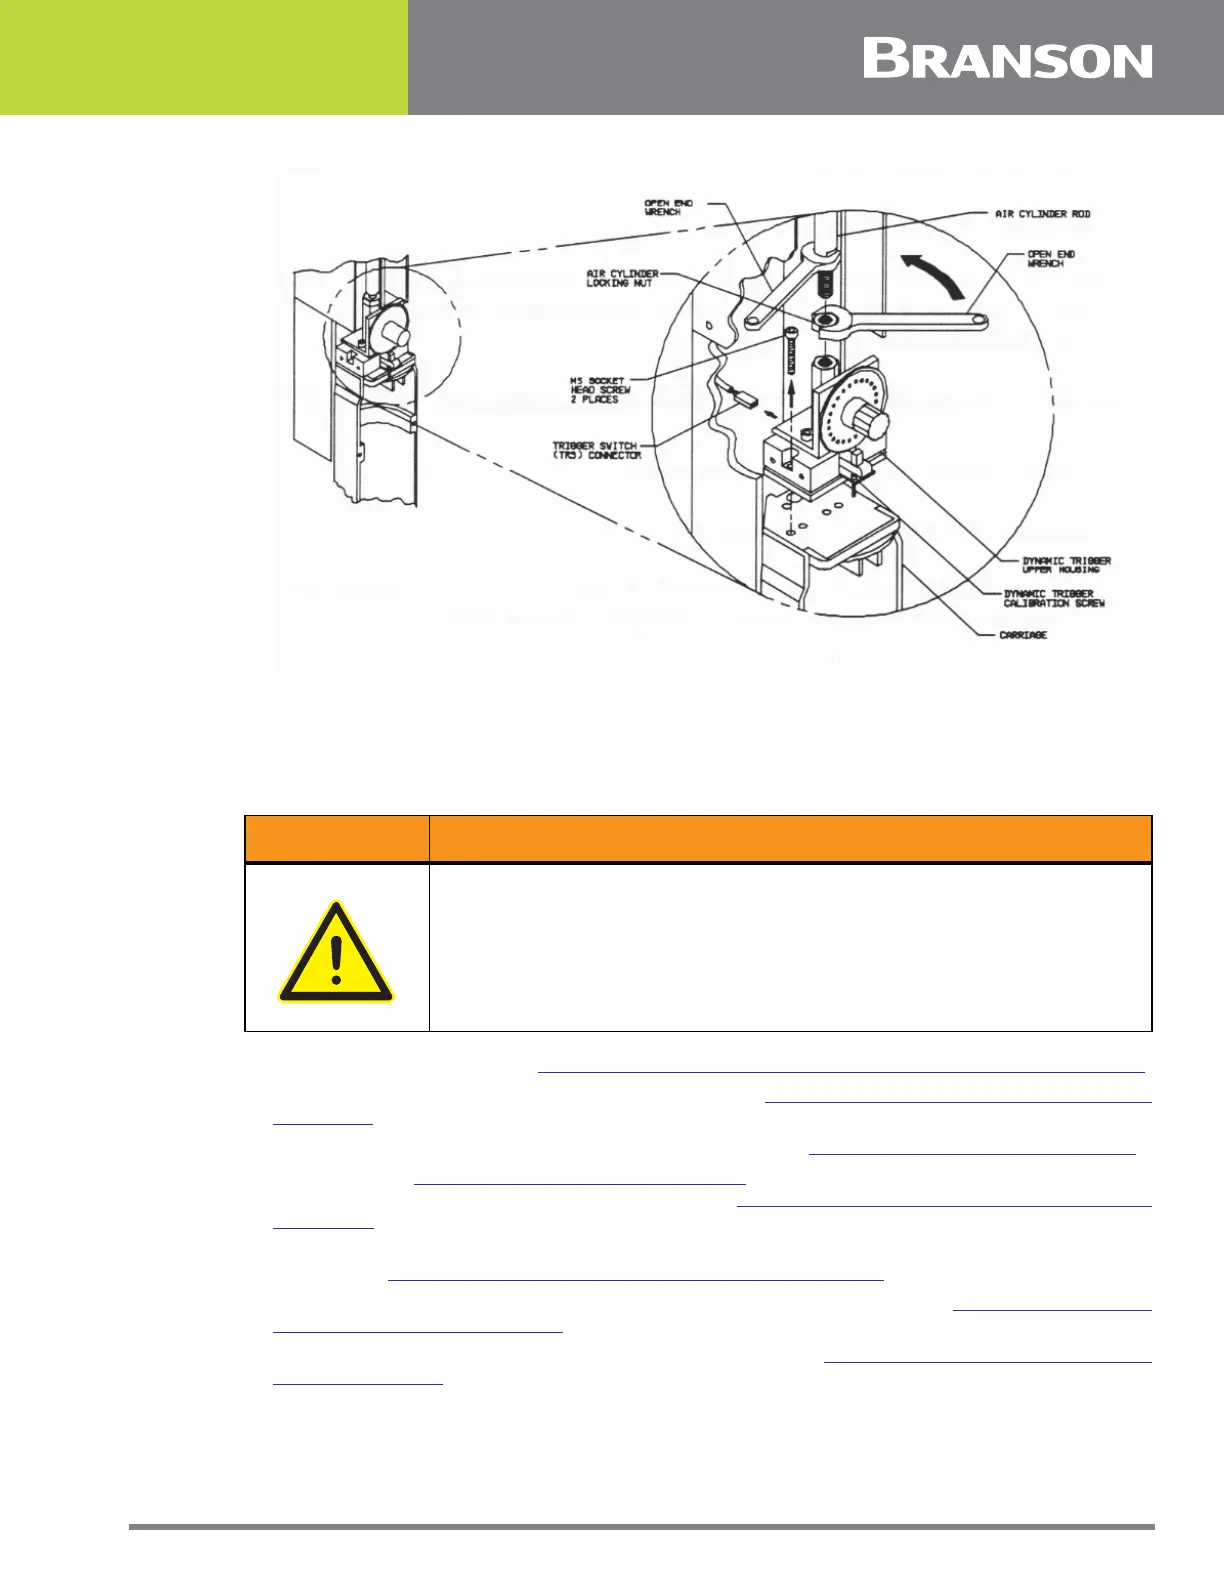
Figure 5.28 Removing the Dynamic Trigger Mechanism
5.5.11.1 Removing the Dynamic Trigger Mechanism
1. Turn off the welder and unplug main power.
2. Turn air pressure to zero, then disconnect main air supply.
3. Open the left side cover. See
5.3 Opening and Removing the Left Side Cover (EDP 100-032-338).
4. Remove the Converter-Booster-Horn Stack (Section
5.5.8.1 Removing the Converter-Booster-
Horn Stack).
5. Remove the Trigger Guard and lower the carriage (Section
5.5.9.1 Removing the Trigger Guard).
6. Use a wrench (
Table 5.3 Air Cylinder Part Numbers) to hold the Air Cylinder rod. Use a 3/4 in.
wrench to loosen the Air Cylinder locking nut (
Figure 5.28 Removing the Dynamic Trigger
Mechanism).
7. Turn the Air Cylinder rod until it separates from the large hex-head nut on the Dynamic Trigger
Mechanism (
Figure 5.28 Removing the Dynamic Trigger Mechanism).
8. Remove the retaining screws on each side of Dynamic Trigger Mechanism (
Figure 5.28 Removing
the Dynamic Trigger Mechanism).
9. Remove the Dynamic Trigger Mechanism from the welder (
Figure 5.28 Removing the Dynamic
Trigger Mechanism):
• Pull the Dynamic Trigger Mechanism out until you can unplug the white TRS connector
• Remove the Dynamic Trigger Mechanism from the welder
WARNING General Warning
Turn air pressure to zero and disconnect the main air supply. Failure
to do this leave the welder under potentially dangerous air pressure.