Section 11: Standard and Optional Machine
Features
127
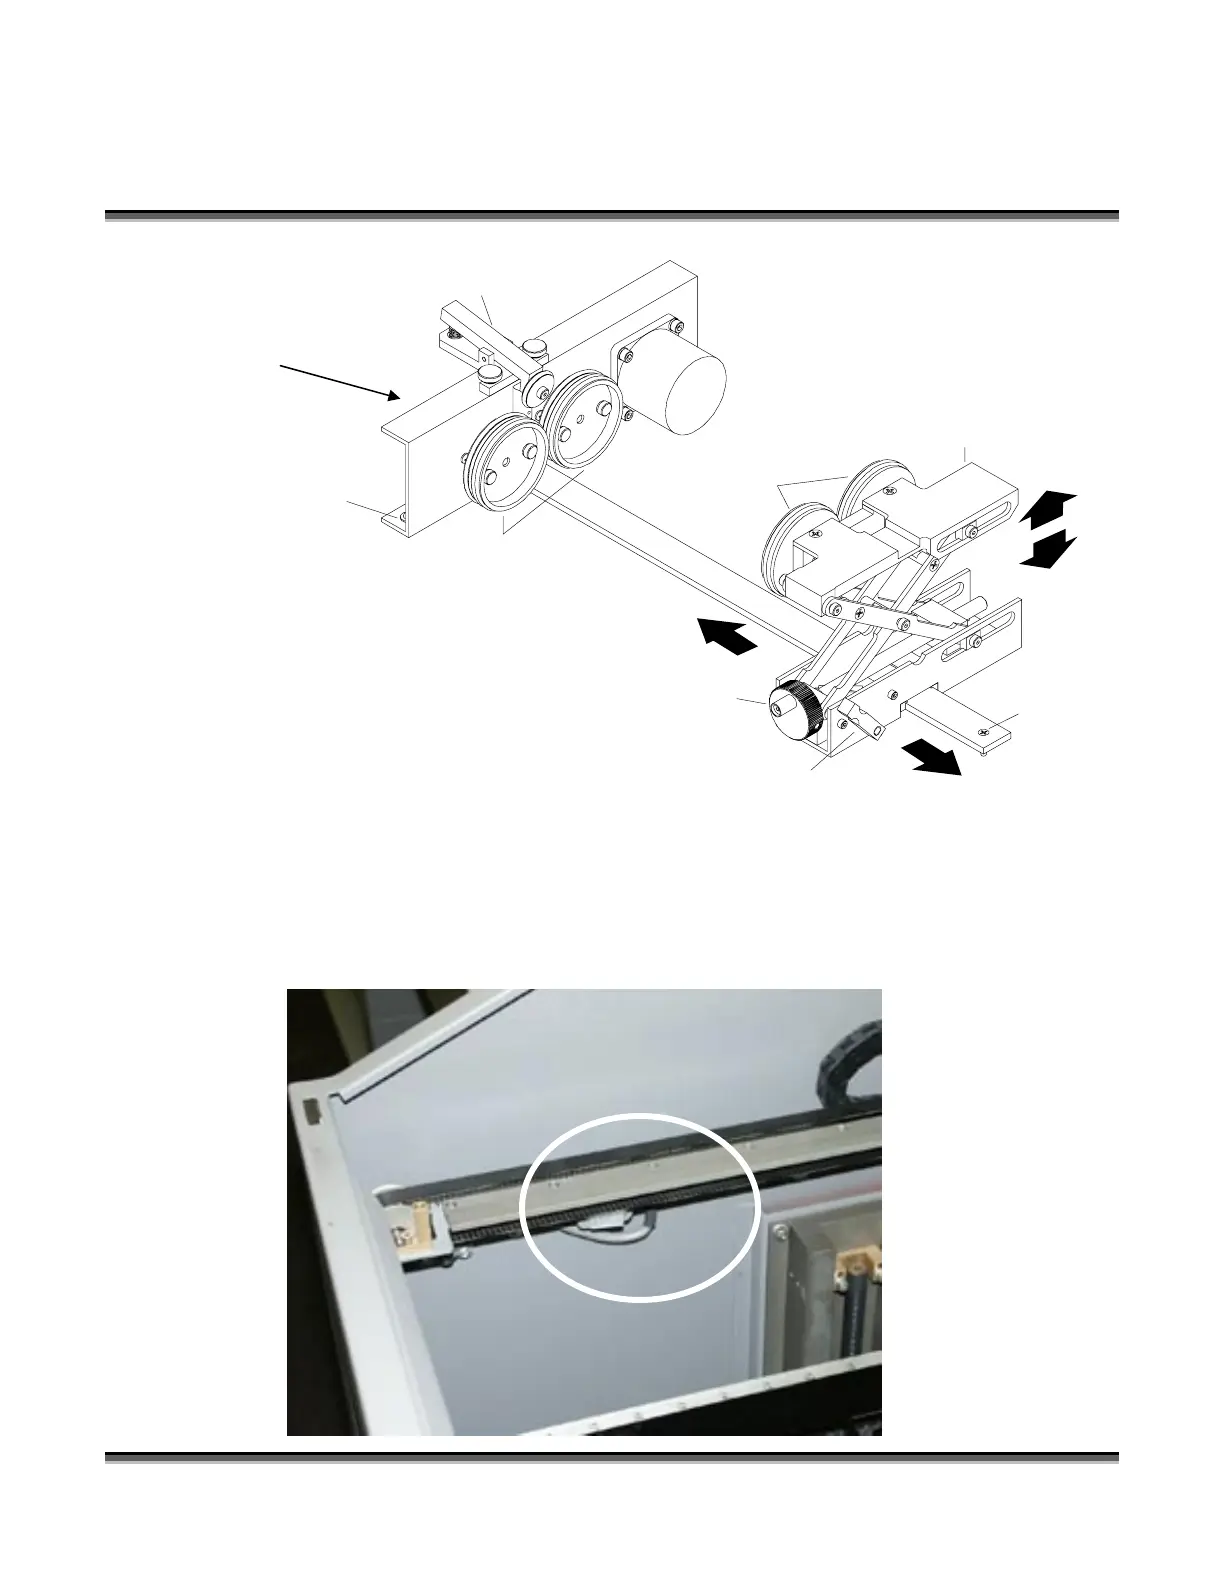
Clamp
Drive Wheels
Idler Wheels
Elevator
Mounting
Pin
Mounting
Pin
Adjustment
Knob
Elevator Lock
(shown unlocked)
4. There is a motor on the rotary attachment with a plug on the end. Plug the
rotary into the mating connector located at the front, left inside corner of the
cabinet (see photos on following pages). This connector is keyed and will only
fit if inserted properly.
The Legend 32 EX Rotary connection (shown in photo) is located in the front left
inside of the chassis.
The 24 EX connector
(not shown in this
photo) is located in the
same general area as the
32 EX, but is under the
shelf.
Make sure the table is
lowered and the Legend
EX is turned off before
plugging the Rotary
Attachment into this
white connector. It is a
Black Bumper
(not obvious in
this drawing)
 Loading...


